


Step 5.
Lift up the plastic handle and slide the hard disk drive out of the drive bay.
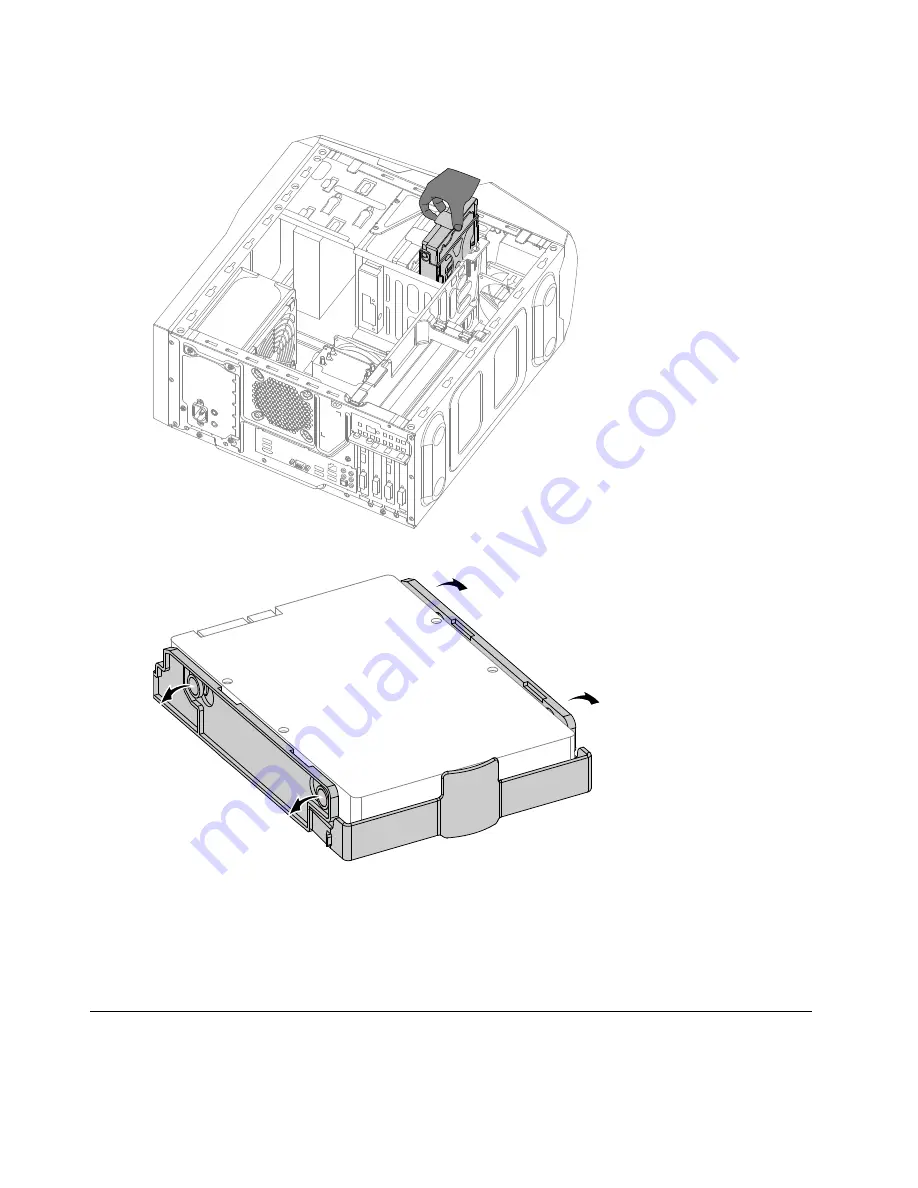
Step 6.
Remove the hard disk drive from the plastic bracket as shown.
Step 7.
To install the new hard disk drive
:
a.
Line up the new hard disk drive with the plastic bracket and snap it into position.
b.
Slide the new hard disk drive into the drive bay and slide the drive bay into place.
c.
Connect the data and power cables to the new hard disk drive.
Step 8.
Reattach the computer cover.
Removing the front bezel
Attention:
Turn off the computer and wait 3 to 5 minutes to let it cool down before removing the cover.
30
Lenovo Erazer X510Hardware Maintenance Manual
Summary of Contents for 10140/90AC
Page 2: ......
Page 3: ...Lenovo Erazer X510 Hardware Maintenance Manual Machine Types 10140 90AC 10143 90AD ...
Page 6: ...iv Lenovo Erazer X510Hardware Maintenance Manual ...
Page 8: ...2 Lenovo Erazer X510Hardware Maintenance Manual ...
Page 16: ...10 Lenovo Erazer X510Hardware Maintenance Manual ...
Page 18: ...12 Lenovo Erazer X510Hardware Maintenance Manual ...
Page 24: ...18 Lenovo Erazer X510Hardware Maintenance Manual ...
Page 51: ...Step 6 Disconnect the power cable from the power board 1 Chapter 8 Replacing hardware 45 ...


