


44
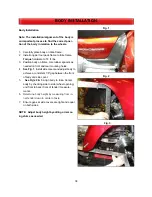
Final Assembly
1. Set tour box in place on frame. Make sure all
wiring is routed in the proper location before
attaching tour box to frame.
2. Attach tour box to frame with original hard-
ware.
NOTE: Leave mounting hardware loose until
lower trim panels are installed.
3. Attach trunk release cable to tour box latch
assembly on RH side.
4.
See Fig. 1
. Cut 1-1/2” x 1/4” slot into lower
cover as shown for cable clearance.
5. Reinstall all tour box trim and lights into OEM
locations using original hardware.
6. Reconnect tour box connectors to motorcycle
harness.
7. Plug in all electrical connectors from trike har-
ness to motorcycle harness.
8. Connect battery and check lights for proper
operation.
9. Tighten all tour box mounting hardware.
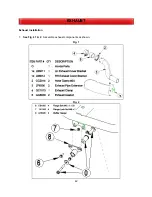
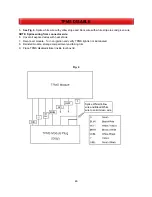
10.
See Fig. 2
. Route safety cable to front of tour
box. Install cable clamp and make small loop.
Crimp cable clamp and secure to front of tour
box
•
(1) Cable Clamp- CC1900
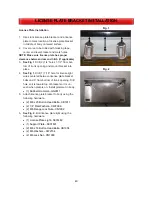
11. Install seat and grab handles using original
hardware.
12. Install passenger footboards using original
hardware.
13. Verify all side covers are reinstalled.
14. Install wheels and torque lug nuts to
85 ft-lbs.
Install center caps (if applicable).
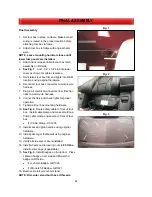
15.
See Fig. 3.
Install badges on trunk door. Place
Lehman badge on LH side and Monarch II
badge on RH side.
•
(1) Lehman Badge– GB1320
•
(1) Monarch II Badge– GB1321
16. Remove motorcycle center stand.
NOTE: RH center stand bolt has LH threads.
FINAL ASSEMBLY
Fig. 1
Fig. 2
Fig. 3


