


Page 15
REMOVING LEVER LOCK PLATE AND CHANNELS
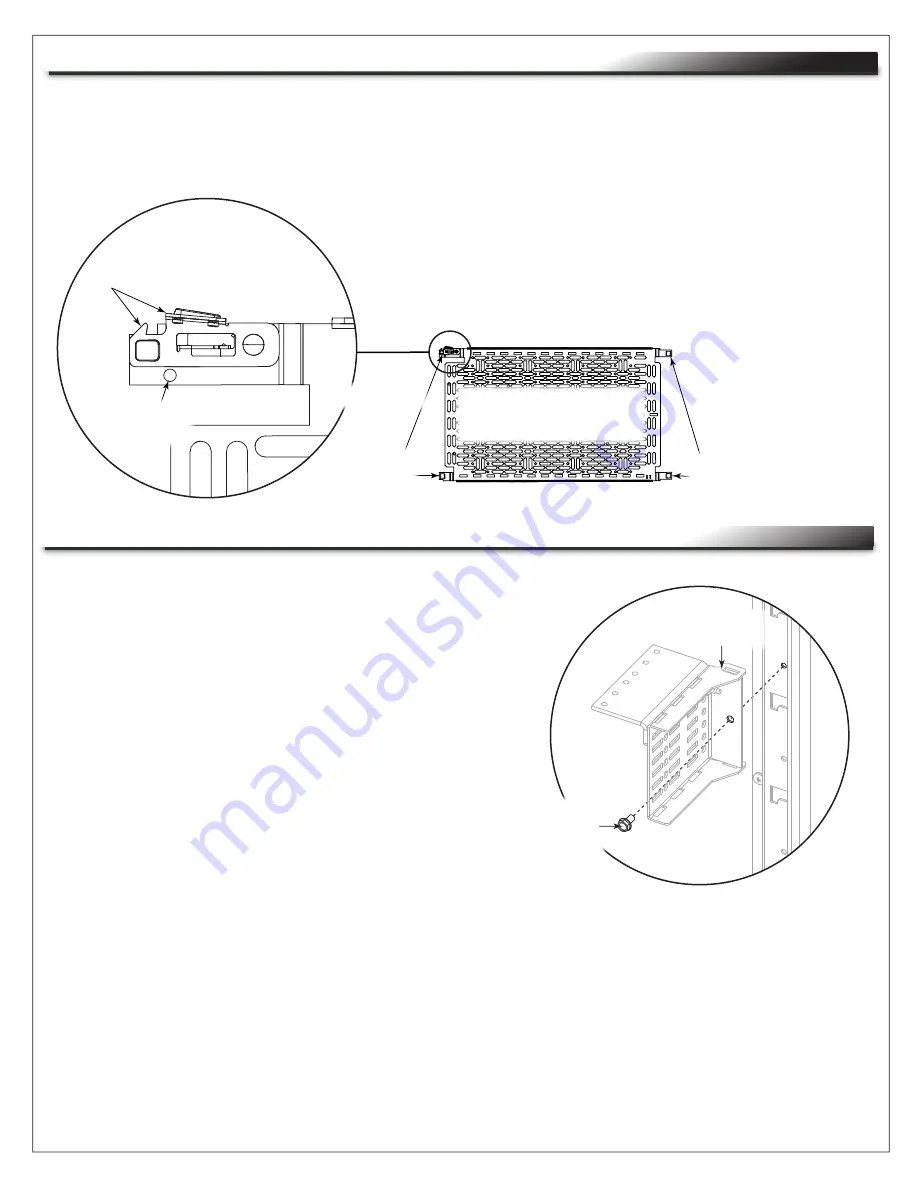
TIP
: Use screwdriver to push the tip end of the rivet, and
then pull the head out.
2. Use a flat head screwdriver to pop out Lever Lock securing rivets
from your 10” plate and (2x) 2” channels. (
FIGURE R
)
NOTE
: Your FlexView Conferencing Cart comes with a 10” Lever Lock plate and (2x) 2” channels
pre-installed inside. This topic explains how to remove them.
1. Temporarily remove any devices, cables, and cable management from the inside of your cart.
Clip
Side
with clip
Side
without clip
NOTE
: 10” Lever Lock
plate (B) shown.
Securing
Rivet
FIGURE R
CHANGING LEVER LOCK BRACKET LOCATIONS
NOTE
: This topic explains how to reposition the locations of your pre-installed
Lever Lock brackets, if desired. In order to do this, you must
temporarily remove any devices, cables, and cable management
from inside your cart, and then remove Lever Lock plate and
channels as explained in the previous topic.
1. Temporarily remove any devices, cables, and cable
management from the inside of your cart.
2. Remove Lever Lock plate and channels as explained
in the previous topic.
3. Use a power driver or wrench and a 5/16” socket to
remove 10-32 x ⅜” hex head screws from Lever Lock
brackets as shown (1 screw per bracket). (
FIGURE S
)
NOTE
: Hex head screw shown in black for clarity.
4. Reinstall Lever Lock brackets into your cart at the desired height.
NOTE
: When selecting the new height, make sure the Lever Lock brackets are reinstalled in pairs, at the
same height, and are distanced so they properly accommodate the plate and channels.
5. Reinstall 10” Lever Lock plate, 2” channels, devices, cables, and cable management as necessary.
FIGURE S
Hex
Head
Screw
Lever Lock
Bracket
Summary of Contents for MIDDLE ATLANTIC FlexView 800 Series
Page 18: ......


