

Group of Pictures (from 5 to 300),
(f) set the encoding method (VBR – variable, or CBR -
continuous bitrate), (g) set the URL addresses for the supported communication protocols,
including TS, HLS, FLV (along with HTTP Port# setting), RTSP (along with Port# setting
and Push or Pull mode selection via pulldown tab), RTMP (along with Port# setting and
Push or Pull mode selection via pulldown tab), and Multicast IP (along with Port#
selection), (h) enable or disable each of these communication protocols from a pulldown
tab,
Note
: Only a limited selections should be made at a time. Do not enable all at the
same time. (i) set the embedded audio input source (to HDMI, or Analog via 3.5mm jack)
(j) set the audio bitrate (from 48Kbps to 320Kbps) (k) set the audio codec (to AAC, or
MP3), (l) set the audio frequency (to 44100Hz, or 48000Hz), and (k) enable or disable the
Dip Switches via a pulldown tab. Click on the “Apply” button to accept changes, or on
“Reset” to return to the previous settings.
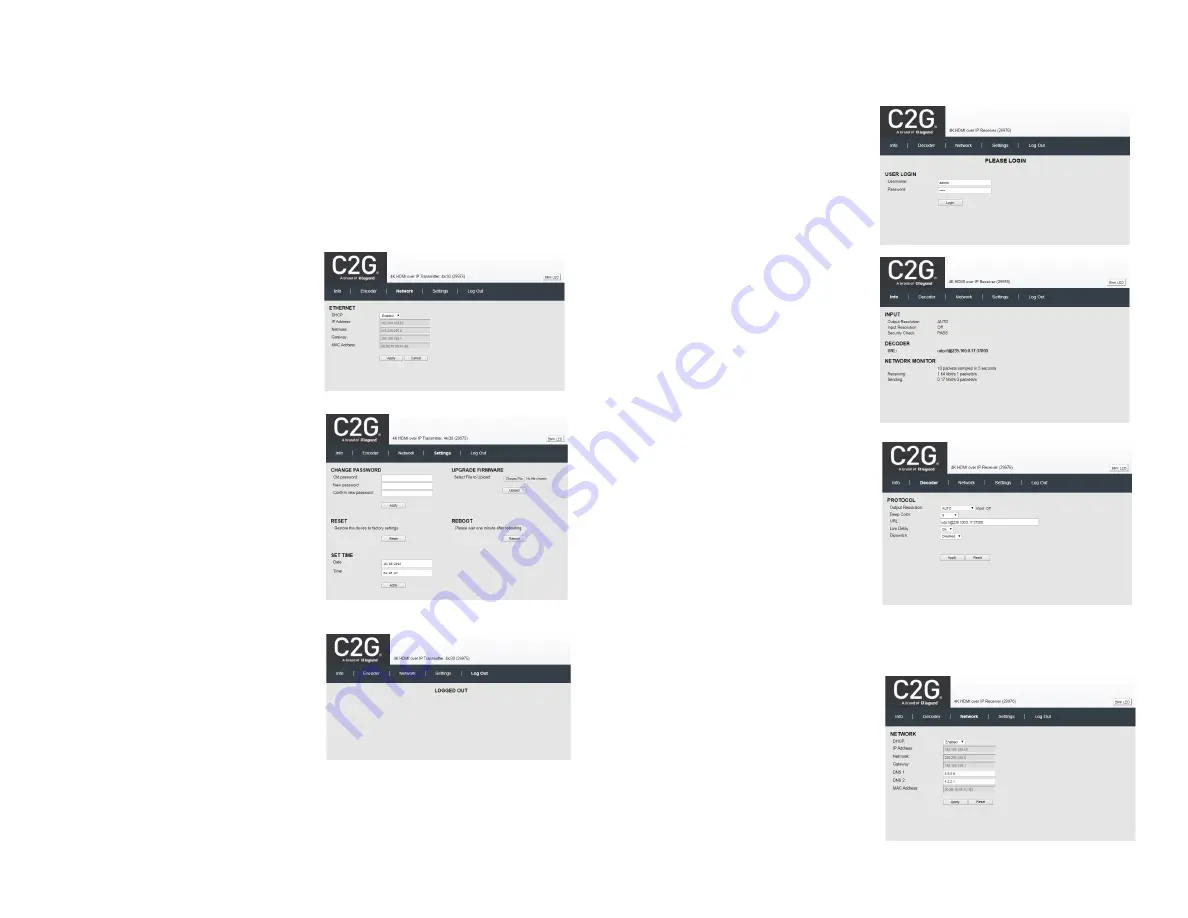
Network Tab
Click on the Network tab to (a) enable or
disable DHCP via a pulldown tab, (b) set
the device Static IP Address, Subnet
Mask and Gateway, and (c) to get the unit
MAC address.
Click on the “Apply” button to accept
changes, or “Reset” to return to the
previous settings.
Settings Tab
Click on the “Settings” tab to (a) change
the login password, by entering the old
password, new password,
and
reconfirming the new password, and
clicking on “Apply”, (b) upgrade the device
firmware, by clicking on the “Choose File”
button to search for and select the new
firmware, and then clicking “Upload”, (c)
reset the unit to factory defaults, by
clicking on the “Reset” button, and (d)
reboot the unit, by clicking on the “Reboot”
button.
Log Out Tab
Click on the “Log Out” tab to log out of the
device web interface.
2) HDMI over IP Receiver - 4K 60Hz (29976)
There are several screens to navigate in order to manage the 29976 Receiver. The first
screen shown after entering the device IP address in the browser is the login screen.
Login
To login to the 29976 web interface, type
in the Username and Password, and
then click on “Login”. The default
Username and Password is “admin”.
Info Tab
Click on the “Info” tab to get information
on the 29976, such as the output and
input video resolution, and the URL
addresses for the supported &
configured communication protocols,
including TS, HLS, FLV, RTSP, RTMP,
and Multicast.
Decoder Tab
Click on the “Decoder” tab to (a) set the
output video resolution via a pulldown tab
(to Auto, or from 480/60 to 3840x2160),
(b) set the URL addresses for the
supported communication protocols,
including TS, HLS, FLV, RTSP, RTMP,
and Multicast, (c) enable or disable each
communication protocol from a pulldown
tab, (d) set Deep Color, and (f) enable or
disable the Dip Switches via a pulldown
tab.
Click on the “Apply” button to accept changes, or on “Reset” to return to the previous
settings.
Network Tab
Click on the Network tab to (a) enable or
disable DHCP via a pulldown tab, (b) set
the device Static IP Address, Subnet
Mask, Gateway, DNS 1 and DNS 2, and
(c) to get the unit MAC address.
Click on the “Apply” button to accept
changes, or “Reset” to return to the
previous settings.


