background image

6  Operation

6.1 

Switching on the device

NOTICE!

Overheating of the pump

Device damage

Never operate device without heat transfer liquid.

Personnel:

n

Operating personnel

1.

Switch on the device using the mains power switch.

A signal tone sounds. The software version is shown on the dis-

play. The actual temperature is shown on the display afterwards.
The temperature control device starts operation; the pump is

started.
Depending on the specified setpoint temperature, the refrigerant

unit is started after 2 minutes at the earliest. The blue LED lights

if the refrigerant unit is active.

2.

Depending on the size of the consumer, heat transfer liquid must be

refilled if necessary. Monitor the level indicator for this.

Further information about refilling heat transfer liquid can be

found in 

Ä

 Chapter 5.3 ‘Switching on the device and

filling with heat transfer liquid’ on page 30

.

6.2  Default display and menu items

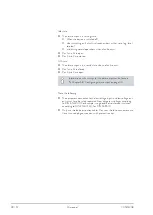
1.

Press the ENTER button to reach the menu items from the default

display of the actual temperature.

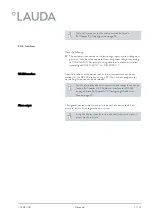
If no button has been pressed for longer than 4 seconds, you

exit from the menu item or input window.

2.

Scroll from menu item to menu item using the arrow buttons.

3.

Press the ENTER button at the selected menu item.

The display flashes.

4.

The value or the setting can be changed using the arrow buttons.

V05REV08

Microcool

34 / 57

Summary of Contents for MC 250

Page 1: ...Microcool MC 250 MC 350 MC 600 MC 1200 Operating instructions Circulation chiller V05REV08 Read the instructions prior to performing any task...

Page 2: ...H CO KG Pfarrstrasse 41 43 97922 Lauda K nigshofen Germany Phone 49 0 9343 503 0 Fax 49 0 9343 503 222 E Mail info lauda de Internet https www lauda de YAWD0033 5 en_GB LAUDA 2013 V05REV08 Microcool 2...

Page 3: ...1 3 Device description 12 3 1 Device types 12 3 2 Design of the circulation chiller 13 3 3 Operating elements 17 3 3 1 Mains power switch 17 3 3 2 Display buttons 18 3 4 Functional elements 19 3 4 1 L...

Page 4: ...ds 42 6 7 4 Read commands 43 6 7 5 Error messages 43 6 8 Configuring alarm output 44 6 9 Inputting offset of the temperature sensor 44 6 10 Restoring the factory settings 45 7 Maintenance 46 7 1 Gener...

Page 5: ...frigerant and filling quantity 53 11 4 Hydraulic circuit 54 11 5 Voltage dependent data 54 12 General 55 12 1 Copyright 55 12 2 Technical changes 55 12 3 LAUDA contact 55 13 Index 56 V05REV08 Microcoo...

Page 6: ...sing any of the following measures n If relevant there are safety fittings for the device These devices are essential for the safety of the device Their functionality must be ensured by carrying out t...

Page 7: ...tricted This equipment has been tested and found to comply with the limits for Class A digital device pursuant to Part 15 of the FCC Federal Communica tion Commission Rules These limits are designed t...

Page 8: ...he safety data sheet of the heat transfer liquid must therefore be consulted for the intended use of the device 1 7 Materials All parts coming into contact with the heat transfer liquid are made of hi...

Page 9: ...are required for certain activities These protective gog gles must comply with the legal requirements for personal protective equip ment of the European Union 1 12 Structure of warnings n A warning of...

Page 10: ...injuries if the warning is disregarded CAUTION Type and source Consequences in the event of non compliance Measure 1 Measure A notice warns about possible property or environmental damage NOTICE Type...

Page 11: ...ter delivery for completeness and transport damage If there is unexpected damage to the device or accessories inform the carrier immediately so that a damage report is produced and a check of the tran...

Page 12: ...letop device with a cooling capacity of 250 watts MC 350 Air cooled tabletop device with a cooling capacity of 350 watts MC 600 Air cooled floor standing device with a cooling capacity of 600 watts Th...

Page 13: ...er nozzle with cover 2 Level indicator 3 Control panel 4 Front panel with ventilation openings 5 Four support feet Front side MC 250 MC 350 V05REV08 Microcool 13 57 Note Some of the illustrations show...

Page 14: ...ar side 1 Pump connection outlet 2 Overflow connection 3 Pump connection inlet 4 Type plate 5 RS 232 interface 6 Alarm output 7 Drain plug 8 Mains cable 9 Ventilation openings Rear side MC 250 MC 350...

Page 15: ...f the front side 1 Filler nozzle with cover 2 Level indicator 3 Control panel 4 Manometer 5 Front panel with ventilation openings 6 Four castors with locking brakes Front side MC 600 MC 1200 V05REV08...

Page 16: ...ss adjustment wheel 2 Pump connection inlet 3 Pump connection outlet 4 Overflow connection 5 Type plate 6 Drain plug 7 Alarm output 8 RS 232 interface 9 Mains cable 10 Ventilation openings Rear side M...

Page 17: ...ons 4 Mains switch 3 3 Operating elements 3 3 1 Mains power switch The mains power switch can be put in the following positions n In position I the device is switched on n In position O the device is...

Page 18: ...tton 3 DOWN arrow button Functions in the display of the device can be controlled using the display buttons n A selection in the display can be confirmed with the ENTER button n The UP and DOWN arrow...

Page 19: ...s 3 4 2 Hydraulic circuit The hydraulic circuit designates the circuit through which the heat transfer liquid flows The circuit basically consists of the following components n internal storage bath w...

Page 20: ...arrow indicates the minimum liquid level of the machine 1 Maximum level 2 Minimum level 3 4 5 Cooling unit The cooling unit includes the following components n Compressor A hermetically sealed compre...

Page 21: ...evice such as the set temperature can be con trolled with the RS 232 interface using a PC Thus custom programs for controlling the device can be developed Changeover contact which switches in the even...

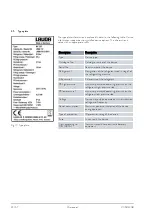
Page 22: ...machine Fill quantity I Fill quantity of the refrigerant PS high pressure I maximum permitted operating pressure on the refrigerant high pressure side PS low pressure I maximum permitted operating pr...

Page 23: ...uirements can be found at Chapter 1 4 EMC classification on page 7 WARNING Rolling away falling over of the device Impact crushing Do not tilt the device Place the device on a level non slip surface w...

Page 24: ...ation about the pump connections of the individual devices can be found in Chapter 11 4 Hydraulic circuit on page 54 Tab 3 Hoses not insulated Type Hose nozzle Maximum permissible pressure Clear width...

Page 25: ...105 19 17 5 RKJ 112 RKJ 024 50 110 16 8 RKJ 112 RKJ 009 50 110 23 8 5 RKJ 031 RKJ 013 50 110 29 8 5 RKJ 032 Tab 6 Adapter suitable for MC 600 and MC 1200 Designation Description Catalogue number Thre...

Page 26: ...mptying of the external volume can occur if the pump is stopped and there is ingress of air in the external liquid circuit even for closed circuits In this case there is the risk of the device overflo...

Page 27: ...T XP using the HyperTerminal program HyperTerminal is no longer part of the operating system for the Windows Vista Windows 7 and Windows 8 operating systems n The RS 232 interface can be addressed usi...

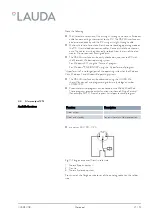
Page 28: ...d n Pins 3 and 2 are open Information on the settings for the alarm output can be found in Chapter 6 8 Configuring alarm output on page 44 Note the following n The equipment connected to the low volta...

Page 29: ...30 90 4 50 at 25 C LZB 109 LZB 209 LZB 309 Aqua 90 decalcified water 5 90 1 LZB 120 LZB 220 LZB 320 Note the following for Kryo 30 n The water content is reduced during long operation at higher temper...

Page 30: ...eres n Exception Devices with 13 ampere UK plugs 5 3 Switching on the device and filling with heat transfer liquid The device has a software program starting from and including software ver sion 1 46...

Page 31: ...etting the pump pressure on page 32 1 Close the drain plug For this turn the plug clockwise as far as the stop 2 Turn the bypass adjustment wheel anti clockwise as far as it will go 3 Attach a suitabl...

Page 32: ...to the maximum fill level If necessary use a funnel for the filling The level indicator must not be above the maximum fill level 9 Press the Enter button when the fill level is at its maximum or suffi...

Page 33: ...ermissible operating pres sure below the maximum pressure of the pump use a safety valve for protection This safety valve must be installed in the outlet of the device 1 To increase the pressure in th...

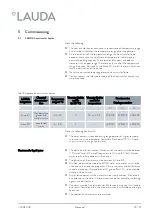
Page 34: ...t unit is active 2 Depending on the size of the consumer heat transfer liquid must be refilled if necessary Monitor the level indicator for this Further information about refilling heat transfer liqui...

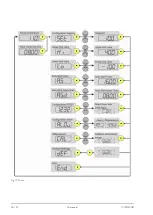
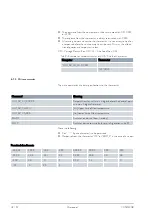
Page 35: ...s applied immediately by pressing the ENTER button If no button has been pressed for longer than 4 seconds changed values or settings are applied automatically and you exit from the menu item or input...

Page 36: ...Fig 12 Menu V05REV08 Microcool 36 57...

Page 37: ...perature control can take place A warning is output by the device if the temperature is outside the limits This range is necessary so that no unnecessary warnings are output during transient condition...

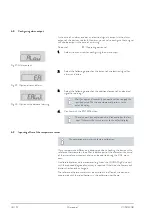
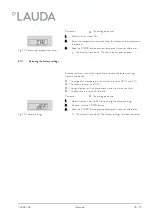
Page 38: ...42 C and 12 By adjusting the temperature limit values the configurable setpoint range is automatically limited to as 2 C below the upper tem perature limit and 2 C above the lower temperature limit Pe...

Page 39: ...for Auto Shut Down has elapsed the device is not switched off completely but switched to standby Standby means all components of the device are switched off and only the display of the device is still...

Page 40: ...button 3 Specify the time until the device should be switched on again If no Auto Shut Down is configured for the device the device is switched directly into standby with the confirmation Wait for ap...

Page 41: ...nd thousands digits are not visible on the dis play 3 Confirm with the OK button Your input is applied automatically after approx 4 seconds 6 7 2 Protocol Note the following n The interface operates w...

Page 42: ...Write commands The write commands are data specifications to the thermostat Command Meaning OUT_SP_00_XXX XX Setpoint transfer with max 3 digits before the decimal point and max 2 digits afterwards OU...

Page 43: ...lt Character 1 error Character 2 not assigned Character 3 not assigned Character 4 not assigned Character 5 low level Character 6 not assigned Character 7 not assigned Note the following n For _ space...

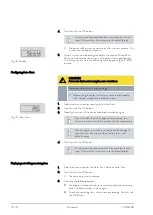
Page 44: ...he value must be confirmed within 4 seconds after the last input Otherwise the screen returns to the default display 6 9 Inputting offset of the temperature sensor The calibration overwrites the facto...

Page 45: ...ored in the device n The range of the temperature limit values is reset to 45 C and 5 C n The timers are reset to 00 00 n The signal output at the alarm output is reset to alarms and faults n The baud...

Page 46: ...fore touching them Also note the following n Before all maintenance work you should ensure that decontamination of the device has been performed if it came into contact with hazardous materials 7 2 Ma...

Page 47: ...enser Personnel n Operating personnel 1 Switch off the device 2 Remove the front cover by holding underneath with both hands and pulling the grating to the front Remove the front cover slowly and care...

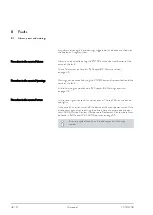
Page 48: ...rnings can be found in Chapter 8 3 Warnings overview on page 49 A two tone signal is output if any error occurs The red LED on the device also lights In the case of an error switch off the device at t...

Page 49: ...han 75 C 8 3 Warnings overview Warnings are not relevant for safety The device continues running A con tinuous tone is output for a short time by the device Warnings are output periodically You are th...

Page 50: ...bserve the regulations for disposal of the used heat transfer liquid 1 Switch off the device 2 Let the device and the heat transfer liquid cool down or heat up to room temperature 3 Position a contain...

Page 51: ...ircuit Disposal must be performed by specialist personnel Type and fill quantity of the refrigerant can be seen on the rating plate 10 2 Device disposal The following applies in member states of the E...

Page 52: ...ndings front and rear sides 40 cm Overvoltage Overvoltage category II and transient overvoltages according to category II Protection class for electrical operating equipment DIN EN 61 140 VDE 0140 1 1...

Page 53: ...tial pressure is 3 bar for the measurement of water cooled devices 11 3 Refrigerant and filling quantity The device contains fluorinated greenhouse gases Tab 11 Devices with 230 V 50 Hz Unit MC 250 MC...

Page 54: ...MC 600 MC 1200 Fill capacity l 2 4 4 7 4 8 7 14 Maximum flow rate l min water 20 C 16 16 35 35 Maximum flow pressure bar water 20 C 0 35 0 35 1 30 1 30 Pump connection internal diameter in mm Hose noz...

Page 55: ...esult in legal action for damages We reserve the right to assert further claims 12 2 Technical changes Manufacturer reserves right to make technical modifications 12 3 LAUDA contact Contact LAUDA Serv...

Page 56: ...50 Placement 23 Unpacking 11 Display buttons Operation 18 Disposal Packaging 51 Refrigerant 51 Disposing of refrigerant 51 DM water 29 Draining Device 50 E EMC 7 ENTER button position 18 Error Descri...

Page 57: ...verview 9 Personnel qualification overview 8 Placement device 23 Placement location 23 Protective equipment personal overview 9 Pump pressure setting 32 R Refrigerant Filling quantity 54 Filling weigh...

Page 58: ......

Page 59: ...Directive 2011 65 EU The equipment is not covered by the Pressure Equipment Directive 2014 68 EU as the maximum classification of the equipment is Category 1 and it is covered by the Machinery Directi...

Page 60: ......

Page 61: ...enclose this fully completed declaration RMA number Product serial number Customer operator Contact name Contact email Contact telephone Zip code Place Street house number Additional explanations The...

Page 62: ......

Page 63: ......
Page 64: ...LAUDA DR R WOBSER GMBH CO KG Pfarrstrasse 41 43 97922 Lauda K nigshofen Germany Phone 49 0 9343 503 0 Fax 49 0 9343 503 222 E Mail info lauda de Internet https www lauda de...

Reviews: