


Larson Electronics, LLC
Phone: (877) 348-9680
Fax: (903) 498-3364
www.larsonelectronics.com
7
of
10
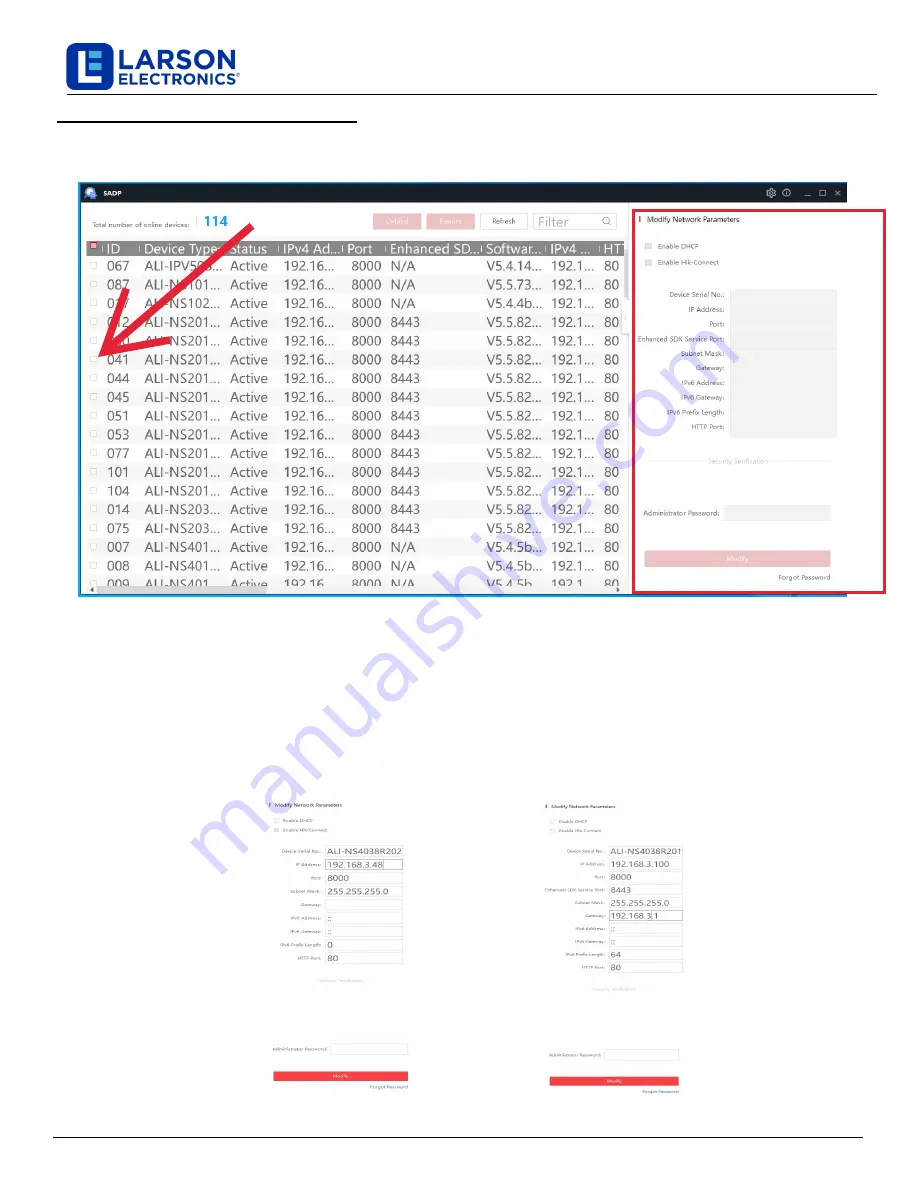
1.
In the list of devices discovered,
find
the device you want to change the network settings for, click the select
box to check it, and then see the
Modify Network Parameters
window. See below.
2.
In the Modify Network Parameters window, edit the correct network parameters, and then enter the
admin
user
password in the field at the bottom.
a.
Enable DHCP
: You can select
Enable DHCP
to acquire compatible network settings from a DHCP server
installed on the LAN. However, these settings can be changed by the DHCP server. Since it is
recommended to use
a static
IP address, you can use DHCP to acquire compatible network
settings, and
then uncheck
Enable DHCP
and save that configuration to retain the new network
parameters.
b.
In the example below, the IPv4 address was changed to 192.168.3.100, and the IPv4 Gateway was
changed to 192.168.3.1. These settings were determined to be compatible with the network
switch
and
other devices that share the same
network
.
3.
Click
Modify
to save your settings.
Step 3. Modify Network Parameters
IP Camera Network Setup Guide


