32
OSD Settings
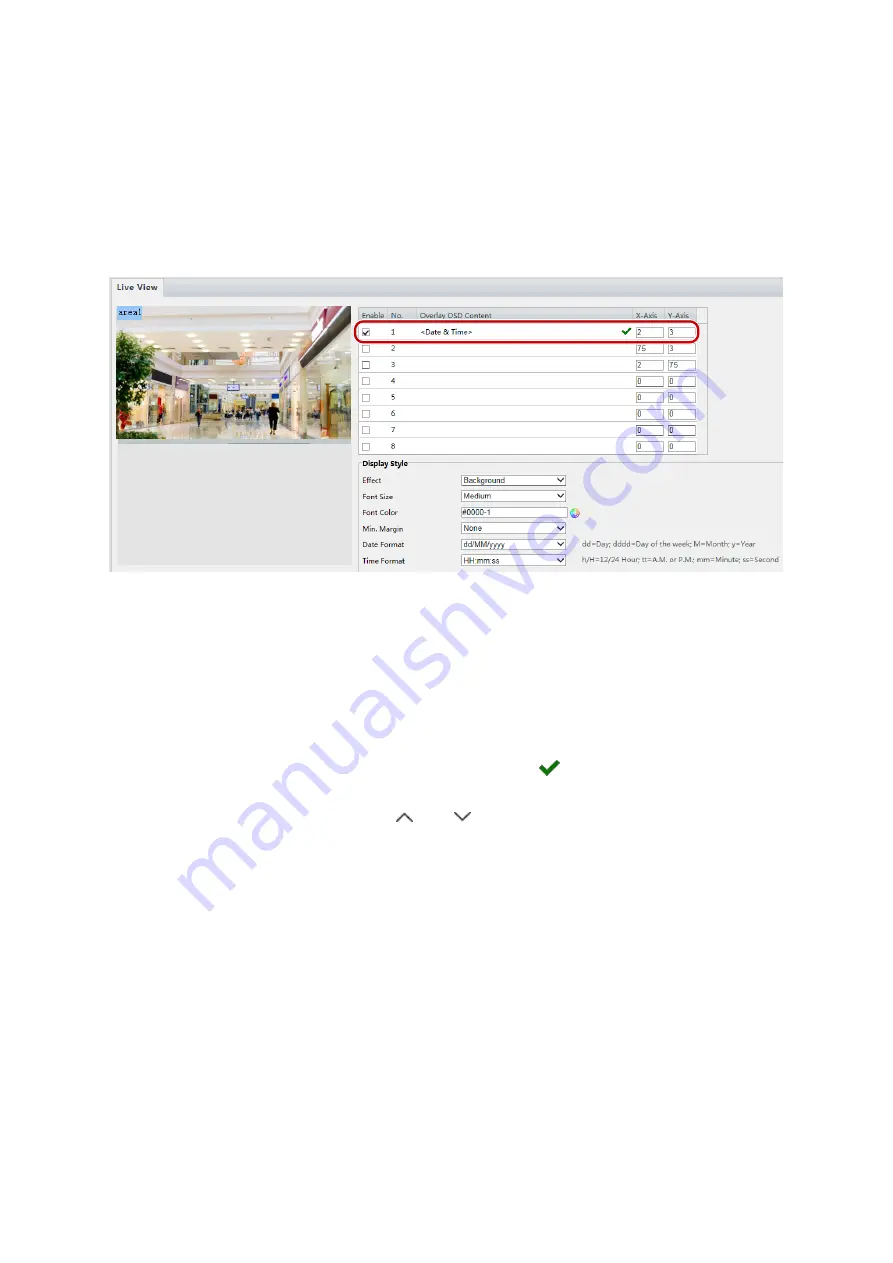
On Screen Display (OSD) is the text or image displayed on the screen with video images. OSD
contents may include time and other customized contents.
NOTE:
This function may vary with models, please see the actual Web interface for details.
1.
Click
Setup
>
Image
>
OSD
.
2.
Select the check box, the content of the OSD and then set the position to display it.
Position: Click the desired box in the
Live View
area. After the cursor shape is changed,
click and hold the button to move the box to the desired position. To set the position
precisely, use the X and Y coordinates under
Overlay Area
.
Overlay OSD Content: The drop-down list provides
Time
,
Preset
and
Serial Info
. You may
also select
Custom
and enter the content you want.
After you have set the position and OSD content, the
symbol appears in the
Status
column, which means that the OSD is set successfully. You may set multiple lines of
contents for each area and use
and
to adjust the sequence of display.
3.
After you have completed the settings, a message appears to indicate the successful settings.
You may right-click in the preview window and then choose to view in full screen mode or at an aspect
ratio. You may also double-click the preview window to enter or exit full screen mode.
To cancel OSD for an area, clear the OSD content in the
Overlay OSD Content
column or select
None
in the
Position
column.


