L
ANTRONIX
UDS1100: C
ONNECTION AND
D
EVICE
P
ROGRAMMING
G
UIDE
(PN 9719-7031B)
P
AGE
4
OF
7
Programming the UDS1100
Installing the Lantronix DeviceInstaller Software
NOTE:
These procedures are written for Lantronix DeviceInstaller Version 4.2.0.1 Software.
You can download Version 4.2.0.1 from the Lantronix website at
http://www.lantronix.com/ftp/DeviceInstaller/4.2.0.1/Di32DL_4.2.0.1_Web.exe
After you have installed DeviceInstaller Version 4.2.0.1, run the program by clicking on the “Start” button
and going to Programs
Lantronix
DeviceInstaller 4.2
DeviceInstaller. When the
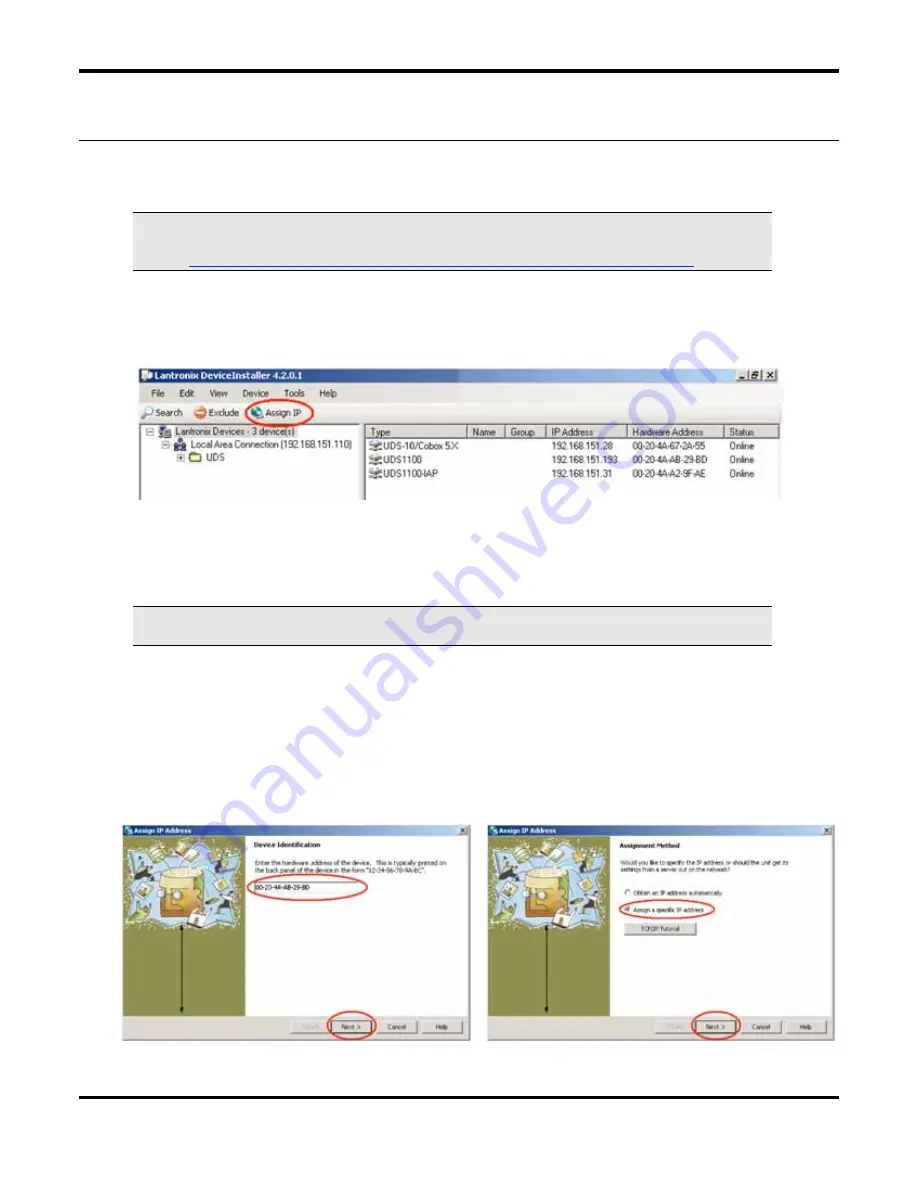
DeviceInstaller program starts, it will look similar to Figure 8.
Setting the IP Address
NOTE:
If you are connecting the Lantronix Device directly into your PC for program purposes,
you should use an Ethernet crossover cable.
1.
Connect the Lantronix UDS1100 to your network. Connect the Power Adapter to an AC
outlet and to the Lantronix device.
2.
Click on “Assign IP” to go to the “Device Identification” window. (Figure 9).
3.
Enter the hardware address of the UDS1100. (Figure 9) The hardware address (MAC
Address) is typically printed on the back panel of the UDS1100, and is formatted like “12-
34-56-78-9A-BC.” Then click on “Next”.
4.
At the next window (Figure 10), select “Assign a specific IP address” and click “Next”.
Figure 8: Lantronix DeviceInstaller program screen
.
Figure 9
Figure 10


