


Chapter 3: Hardware Setup
27
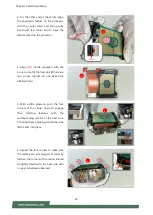
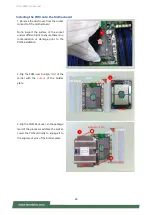
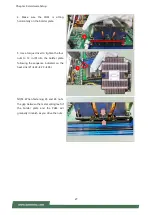
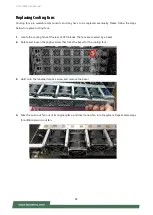
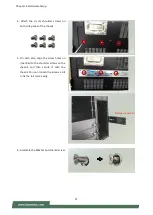
4. Make sure the PHM is sitting
horizontally on the bolster plate.
5. Use a torque driver to tighten the four
nuts to 12 in-lbf into the bolster plate
following the sequence indicated on the
heat sink (#1
#2
#3
#4).
NOTE: When fastening #3 and #4 nuts,
the gap between the metal spring leaf of
the bolster plate and the PHM will
gradually diminish as you drive the nuts.
4
5
Summary of Contents for HTCA-6400
Page 45: ...Chapter 4 BIOS Setup 45 Trusted Computing TPM 2 0...
Page 47: ...Chapter 4 BIOS Setup 47 Trusted Computing PTT Enable...
Page 49: ...Chapter 4 BIOS Setup 49 AST2500 Super IO Configuration...
Page 68: ...HTCA 6400 User Manual 68 Server ME Configuration...
Page 71: ...Chapter 4 BIOS Setup 71 Processor Configuration...