43
SYSTEM FILLING
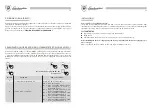
Bring the 3-way valve into the manual position. Open the inlet valve slowly until the system reaches a
working pressure (indicated on the hydrometer) of approximately 1 bar, then close it.
Check that the automatic air bleed valve has its cap loosened, run the circulator to eliminate the any air
in the circuit, proceeding as follows:
press the ON button on the control panel (the display lights up) and activate the heating function
(Winter/Summer switch set to in Winter) to start the circulator. Press the OFF button to stop the circulator;
repeat the procedure until all the air has been vented.
Reset the 3-way valve to the “automatic” position.
IGNITION
Open the gas tap, press the ON button. The burner will ignite automatically (the heating and hot water
functions are set by the manufacturers).
Should the unit fail to ignite there will be another 2 ignition attempts after which there will be a shutdown
(the display will flash
2
-
02
). Press RESET: if the unit still fails to ignite contact the technical assistance
service.
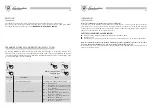
IGNITION
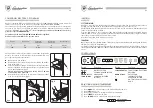
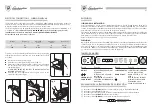
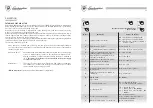
ADJUSTING HEATING TEMPERATURE
1) Press
(MODE)
. An indicator light on the left-hand display comes on.
2) Press
(STEP)
to phase 4.
3) Press the
(+) (-)
buttons to modify the hot water temperature.
4) Press
(STORE)
to memorise the data.
5) Press
(MODE)
twice to enter the new temperature setting.
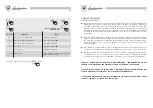
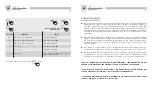
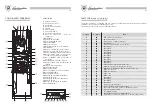
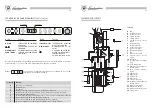
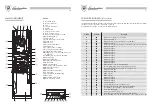
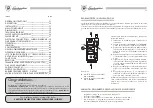
CONTROL PANEL
Button
Function
ON/OFF
ON/OFF SWITCH
SUMMER/WINTER SWITCH
RIARMO/RESET
BOILER RESET
PROG./MODE
PROGRAM SELECTOR
(DISPLAY)
Button
Function
SEQUENZA/STEP
SELECTS PARAMETERS TO BE
DISPLAYED
MEMO/STORE
ENTERS DATA
+
INCREASES SETTING
-
DECREASES SETTING
HOT WATER ADJUSTMENT
0-60
°
C
62
CONEXIONES ELÉCTRICAS - ESQUEMAS
Hay que conectar la caldera a una red de alimentación de 230V-50Hz monofásica + tierra a través del
cable con 3 hilos que se da en dotación y respetando la polaridad LÍNEA-NEUTRO.
La conexión tiene que efectuarse mediante un interruptor bipolar con una apertura de los contactos de
unos 3 mm. por lo menos. Si hubiera que cambiar el cable de alimentación habría que utilizar un
cable tipo “HAR H05 vv-F” 3x1,00 mm
2
.
(Les aconsejamos que utilicen exclusivamente accesorios y
piezas de repuesto LAMBORGHINI).
La instalación debe cumplir las NORMAS VIGENTES de seguridad.
Realicen una buena instalación de puesta a tierra.
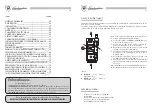
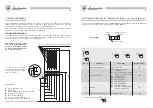
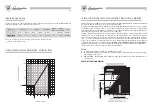
Para acceder al circuito eléctrico donde se encuentran la regleta de
bornes y la conexión (si la hubiera) del termostato ambiente, hay
que seguir las siguientes operaciones:
●
Quitar tensión a la caldera.
●
Destornillar los dos tornillos de sujeción 1 del tablero de mandos
de la caldera (fig.1).
●
Sacar hacia fuera el tablero de mandos hasta llegar al primer
tope de seguridad. Levantar para desbloquear e inclinar hasta
que se abra totalmente (fig.3).
NOTA:NO FUERCEN NUNCA PARA EVITAR QUE SE ROMPA
EL MECANISMO DE APERTURA.
●
Destornillar los dos tornillos 2 de sujeción de la tapa y acceder
a las conexiones eléctricas (fig.4).
Tensión
V
230
Frecuencia
Potencia
absorbida
Hz
kW
50
0,274
Grado de
protección
Nivel sonoro
IP
dB (A)
44
<50
fig.4
2
fig.3
fig.2
1
fig.1

