background image

11

A GUIDE TO SPEED SETTINGS 

The stand mixer has 6 speed settings for mixing, whipping and kneading ingredients for 

your favourite cakes, bakes, biscuits and breads, plus a fermenting setting.
Begin mixing your ingredients on the ’1’ setting, twist the speed dial clockwise to 

increase the speed settings one at a time to the speed you require.
Here is a guide to the attachments and the speeds we recommend.
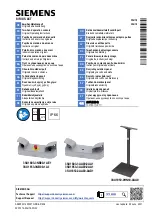
Attachment 

Speed

Time 

(min)

Use

Tips

Dough hook

1-3

3-5

Use on lower speeds for
combining dry ingredients
with liquid, and thicker
heavier mixtures like
biscuits, scones, bread
dough, pizza bases, pastry
and muffins. Maximum 
ingredients 1000g flour and 
530g water. For best results 
use speed 1 for 30s, then 
speed 2 for 20s, then speed 3 
for 2-3 minutes until a dough 
ball forms.

Turn the speed dial to 
‘O’as soon as the mixture 
has formed a ball. Press 
the ‘TILT’ lever to raise 
the arm into the upwards 
position. The mixture can 
now be removed using 
a spatula. Always use 
cold ingredients for short 
crust pastry.

Beater

2-4

3-10

Use on medium speeds
to mix cakes, batter, dips,
icing and to cream butter
or margarine with sugar.
Use for medium to heavy 
mixtures Maximum 
ingredients 660g flour and 
840g water. For best results 
use speed 2 for 20s, then 
speed 4 for more than 2 
minutes 40 seconds.

Butter and margarine 
should be at room 
temperature.

Whisk

6

3-10

Use to whisk egg whites,
meringues and cream.
Use for light mixtures. 
Minimum ingredients 3 egg 
whites.  For best results use 
speed 5 or 6 for 3 minutes.

For best results, 
whisk eggs at room 
temperature.

Summary of Contents for 32925

Page 1: ...INSTRUCTION BOOKLET Model 32925 7L STAND MIXER...

Page 2: ...e planetary mixing action works at 6 speeds to ensure even blending and the powerful 1800W motor The stand mixer has a built in timer and a stainless steel 7 litre bowl has a splatter guard to minimis...

Page 3: ...d and plug 4 LED control panel 5 Tilt lever 6 Speed control dial 7 Base unit 8 Bowl lock 9 Splatter guard feed hole 10 Splatter guard 11 Mixing bowl 12 Beater 13 Whisk 14 Dough hook PRODUCT FEATURES 1...

Page 4: ...4 1 Kneading icon 2 Speed function icons 3 Time function icons 4 Decrease button 5 Time button 6 Increase button 7 Fermenting icon 8 Mixing icon 9 Whisking icon LED CONTROL PANEL 2 3 4 1 9 7 6 8 5...

Page 5: ...ing time is 10 minutes The LED control panel will change from showing 00 00 which is not flashing to 10 00 which will be flashing 10 minutes is the default time for the mixing functions and 60 minutes...

Page 6: ...if damaged or has been dropped In the event of damage or if the appliance develops a fault contact the Lakeland customer care team on 015394 88100 Do not use this appliance if the lead is damaged Cont...

Page 7: ...o not put your hands or utensils inside the mixing bowl while the stand mixer is on to avoid the risk of injury and damage to the appliance Avoid contact with rotating parts To add food to the bowl tw...

Page 8: ...ash the attachments bowl and splatter guard in warm soapy water rinse and dry thoroughly Make sure that all parts are clean and dry before assembling the product Warning Do not insert the plug into a...

Page 9: ...n place Adding the attachments Select your attachment Place this over the end of the attachment lock locating the two notches into the slits on either side Push the attachment up as far as it will go...

Page 10: ...hrough the speeds to the speed you require the light around the speed dial will be solid when the appliance is mixing DO NOT put your hands or utensils inside the mixing bowl while the stand mixer is...

Page 11: ...esults use speed 1 for 30s then speed 2 for 20s then speed 3 for 2 3 minutes until a dough ball forms Turn the speed dial to O as soon as the mixture has formed a ball Press the TILT lever to raise th...

Page 12: ...ntrol dial is in the 0 position Press the time button in the middle and it will show 10 00 the default time for the speed functions press the time button again to switch to the default fermenting time...

Page 13: ...ed so that the arm is fully tilted down or the stand mixer will not work Question Why is the beater struggling to rotate Answer The mixture is too thick or you have added too many ingredients to the b...

Page 14: ...licone spatulas Never immerse the base unit in water or any other liquid To clean the outer surfaces wipe the base unit with a clean damp cloth and dry thoroughly before storing Wash the attachments b...

Page 15: ...to the plug the appliance must not be used without a fuse cover If lost replacement fuse covers can be obtained from an electrical shop This appliance complies with the following EU Directives 2014 3...

Page 16: ...Lakeland Alexandra Buildings Windermere Cumbria UK LA23 1BQ Tel 44 0 15394 88100 lakeland co uk 32925_160222_v1...

Reviews: