background image

Copyright © 

2021 

Laia · www.laiatech.com


- 1 - 

All rights reserved


Attentions 


This manual describes in detail the functions, installation and operation principles and methods of the 

product. Before installing and using this product, please read it carefully. 


1.


Use Attention 

★ 

During transportation, storage, installation and use, it is necessary to prevent heavy pressure, 

severe vibration and immersion so as to avoid damage to products. 


The product shell is made of organic material. It is strictly forbidden to contact with corroded liquid, 

gas or solid substances. 


Don't let the product get wet or rained. Don't use it beyond the limit of temperature and humidity. 


When cleaning equipment lens, please use dry soft cloth to wipe. When dirt is serious, please use 

neutral cleaner to wipe gently. 


Do  not  use  strong  or  corrosive  detergents  to  avoid  scratching  the  lens  and  affecting  the  image 

effect. 


This product has no parts that users can repair by themselves, and the damage caused by 

users'self-disassembly does not fall within the scope of warranty. 


2.


Electrical safety 

★ 

The  installation  and  use  of  products  must  strictly  comply  with  the  national  and  local  electrical 

safety standards. 

★ 

Do  not  use  power  adapters  beyond  the  specifications  of  the  power  supply,  otherwise  the 

equipment components will burn out and will not work properly. 

★ 

In  the  process  of  using  the  product,  we  should  keep  enough  distance  from  the  high-power 

equipment, and do a good job of lightning protection, surge protection and other protective measures 

when necessary. 


When the product is not in use, please disconnect the power 

switch 

and disconnect the power adapter from the power socket. 


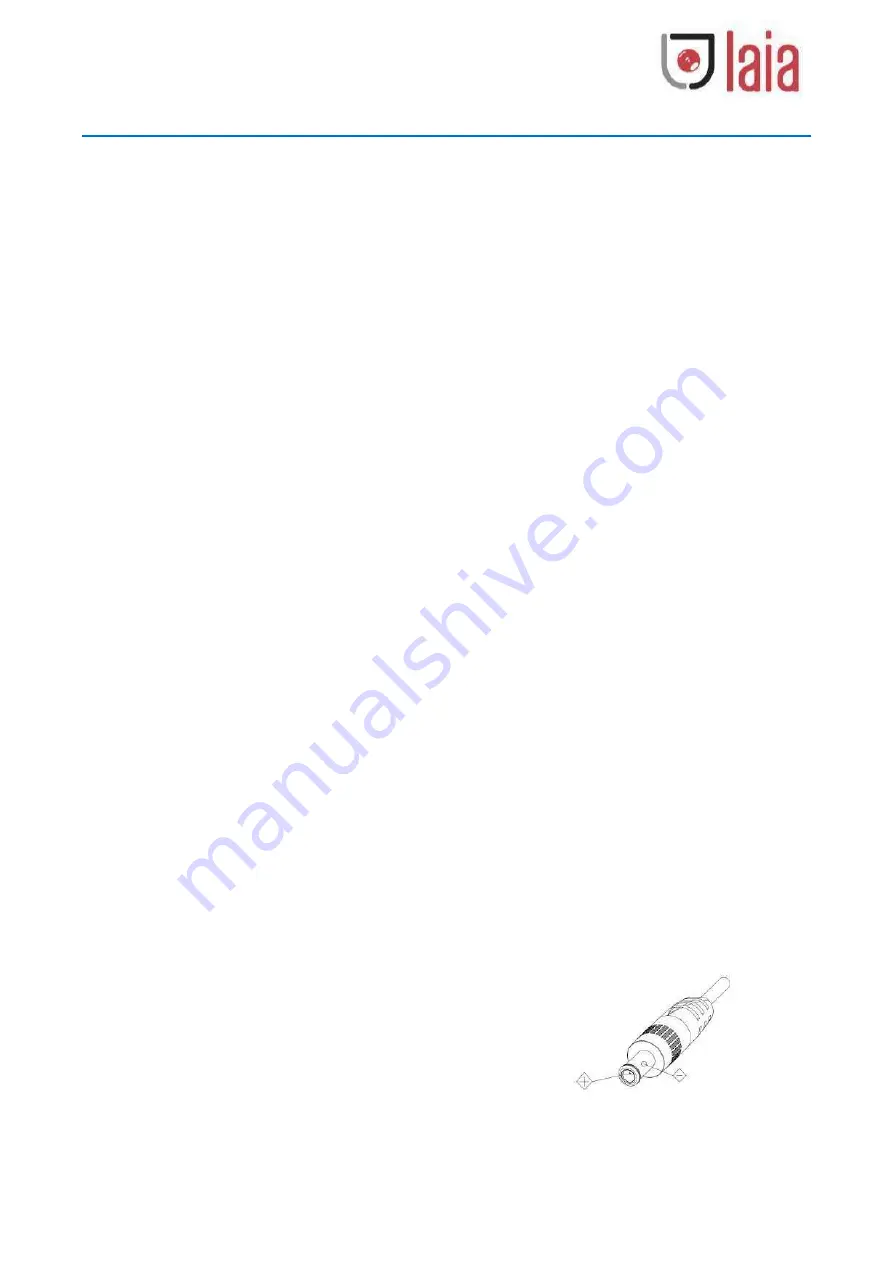
The product uses DC 12V power supply, and the polarity of 

the 

power plug is as shown in the right picture. 


3.


Careful installation 

Summary of Contents for CUTE 30X

Page 1: ...CUTE 12 30X User Manual Copyright 2021 Laia www laiatech com All rights reserved...

Page 2: ...grasp the lens barrel with your hand while moving the camera Move the camera by holding the bottom with both hands or one hand Wh ether electrified or not do not shake the lens and the platform by han...

Page 3: ...use strong or corrosive detergents to avoid scratching the lens and affecting the image effect This product has no parts that users can repair by themselves and the damage caused by users self disasse...

Page 4: ...duct should not be tilted otherwise the picture may be skewed Installation ensures that there are no obstacles in the rotating range of the platform to prevent damage to the rotating shaft of the stru...

Page 5: ...RELESS REMOTE CONTROLLER 10 3 2 KEYS INSTRUCTION 11 3 3 MENU INTRODUCTION 13 4 NETWORK CONNECTION 15 4 1 NETWORK CONNECTION 15 4 2 INTERNET EXPLORER LOG IN 17 5 SERIAL COMMUNICATION CONTROL 18 5 1 VIS...

Page 6: ...put Interface Line IN 2 Camera Base 8 Power input socket DC12V 14 RS232 Input Interface 3 Remote Controller Receiver Light 9 HDMI Output Interface 15 RS232 Output Interface 4 Infrared reception 16 RS4...

Page 7: ...When you unpack check that all the supplied accessories are included Configuration Standard Optional Accessory Power adapter 1piece IR Remote controller 1 piece USB3 0 Cable U3 Model WR Remote contro...

Page 8: ...TXD Transmit Data 4 DTR Data TerminalReady 5 GND System Ground 6 DSR Data Set Ready 7 RTS Request to Send 8 CTS Clear to Send 9 RI Ring Indicator Product 1 DTR 2 DSR 3 TXD 4 GND 5 RXD 6 GND 7 IR OUT 8...

Page 9: ...s with 83 7 wide view angle without distortion 3 Leading Auto Focus Technology Leading auto focus algorithm makes lens a fast accurate and stable auto focusing 4 Low Noise and High SNR Low Noise CMOS...

Page 10: ...remote controller is not affected by angle distance and infrared interference Support remote control signal transmission function convenient for the use of back end equipment 15 Wide Application Tele...

Page 11: ...ol VISCA Pelco D Pelco P Baud Rate 115200 9600 4800 2400bps Power Interface HEC3800 outlet DC12V Input Voltage DC12V 10 Input Electric Current Maximum 1A Power Consumption Maximum 12W PTZ Parameter Pa...

Page 12: ...de is successfully matched The product can only be controlled by this remote controller after the code is matched alone If other remote controllers need this remote controller to clear the code or the...

Page 13: ...order of the instructions For example press the F1 key means first press the key then press and finally press the F1 key 1 Address selection Select the camera address to control 2 Standby Key After 3S...

Page 14: ...f Press Key Right HOME Key Return to the middle position or enter into the next level menu Up and down left and right key control the top and bottom left and right rotation of the platform long press...

Page 15: ...ideo Format 720P30 9 Switching Video Format 720P25 Note If the address of the remote control used before is not 1 but one of 2 3 4 After restoring the default of the factory the product address corres...

Page 16: ...Copyright 2021 Laia www laiatech com 14 All rights reserved...

Page 17: ...he device will not be accessible if without the segment I E The camera default IP address is 192 168 5 163 then segment 5 must be added in the computer Specific steps are as below Firstly open the win...

Page 18: ...address to be added cannot be same with that of other computers or devices The existence of this IP address needs to be verified before adding Click the Start and select Operation to input cmd as pic...

Page 19: ...ministrator and normal user If login as administrator Default User name Password admin users can preview playback configuration and cancel in the Web Client If login in as normal user Default User nam...

Page 20: ...the command is accepted Completion z0 51 FF Returned when the command has been executed z camera address 8 Error Messages Command packet Note Syntax Error z0 60 02 FF Returned when the command format...

Page 21: ...M _RGain Reset 8x 01 04 03 00 FF Manual Control of R Gain Up 8x 01 04 03 02 FF Down 8x 01 04 03 03 FF Direct 8x 01 04 43 00 00 0p 0q FF pq R Gain CAM_ Bgain Reset 8x 01 04 04 00 FF Manual Control of B...

Page 22: ...03 FF Direct 8x 01 04 42 00 00 0p 0q FF pq Aperture Gain CAM_Memory Reset 8x 01 04 3F 00 pq FF pq Memory Number 0 to 254 Corresponds to 0 to 9 on the Remote Commander Set 8x 01 04 3F 01 pq FF Recall 8...

Page 23: ...WW 03 03 FF AbsolutePosition 8x 01 06 02 VV WW 0Y 0Y 0Y 0Y 0Z 0Z 0Z 0Z FF RelativePosition 8x 01 06 03 VV WW 0Y 0Y 0Y 0Y 0Z 0Z 0Z 0Z FF Home 8x 01 06 04 FF Reset 8x 01 06 05 FF Pan tiltLimitSet Set 8...

Page 24: ...AM_PictureEffectModeInq 8x 09 04 63 FF y0 50 00 FF Off y0 50 04 FF B W CAM_MemoryInq 8x 09 04 3F FF y0 50 0p FF p Memory number last operated SYS_MenuModeInq 8x 09 06 06 FF y0 50 02 FF On y0 50 03 FF...

Page 25: ...d SUM Upright 0xFF Address 0x00 0x0A Pan Speed Tilt Speed SUM DownLeft 0xFF Address 0x00 0x14 Pan Speed Tilt Speed SUM DownRight 0xFF Address 0x00 0x12 Pan Speed Tilt Speed SUM Zoom In 0xFF Address 0x...

Page 26: ...0xA0 Address 0x00 0x20 0x00 0x00 0xAF XOR Zoom Out 0xA0 Address 0x00 0x40 0x00 0x00 0xAF XOR Focus Far 0xA0 Address 0x01 0x00 0x00 0x00 0xAF XOR Focus Near 0xA0 Address 0x02 0x00 0x00 0x00 0xAF XOR S...

Page 27: ...video output and video display is normal 2 Images are sometimes absent Solution A Check whether the connection of video output and video display is normal3 Lens zoom image jitter Solution A Check whe...

Page 28: ...segment is identical to the device IP address D Open Start in the computer select Run and enter cmd click OK and then open the computer DOS command window and enter Ping 192 168 5 163 Press the Enter...

Reviews: