LAGOON 380
9
RIGGING
& SAILS
83
•
CABLE ADJUSTMENT
Your mast will have been pre-set both by the boatyard and by the
mast manufacturer during the first mast stepping.
However,after a few sea trips,the mast should be reset once the
cables have "given" to their full length.
proceed as follows:
- Slacken the lower shrouds.
- Tighten the topping lift or use the mainsail halyard in its place.
- Loosen the lazy-jacks.
- Take up the upper and lower diamonds,evenly in order to obtain a
straight profile. The mast should now curve evenly towards aft.
- The forestay is pre-adjusted to have an angle of 2,6° to aft.
- ension the backstays by tightening the turnbuckles with a wrench
and a 30 cm pipe (check that the mast head is centered).
- Take the tension back up in the lower shrouds by turning the tur-
nbuckles by hand.
- Take the lazy-jacks back up.
- The mast should remain curved towards aft.
Under sail with a 20 knot apparent cross wind,it is normal for the
leeward rigging to be slightly slack; if necessary,thread a shock cord
between the backstay and the lower shroud leeward to stop any
flapping .
•
MAINTENANCE
Before each trip, carefully inspect the mast from top to bottom.
Periodically check the rigging tightening and the lock nut or pin
locking (you should check it for the first time after a few days sailing
in all types of weather).
Secure and lubricate the bottle screws with tallow, graphite grease
or other (Never lubricate the bottle screws with silicone).
Check the bottle screw tightening.
Inspect the bottle screws for possible wear (due to the chainplate
friction if the rigging is slack).
Change any shroud or stay with severed wires or kinks.
Regularly check the chain-plates for wear.
ADVICE: Your LAGOON dealer can carry out all the maintenance
operations.
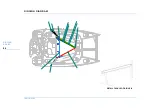
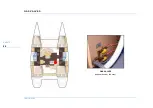
S t a n d i n g r i g g i n g
DANGER
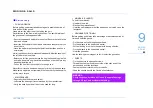
To hoist a crew member up to the top of the mast, make a
bowline with the halyard directly on the bosun's chair ring
(never use the halyard snap shackle or shackle).
Do not hoist a crew member when sailing in heavy weather.
R I G G I N G & S A I L S
Summary of Contents for 380
Page 1: ...www cata lagoon com LAGOON 380 Owner s Manual...
Page 4: ......
Page 6: ......
Page 10: ...LAGOON 380 NAVIGATION 8 FUEL SUPPLY VALVE located directly on the tanks FUEL SUPPLY VALVE...
Page 16: ...LAGOON 380 NAVIGATION 14...
Page 22: ...LAGOON 380 NAVIGATION 20 DAVIT DAVIT BLOCKERS ATTACH DAVIT LINES DAVIT...
Page 24: ......
Page 25: ...23 LAYING UP 25 PROTECTION AND MAINTENANCE 25 Winter Storage 2...
Page 26: ...LAGOON 380 WINTER STORAGE 24 BLOCKING THE BOAT ASHORE...
Page 28: ......
Page 29: ...27 RECOMMENDATIONS 29 STEPPING THE MAST 31 Launching 3...
Page 30: ...LAGOON 380 LAUNCHING 28 1 Centre of gravity POSITIONING OF HOISTING STRAPS...
Page 34: ...LAGOON 380 LAUNCHING 32 MAST JUNCTION BOX...
Page 36: ......
Page 38: ...LAGOON 380 HULL DECK 36 Wetted area including appendices 44 m CARREENING...
Page 42: ......
Page 44: ...LAGOON 380 INTERIOR 42 3 cabin version 4 cabin version INTERIOR...
Page 50: ......
Page 60: ......
Page 70: ......
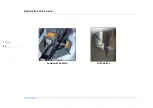
Page 76: ...LAGOON 380 ENGINE 74 ENGINE WATER VALVE STUFFING BOX ENGINE WATER VALVE...
Page 80: ......
Page 81: ...79 STANDING RIGGING 83 RUNNING RIGGING 87 WINCHES 87 SAIL SETTING 89 SAILS 91 Rigging Sails 9...
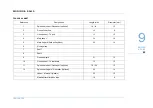
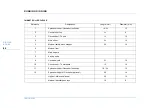
Page 82: ...LAGOON 380 RIGGING SAILS 80 STANDING RIGGING...
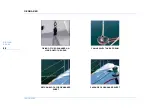
Page 84: ...LAGOON 380 RIGGING SAILS 82...
Page 92: ...LAGOON 380 RIGGING SAILS 90...
Page 94: ......
Page 96: ...LAGOON 380 SAFETY 94 DIMENSIONS OF LIFE RAFT LOCKER IN MM POSITION OF THE LIFERAFT...
Page 98: ...LAGOON 380 SAFETY 96 GAS VALVES cupboard under the oven GAS VALVES...
Page 104: ...LAGOON 380 SAFETY 102 ESCAPE HATCHES...
Page 106: ......
Page 107: ...105 DESIGN CATEGORY 106 GENERAL SPECIFICATIONS 107 General specifica tions 11...
Page 112: ......
Page 113: ......

