28
MAINTENANCE WORK AND REPLACEMENT OF WEARING PARTS
6.7 CHANGING THE RUBBER BEARINGS OF THE
SANDING DISC GEAR
Only use original LÄGLER rubber bearings (order no. in
Section 11,
Spare parts
).
1
Switch off the machine.
2
Disconnect power supply before commencing any work on
the machine; this will prevent inadvertent motor action!
3
Release the clamping lever of the handle, press handle for-
ward and pull the clamping lever back into its prior position
(Fig. 51).
4
While holding on to the handle, carefully tilt the machine back-
wards into a horizontal position. Make sure that the machine
gets to rest safely on the guide tube and the two protective
cushions (Fig. 52).
Make sure the machine is in a safe posi-
tion!
5
Remove the sanding discs or brushes. To do this, grasp the
gear edges with your fingers and pull the gear out of the rub-
ber jig (Fig. 53).
6
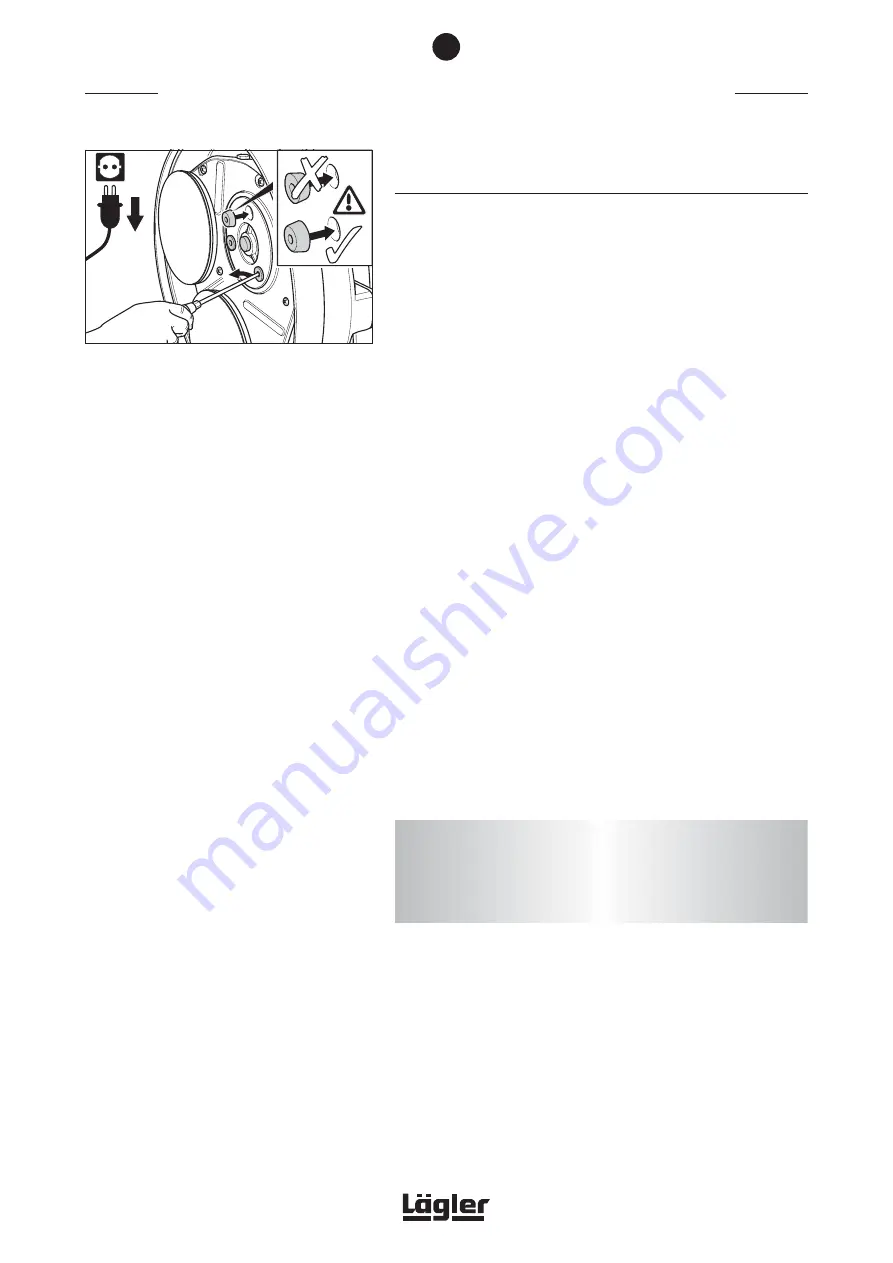
Use a screwdriver to prize the rubber bearings out of the
sanding disc gear (Fig. 57).
7
Insert the new rubber bearings. Make sure you have the cor-
rect insertion position! The larger diameter of the bearings
must be inserted in the hole first (Fig. 57)!
8
Tilt the machine forward into working position and adjust
handle. Connect power again.
The machine is now ready to use.
Fig. 57
Replacing the rubber bearings. Make sure of the
correct insertion position!
6
ATTENTION!
Make sure the gear is in place correctly. It must slide in place
with a perceptible click. Always use three gears of the same
type!
Summary of Contents for Trio
Page 37: ...37 NOTES...
Page 38: ...38 SPARE PARTS 11...
Page 40: ...40 SPARE PARTS 11...
Page 42: ...42 SPARE PARTS 11...
Page 44: ...44 SPARE PARTS 11...
Page 46: ...46 SPARE PARTS 11...
Page 48: ...48 SPARE PARTS 11...
Page 50: ...50 NOTES...


