background image

EC DECLARATION OF CONFORMITY

Copyright © Eugen Lägler GmbH, 2019 – All rights reserved – T

ranslation of original operating instructions FLIP

®

 – 12 / January 1, 2019 – Printed on chlorine-free bleached paper

. Part number 00.320.20.002

No guarantee is provided for the contents of these operating instructions. No liability is assumed for errors or damages which 

arise from the use of these operating instructions. Subject to changes.

EC Declaration of  conformity for machines 

(EC Directive 2006/42/EC)

The manufacturer  

Eugen Lägler GmbH, Kappelrain 2, D-74363 Güglingen-Frauenzimmern, Germany


Tel.: 0049 - 7135 - 98 90-0 · Fax: 0049 - 7135 - 98 90-98


E-Mail: [email protected] · http://www.laegler.com

certified herewith, 

that the machine 

Generic denomination:  

Floor sanding machine

 Function: 


Dry sanding of wooden floors, wooden stairs

 Model: 

FLIP

®


Serial number:  

See type plate


Commercial name:  

Edge-, corner- and stair-sanding machine

fulfils all the relevant provisions of the specified above European Directive.

The machine also fulfils all the relevant provisions of the European Directive

Electromagnetic Compatibility (2014/30/EU)

.

The following harmonized standards have been applied:

DIN EN ISO 12100:

  Safety of machinery - General principles for design - Risk assessment and risk reduction

DIN EN 60204-1:

 Safety of machinery - Electrical equipment of machines - Part 1

DIN EN 55014-1:

 Electromagnetic compatibility - Requirements for household appliances, electric tools and similar 

apparatus - Part 1

DIN EN 55014-2:

 Electromagnetic compatibility - Requirements for household appliances, electric tools and similar 

apparatus - Part 2

DIN EN 61000-3-2:

 Electromagnetic compatibility (EMC) - Part 3-2: Limits

DIN EN 61000-3-3:

 Electromagnetic compatibility (EMC) - Part 3-3: Limits

13

www.laegler.com

FLIP

®

Serial number: 


Year of manufacture: 


Technical file at: 

Eugen Lägler GmbH, Kappelrain 2

 D-74363 

Güglingen-Frauenzimmern

 Germany

64

Summary of Contents for Flip

Page 1: ...AIR SANDING MACHINE FLIP FLIP English Englisch www laegler com Operating Instructions Translation of original operating instructions for the edge corner and stair sanding machine 00 320 20 002 01 01 2...

Page 2: ...1 General application tips 20 5 2 Replacing the sanding medium 22 5 2 1 Velcro sanding discs 22 5 2 2 Conventional sanding discs 23 5 3 Emptying the dust bag 24 6 Transport and storage 27 7 Maintenan...

Page 3: ...but creates a great deal of dust 48 9 6 Sanding problems waves strips grooves 49 10 Circuit diagram 51 11 Spare parts FLIP 52 12 Service passport 63 13 EC Declaration of conformity for machines EC Di...

Page 4: ...nglish Englisch FLIP COMPONENTS Dust bag Rocker switch Guide roller Handle Motor Attachment Fig 1 Components of the edge corner and stair sanding machine FLIP Motor cable Fan housing Pipe socket with...

Page 5: ...machine There are three different attachments for the FLIP part numbers are in Section 11 Spare parts FLIP short attachment for sanding edges and stairs long attachment for sanding edges and below rad...

Page 6: ...5 MACHINE CONFIGURATION 1 5 1 BASIC EQUIPMENT 1 Machine ready for operation 1 Operating instructions 1 Dust bag 1 Extension cable 3 x 1 5 mm 3 x 0 0023 sq in length 10 m 394 1 Universal spanner Torx...

Page 7: ...ntioned below at regular intervals in order to be able to work safely and optimally at all times Replace the following parts in case of wear and or damage Velcro coating on the sanding plate V belt Mo...

Page 8: ...grounded parts e g pipes radiators ovens refrigerators The quality of the motor cable and the power cables must match the quality of the original L GLER cables The motor cable and the power cables mu...

Page 9: ...waxed floors or metal Therefore the machine must always be cleaned carefully directly after sanding Be certain to note the warning notices of the manufacturers of paint oil and wax Cloths pads et cete...

Page 10: ...e to the mains supply must not exceed 20 m 790 HEALTH RISK caused by dust Make sure that the dust bag is properly fastened to the machine Do not use damaged washed or repaired dust bags Do not work wi...

Page 11: ...ine Never leave the operational machine unattended Do not reach into rotating tools or parts of the machine Do not wear any long articles of clothing or jewelry These could be caught by moving parts R...

Page 12: ...t the safety devices carefully to ensure that they are working perfectly and as intended Check whether the moving parts are working properly that they are not sticking that no parts are broken whether...

Page 13: ...a tidy Untidy work areas create a risk of accidents Use the proper machines Do not use low performance machines or additional devices for heavy jobs Do not use the machine for purposes and work that i...

Page 14: ...Year 4 Machine name Type 5 Required mains voltage in volt V 6 Current consumption in ampere A 7 Motor frequency in CPS Hz 8 Motor power in kilowatt KW 9 Motor speed in 1 min Rpm 10 Weight of machine...

Page 15: ...hine 9 8 kg 21 6 lbs Dust emissions at workplace measured as per the testing requirements GS HO 15 of German statutory accident insurance DGUV 0 2 mg m 0 0024 gr cu yd Workplace related noise emission...

Page 16: ...materials according to the environmental regulations 2 Pull out the stop bolt on the suction socket of the fan housing fig 4 1 and at the same time insert the pipe socket into the fan housing fig 4 2...

Page 17: ...supply part number in Section 11 Spare parts FLIP Observe the applicable regulations and legal requirements in your country RISK OF FIRE from the overheating of the cables Only cables with two wires a...

Page 18: ...the switch button does not snap into switch position I do not continue sanding Otherwise the motor can be permanently damaged Remedy the following causes for the malfunction The electrical network ha...

Page 19: ...fig 9 2 Flip the rocker switch to O fig 10 2 The switch button will snap into the place and the motor will be switched off 3 Wait until the sanding plate comes to a complete stop before stand the mach...

Page 20: ...ng the V belt step 5 to 8 The FLIP with short or long attachment is handled with rotary clockwise movements fig 12 during the sanding process The FLIP with corner attachment is handled with counterclo...

Page 21: ...g the sanding disc start working in poorly lit areas of the room in order to remove the initial aggressiveness of the sanding medium Vacuum the floor thoroughly always directly before each workstep ev...

Page 22: ...iscs from L GLER Depending on the material being sanded you will use various sandpaper grit grades Proceed as follows to change the sanding medium 5 2 1 VELCRO SANDING DISCS 1 Switch off the machine a...

Page 23: ...ng plate fig 16 4 Remove the screw and paper tensioning disc fig 17 1 Remove the sanding disc from the sanding plate fig 17 2 and put all three parts aside 5 Put on a new sanding disc and insert the s...

Page 24: ...be emptied when it is one third full at the very latest in order to prevent a deterioration of the suction performance due to the lack of filtering surface area The horizontal line on the outside of t...

Page 25: ...e and insert a waste bag from the ribbed side through the opening in the center of the fixture fig 24 8 Pull the waste bag over the emptying fixture from behind fig 25 9 Take hold of the emptying fixt...

Page 26: ...vigorously fig 28 14 Seal the filled waste bag with a cable tie fig 29 15 Keep the dust bag tilted at a slight angle for the residual dust to fall back into the dust bag and open the two quick release...

Page 27: ...torage with minimum temperature fluctuations In order for the FLIP to need less space for transport or storage proceed as follows 1 Pull out the stop bolt in the fan house fig 33 1 2 At the same time...

Page 28: ...ensure that your machine continues to perform Warranty claims for foreign parts or damage caused thereby cannot be accepted Never conduct the maintenance work and replacement of wearing parts on the n...

Page 29: ...screw and the thread of the sanding plate regularly Otherwise the thread will be damaged Check the dust suction system and the dust bag for leaks and damages Conduct a visual inspection of the electr...

Page 30: ...o screws which connect the attachment to the fan housing fig 35 4 Use the universal spanner to undo the screw which attaches the belt tightening plate fig 36 5 Hold the FLIP by the fan housing and pre...

Page 31: ...e with the universal spanner fig 38 1 4 Turn the belt tightening plate away from the attachment fig 38 2 and retighten the screw of the belt tightening plate fig 38 3 5 Use the universal spanner to re...

Page 32: ...ing plate are aligned with the holes in the attachment fig 44 3 Make sure that the sanding plate can be turned by hand and that the V belt is correctly placed in the attachment 4 Turn the attachment o...

Page 33: ...ING PLATE Use only original L GLER sanding plates part number in Section 11 Spare parts FLIP If it is determined while replacing the V belt that the sanding plate pulley is worn out the complete sandi...

Page 34: ...EATH from electrical shock When disassembling the motor the power plug must always be removed from the socket 2 Undo the four fixing screws of the handle fig 49 and remove it from the motor housing fi...

Page 35: ...y using the spanner and pliers 10 Install the handle on the motor housing WARNING RISK OF DEATH from electrical shock Do not pinch any cables while installing the handle 11 Install the attachment on t...

Page 36: ...e collector These parts will then have to be replaced There are no warranty claims for damages of this nature Use only original FLIP carbon brushes with safety contacts part number in Section 11 Spare...

Page 37: ...provided fig 55 3 Install the carbon brush cable like the other old carbon brushes that are still installed This will prevent a later pinching of the cable 7 Replace the second carbon brush in the sam...

Page 38: ...of the guide rollers is conducted as follows 1 Switch off the machine and pull the power plug out of the socket 2 Loosen the locknut of the guide roller to be adjusted fig 56 A If the locknut is screw...

Page 39: ...lers to the same height steps 1 to 6 and repeat the trial sanding operation 7 Fig 62 Improper adjustment of the guide rollers The sanding zone of the machine is too much to the left Fig 60 Improper ad...

Page 40: ...ner Section 7 8 1 Standard setting If you would like a steeper or flatter setting than the standard setting proceed as follows 1 Switch off the machine and pull the power plug out of the socket 2 Loos...

Page 41: ...applying additional force 1 Switch off the machine and pull the power plug out of the socket 2 Remove the screw with the two washers and the nut from the wheel fork fig 68 1 3 Remove the wheel from th...

Page 42: ...sanding various wall shapes or skirting boards 1 Switch off the machine and pull the power plug out of the socket 2 Use the universal spanner to undo the screw in the middle of the wall protecting rol...

Page 43: ...on 11 Spare parts FLIP 1 Switch off the machine and pull the power plug out of the socket 2 Use the universal spanner to undo the screw in the middle of the wall protecting roller fig 71 1 3 Remove th...

Page 44: ...r machine was serviced Enter the serial number and the year of manufacture of your machine please see the type plate on the back cover of these operating instructions If you do not do this your servic...

Page 45: ...rtable electrical equipment insofar as is used extension and device connection cables with plugs connection cables with plugs movable cables with plugs and fixed connections Inspection interval Every...

Page 46: ...temperature switch in the motor has switched off the machine because the power cables have a total length of more than 20 m 790 the power cables have wire cross sections which are smaller than 1 5 mm...

Page 47: ...UNS BUT HAS NO OR VERY LITTLE SANDING POWER CAPACITY The sanding medium is incorrect or dull and must be replaced Section 5 2 Replacing the sanding medium At low temperatures The machine is too cold a...

Page 48: ...hat must be removed Section 7 1 Cleaning and care 9 5 THE MACHINE RUNS BUT CREATES A GREAT DEAL OF DUST The dust bag is more than one third full and must be emptied Section 5 3 Emptying the dust bag T...

Page 49: ...htly before switching the machine on or off so that the sanding disc is lifted off the floor Section 4 3 Switching on the machine Section 4 4 Switching off the machine The machine is being moved too s...

Page 50: ...7 3 Replacing the V belt A pulley is dirty or worn out and must be cleaned or replaced Section 7 4 Replacing the complete sanding plate Section 7 5 Replacing the motor pulley Too much pressure is pla...

Page 51: ...ree capacitor Q1 switch 1 35 kW 230 V 50 60 CPS 1 35 kW 110 120 V 50 60 CPS FLIP universal motor Phone 0049 7135 98 90 0 Fax 0049 7135 98 90 98 e mail info laegler com Internet http www laegler com U...

Page 52: ...FLIP 01 01 2019 English Englisch SPARE PARTS FLIP 52 ATTENTION Please specify in inquiries and spare part orders always the serial numbers of your machines Section 3 1 11...

Page 53: ...11 7500 1005 012 Screw 12 0125 1005 000 Washer 13 320 08 10 100 Fan housing complete 14 320 08 03 100 Belt tightener plate 15 0125 1006 000 Washer 16 7985 1006 816 Screw 17 320 05 00 200 Guide roller...

Page 54: ...FLIP 01 01 2019 English Englisch SPARE PARTS FLIP 54 ATTENTION Please specify in inquiries and spare part orders always the serial numbers of your machines Section 3 1 11...

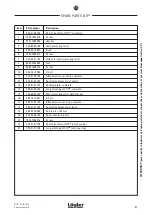
Page 55: ...230 V 50 60 CPS 000 65 60 156 Switch 110 120 V 60 50 CPS 000 65 62 160 PVC cap with switch frame 9 7500 1005 012 Screw 10 320 65 47 100 Cover with seal 11 320 65 48 105 Cover seal 12 320 65 30 100 Int...

Page 56: ...FLIP 01 01 2019 English Englisch SPARE PARTS FLIP 56 ATTENTION Please specify in inquiries and spare part orders always the serial numbers of your machines Section 3 1 11...

Page 57: ...320 01 51 105 Seal attachment cover short 13 320 01 91 100 Sanding plate complete 14 330 01 00 100 Long attachment FLIP complete 15 320 60 00 100 Wall protecting roller with bracket 16 000 70 10 087...

Page 58: ...FLIP 01 01 2019 English Englisch SPARE PARTS FLIP 58 ATTENTION Please specify in inquiries and spare part orders always the serial numbers of your machines Section 3 1 11...

Page 59: ...ro ring flexible 10 320 01 60 100 Milling attachment FLIP complete 11 320 60 00 100 Wall protecting roller with bracket 12 320 01 01 105 Short attachment FLIP only housing 13 000 70 10 055 V belt 14 3...

Page 60: ...FLIP 01 01 2019 English Englisch SPARE PARTS FLIP 60 ATTENTION Please specify in inquiries and spare part orders always the serial numbers of your machines Section 3 1 11...

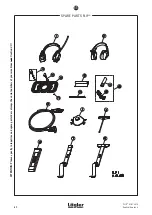
Page 61: ...0 100 Impact tool 7 702 00 00 200 Parquet layer tool ZUGEISEN small 8 703 00 00 200 Parquet layer tool ZUGEISEN broad 10 320 00 70 100 Emptying fixture complete 11 000 10 10 055 Washer 12 000 11 05 90...

Page 62: ...FLIP 01 01 2019 English Englisch NOTES 62...

Page 63: ...ignature and company stamp Date of test and maintenance work Signature and company stamp Date of test and maintenance work Signature and company stamp Date of test and maintenance work Signature and c...

Page 64: ...late Commercial name Edge corner and stair sanding machine fulfils all the relevant provisions of the specified above European Directive The machine also fulfils all the relevant provisions of the Eur...

Reviews: