background image

Instruction manual for CoolSafe 


01012016QA01 

Item No. 700637 

CopyRight © 2016


Page 

23

 of 

30


7.4 

Error codes 

The following situations will invoke an alarm that will be shown in the status line on the touch screen: 


Displayed code 

Description 

E01 

Temperature sensor error 

– PT-100 connection broken or sensor not attached to the system. 

Alarm 

Temperature under freeze drying exceeds -65 °C.


E03 

Temperature sensor error 

– PT-100 shorted or outside range. 


E04 

Pressure sensor error - Pirani connection broken or sensor not attached to the system. 

Cool only 

The pressure in the ice condenser is exceeding the alarm pressure. 

Power out 

A power out has occurred. 

E08 

Pressure sensor error - Pirani shorted or outside range. 

E09 

The safety pressure sensor on stage 1 is active. Restart compressors on stage 1 and stage 2 by manual 
resetting of the safety pressure sensor. 

E10 

The safety pressure sensor on stage 2 is active. Restart of compressor 2 is performed automatically be the 
auto-reset function. If the safety pressure sensor is activated 3 times in a 20-minute period, it must be reset 
by powering the compressor down and turning it on again. 

Preparations 

Check that the CoolSafe ice condenser is free from ice and water, and that all valves i.e. the drain 
valve is closed. Check that there is no water in the drain valve. 


Note


Do not use any tools to close valves, as they will easily be damaged. 


Check that the gas ballast valve on the vacuum pump is open at all times. 


Check the oil level in the pump and the oil mist filter. The filter should have only a maximum 
10 mm oil level (preferably it should be empty). 


Switch on the CoolSafe and the vacuum pump.  


The lowest temperature (-100 °C on the CoolSafe 100-9 Touch Superior XS and -95 °C with 
CoolSafe 95-15 Touch Superior XL) should be achieved within 60 minutes. 


The  vacuum  pump  should  now  be  allowed  to  run  for  at  least  30  minutes  to  achieve  the 
lowest vacuum performa

nce. In this “warm up” phase the gas ballast control ideally should 

be  open  but  closed  during  the  primary  and  secondary  drying  phases.  Please  note  that 
vacuum will not be applied to the condenser at this juncture. The electronic vacuum valve 
remains closed until you enter the freeze drying modes (either opened via the touch screen 
in manual mode or via programme sequence in automatic mode). 

Summary of Contents for CoolSafe 100-9 Touch Superior XS

Page 1: ...Item No 700637 CopyRight 2016 INSTRUCTION MANUAL CoolSafe 100 9 Touch Superior XS CoolSafe 95 15 Touch Superior XL...

Page 2: ...dium or minor injuries or physical damage This document is the original instruction manual in accordance with the current Machinery Directive This document is the reference for any translation of this...

Page 3: ...essure 13 6 3 Auto menu 13 6 3 1 Programme list 14 6 3 2 Start 14 6 3 2 1 Current shelf temperature 14 6 3 2 2 Alarm pressure 15 6 3 3 Edit programme 15 6 3 3 1 Pre freeze 15 6 3 3 2 Alarm pressure 16...

Page 4: ...n Please read this entire manual to fully understand the safe and effective use of this product Should you have any comments about this manual we will be pleased to receive them Note If this equipment...

Page 5: ...um pump with 2 5 m3 h capacity or greater must be connected to the CoolSafe via the connection on the rear of the CoolSafe cabinet in order to allow cryo pumping The vacuum pump can be installed on th...

Page 6: ...n easily be controlled via the control panel or user interface 4 1 Control panel The control panel is placed on the upper front of the cabinet at an angle for easy reading and use The control panel a...

Page 7: ...e freeze dryer function and operate correctly Each must be set correctly and plugged in correctly to make the CoolSafe operational 4 2 1 Power supply and ON OFF switch The CoolSafe is designed to be p...

Page 8: ...ion purposes the temperature in each shelf is measured using a PT 100 temperature sensor The signals from these sensors regulate the heating wire build into each shelf 4 2 4 Product temperature The te...

Page 9: ...ilt in enabling fine tuning of the flow into the chamber This will prevent an over shoot in the chamber pressure and enabling the control of the pressure during the process In order to get the best re...

Page 10: ...to facilitate easy control of the freeze dryer and the freeze drying process in either manual or automatic running mode The touch control system is based on a simple structured menu structure for easy...

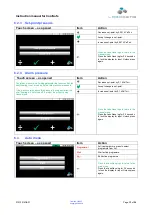
Page 11: ...Action When entering the manual menu the compressors start cooling the ice condenser Scroll up and down using the arrows to the right to select the menu item you want to see or change Freeze drying t...

Page 12: ...press to reset error counter Press the LaboGene logo to return to the main menu Press the LaboGene log for 2 3 seconds to lock the display for input Unlock press again 6 2 1 Current shelf temperatures...

Page 13: ...ot turned on before this pressure is reached If the pressure raise above this pressure during operation the shelf heating will be turned off to protect the product being freeze dryed Decrease set poin...

Page 14: ...ure Actual pressure View the current pressure in the ice condenser Actual shelf temp Press to see list of Current shelf temperatures Product temp View the current product temperature Set point shelf t...

Page 15: ...Pre freeze Press to edit pre freeze process Alarm pressure Press to set alarm pressure Primary drying 1 5 Press to edit primary drying process Primary drying 6 9 Press to edit primary drying process S...

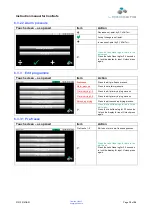
Page 16: ...3 seconds to lock the display for input Unlock press again 6 3 3 2 Alarm pressure Touch screen as opened Item Action Decrease set point by 0 1 hPa Torr Accept change in set point Increase set point by...

Page 17: ...Gene logo to return to the primary drying menu Press the LaboGene log for 2 3 seconds to lock the display for input Unlock press again 6 3 3 4 Secondary drying Touch screen as opened Item Action When...

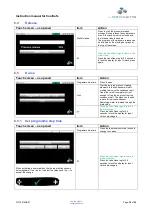
Page 18: ...process Heating elements in the condenser will start melting the ice on the condenser wall Can either melt it completely or just enough to free the ice block from the condenser wall The block can the...

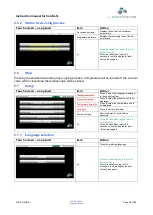
Page 19: ...d the release valve will be closed 6 7 Setup Touch screen as opened Item Action Language selection Press to select the language displayed in the control system Pressure selection Press to select the p...

Page 20: ...LaboGene logo to return to the setup menu Press the LaboGene log for 2 3 seconds to lock the display for input Unlock press again 6 7 4 Set time date Touch screen as opened Item Action When activatin...

Page 21: ...u Press the LaboGene log for 2 3 seconds to lock the display for input Unlock press again 6 9 Info Touch screen as opened Item Action Software version controller The current software version installed...

Page 22: ...minutes At start up stage 1 is running for 6 minutes before stage 2 is started up This is to ensure that pressure in the stage 2 system is keep within the allowable pressure limits In case the ice con...

Page 23: ...te period it must be reset by powering the compressor down and turning it on again 8 Preparations Check that the CoolSafe ice condenser is free from ice and water and that all valves i e the drain val...

Page 24: ...reezing time and shelf temperature 5 steps If you do not need 5 steps enter 0 for the time in the steps not used In the pre freeze mode vacuum is not applied Enter the values for freeze drying time sh...

Page 25: ...arly during the week it is recommended that the vacuum pump run constantly with open gas ballast valve and closed vacuum valve 8 4 Hints tips and reminders The selection of the appropriate sample cont...

Page 26: ...he condenser has dried 9 4 Checking for Leaks on the CoolSafe freezer dryer Always start from the vacuum pump and work forwards towards the chamber 1 Check vacuum hose connection to the pump If the pu...

Page 27: ...inciple the process is very simple but in reality it also can be very complex as the product can consist of many components which interact with each other Moving from one state to another requires the...

Page 28: ...s kg 4 Total volume of Condenser L 9 Weight net kg 75 Cabinet dimensions DxWxH mm 620x495x745 Cabinet material Polyester coated steel Condenser material Stainless steel AISI 316 Cooling media R507 R17...

Page 29: ...Instruction manual for CoolSafe 01012016QA01 Item No 700637 CopyRight 2016 Page 29 of 30 13 Declaration of conformity...

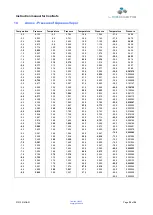
Page 30: ...46 13 0 1 986 22 2 0 835 44 0 0 081173 4 0 4 371 13 2 1 951 22 4 0 819 46 0 0 064112 4 2 4 298 13 4 1 915 22 6 0 803 48 0 0 050383 4 4 4 226 13 6 1 880 22 8 0 789 50 0 0 039387 4 6 4 154 13 8 1 847 23...

Reviews: