background image

Loading print ribbon

Loading print ribbon  

(cont’d)

Open cover by pulling both green cover release tabs straight 
towards you, then lift up on the ribbon access cover to open.
Remove outer plastic bag from the ribbon, and unstick the 
white ribbon ‘leader’ or ‘tail’ from the roll. 
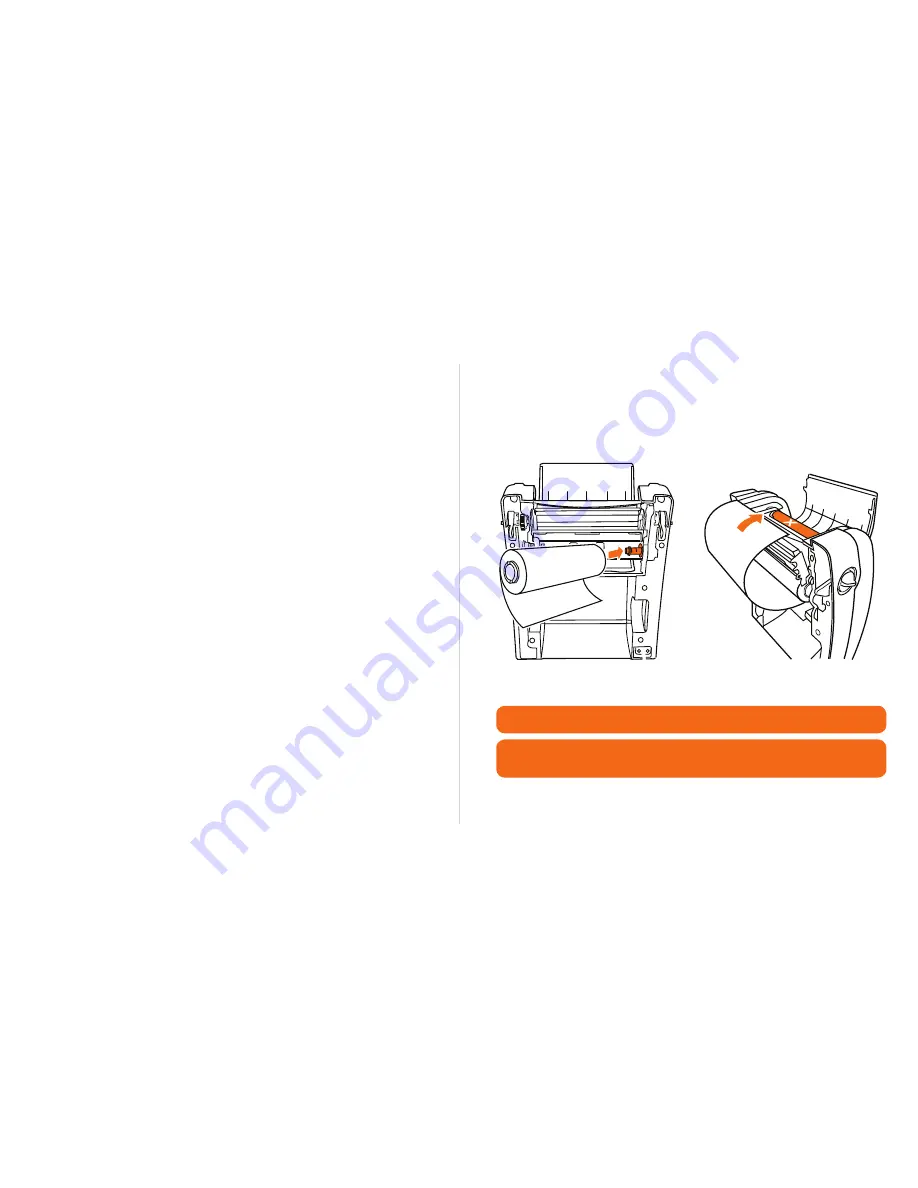
(For new rolls)

With the ribbon leader hanging from behind/under the roll, 
insert the ribbon right-side first onto the ribbon supply hub. 

(a)

Insert the left side of the ribbon onto the other hub and rotate 
the ribbon until you feel the notches on the cardboard core 
lock into the hub spokes.
Insert an empty cardboard core into the ribbon rewind hub, then 
take the hanging ribbon up and over the print head and stick the 
ribbon to the core with scotch tape or the leader adhesive. 

(b)

With your finger, turn the green ribbon rewind gear until the 
leader is wound around the core, and the ribbon is exposed 
and fully covers the print head.
Close the ribbon access cover, push the green cover support 
to the left to disengage and close the top cover gently.

1

2

3

4

5

6

7

Using LabelTac 


Loading print ribbon

12

Using LabelTac 


Loading print ribbon

13

A full print ribbon loading video is available on your LabelTac Install CD under “User 
Guides & Videos” or online at www.labeltac.com/support.

If installed correctly, the dull side of the ribbon should be exposed and facing you.

(a)

(b)

Summary of Contents for 4

Page 1: ...LabelTac 4 Setup Guide...

Page 2: ...Connecting LabelTac Installing LabelTac drivers Installing templates symbols Using LabelTac Loading print ribbon Loading tape supply How to make labels LED button functions Troubleshooting When using...

Page 3: ...ing Pipe Marking Safety Arc Flash OSHA Racks Warehouses Tool Identification Lean 5S Kaizen Kanban Hazmat ANSI ASME more We re here to help Please give us a call or email if you need any help with inst...

Page 4: ...on Button Ribbon Access Cover Cover Releases Ribbon Supply Hub Cover Support Release Media Holder Platen Roller Cutter Alignment Guide Adjustment Wheel Print Head Alignment Guides Black Mark Sensor Mo...

Page 5: ...inue 6 Setup Install Connecting LabelTac 7 Step 1 Connect to PC Connect one end of the USB cable to an available USB 2 0 port on the back of your computer Connect the other end of the cable to the USB...

Page 6: ...e end of the power cord to the power port on the back of the LabelTac and the other end to a power outlet Flip power switch from off position O to on position I The LED indicator on the top side of th...

Page 7: ...the templates and symbols and then click Install We recommend installing to your desktop for easy access when creating signs and labels Click Close when complete 1 2 3 4 5 6 1 2 Setup Install Installi...

Page 8: ...empty cardboard core into the ribbon rewind hub then take the hanging ribbon up and over the print head and stick the ribbon to the core with scotch tape or the leader adhesive b With your finger tur...

Page 9: ...eft media holder Using the green guide adjustment wheel adjust the media guides wider than the width of the material feed the material through the guides and then re adjust the guides so they fit up a...

Page 10: ...gs to 4 height and to 6 width We find Microsoft Word to be the easiest program to design labels and signs but if you don t have access to Word on your computer OpenOffice or Bartender both included on...

Page 11: ...erial loaded and a blue print ribbon the elements on screen that are black will print to the blue ribbon and the elements that are white will not print resulting in a blue on yellow final label You ca...

Page 12: ...would add other images page 19 We include hundreds of free symbols in the LabelTac Symbols folder See page 11 for installation instructions for LabelTac templates symbols Stuck on a label design or ne...

Page 13: ...paper jam ribbon empty or memory error Release during Description Red blinking Ribbon sensor gap mark sensor calibration Amber blinking Gap black mark sensor calibration Dump Mode Green blinking Print...

Page 14: ...avigate to printer preferences through Start Menu Devices and Printers the settings will be retained Symptom Causes Suggested action Speckling spotting rough edges inconsistent print Heat speed densit...

Page 15: ...nt head Our warranty is the label printer equivalent of a bumper to bumper warranty If anything goes wrong we ve got your back Warranty Limitations CSS s limited warranty provides that subject to the...

Page 16: ...28 powered by Creative Safety Supply phone 866 777 1360 web www labeltac com email info labeltac com creativesafety creativesafetysupply Contact Us...

Page 17: ...www labeltac com LT4 2 01 11 12...

Reviews: