


EN
8
boiler to a predetermined level and will
shut off when full.
NOTE: It may be necessary to re-fill the water
reservoir during this process. Check to see if the
“Water Tank Empty” error message is present on
the display before continuing.
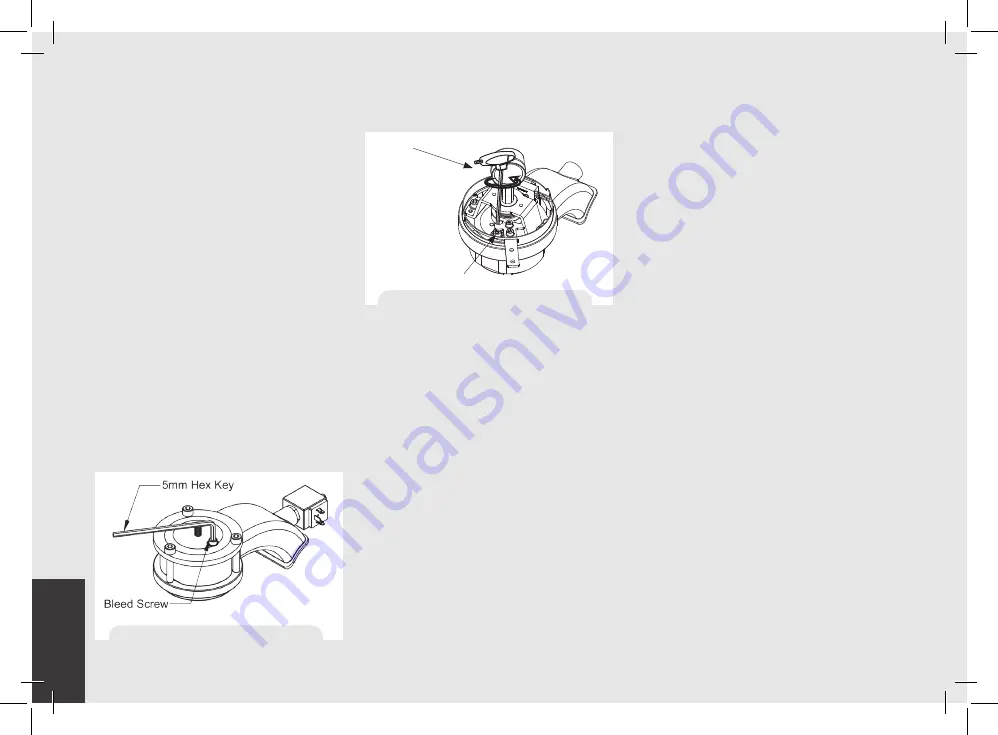
Coffee Boiler:
The water flows inside the
coffee boiler directly when the water pump
is activated. When the GS/3 is turned on
the electronics will activate the water
pump to fill both boilers. Since the inflow
of water will compress the air in the boiler it
will be necessary to remove or “bleed” the
air from the coffee boiler. All air must be
removed in order to completely “saturate”
the coffee boiler/group assembly. To
remove the air from the boiler (“bleed the
groups”) remove the group cover from the
top of the group head. Then loosen the
bleed screw (see picture) to allow air to
escape until water
flows from below the screw head. It may
be necessary to activate the brew process
by pressing button #5 (the
continuous button) to force the air out of
the group. Tighten the screw to stop the
water from flowing. Over-tightening can
cause damage to the sealing washer and
the group cap. If this sealing washer is
damaged replace washer with one included
in accessory kit. Once all air is removed
from the coffee boiler, reinstall the group
cover. For more detailed instruction please
refer the GS/3 Installation Guide.
NOTE: It may be necessary to re-fill the water
reservoir during this process. Check to see if the
“Water Tank Empty” error message is present on
the display before continuing.
4) Verify filling of Boilers.
The installation is now complete and the
espresso machine should be heating to the
operating temperatures.
Brewing after first installation
Once the first installation procedures are
finished, before proceeding with brewing
coffee, hot water and steam, please follow
these steps:
• Engage the portafilter by inserting it into
the group head and rotate the handle from
left to right. Once the portafilter is inserted
properly, you can press one of the brewing
buttons on the keypad to start the flow of
water through the portafilter (AV models)
or rotate the handle from left to right (MP
models). Brew water through the group for
at least two minutes.
• Being careful to avoid burns, turn
on steam wand for at least
one minute.
• Turn on the hot water valve for the time
necessary to allow at least 1 liter of water
to be brewed.
5) Waiting for the Espresso Machine to Heat to
Operating Temperature. During this time, the
pointer of the coffee boiler pressure gauge
may reach as high as 12 bar. This may
happen anytime that the heating element
is in the “on” condition. If the pressure
Figure 3a - “Bleed the Group AV”
Figure 3b - “Bleed the Group MP”
Bleed Screw
5 mm Hex Key


