7
3
Operation
All equipment is shipped from the factory fully checked and adjusted to factory default settings. Before
connecting the battery check with the battery manufacturer for the correct voltage settings and adjust
the configuration accordingly (refer to section 3.3). Failure to match the charger settings with the
connected battery may damage or shorten the life of the battery.
3.1
Initial Setup
Before starting up the MSM, check and verify that all connections are correct and are tightened securely. Check
that the input voltage and frequency of the power source match the rating on the nameplate of the charger. Apply
AC power to the input terminals of the MSM in order to start up the charger.
3.2
Front Display and Indicators
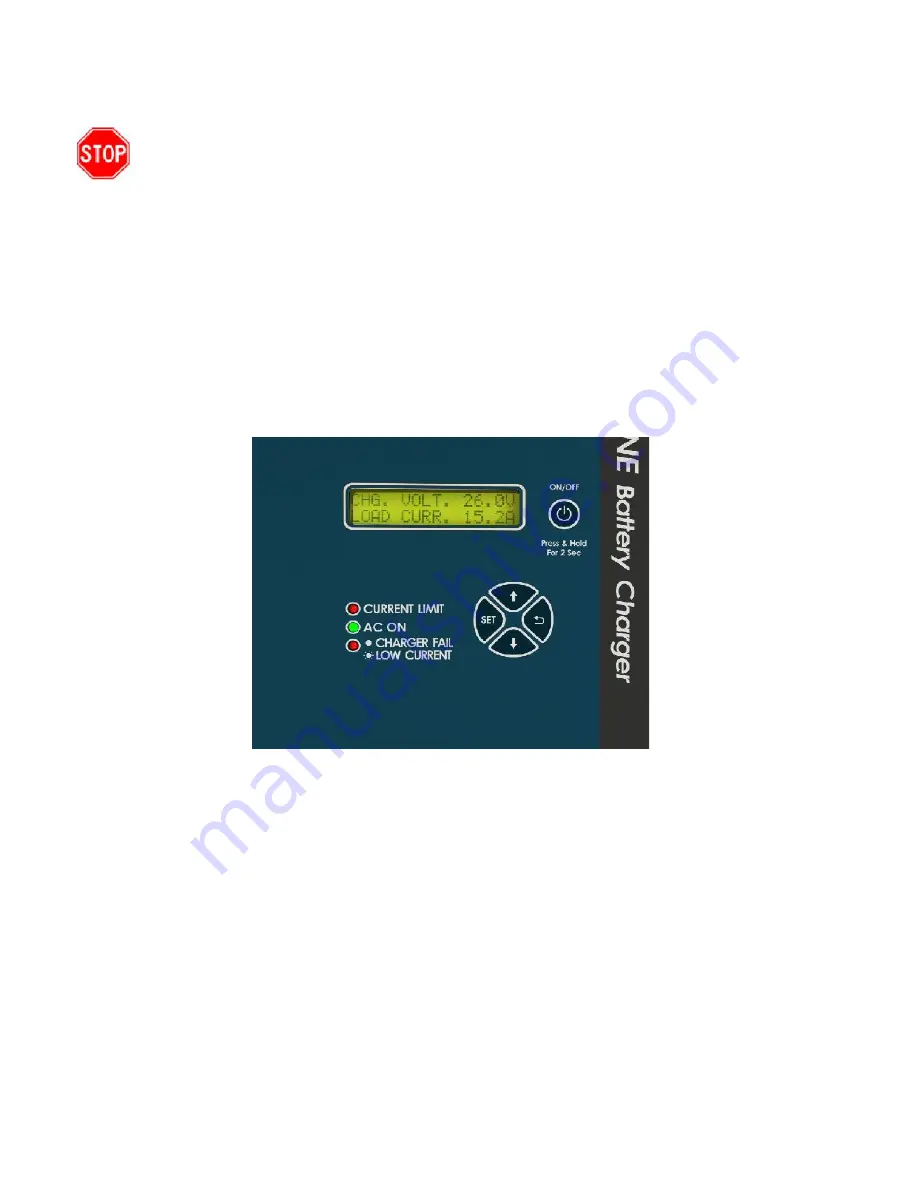
Upon powering up the MSM, the LCD will display the unit’s software revision and LED’s will perform a lamp test.
After the unit has completed the Start-up procedure, the “AC ON” indicator on the front panel will illuminate and
the LCD will show the DC output voltage and DC output current readings.
Figure 5 – Front Panel Display
3.2.1 Controls
Up/Down Arrows
– The Up and Down arrows are strictly used for navigating through the configuration menu
and increasing or decreasing setting values.
Back Button
– Pressing the back arrow button allows the user to navigate to a previous screen or out of the
configuration menu.
SET Button
– The Set button is used to access the configuration menu, allow the user to set the charger
parameters and make selections within the menus.
ON/OFF Button
– ON/OFF button is used to disable or enable the output of the unit by pushing and holding this
button for 2 seconds.


