

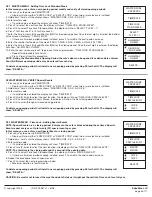

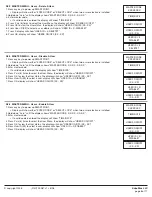

1.0 CHAnGInG YOUR CODE - MASTER
1. Press any key to power up SMARTPOINT.
• Display will show either “ENTER CODE” or SELECT LOCK NUMBER” when two or more locks are installed.
2. Hold down “zero” until the display shows “MASTER CODE, X-X-X-X-X-X-X-X”.
3. Enter “zero” eight times.
4. Enter your existing eight (8) digit master code one time.
5. Enter your NEW eight (8) digit master code two times.
• If a valid code is entered the display will show “MASTER CODE UPDATED”
6. Test lock operation several times before closing the door.
7. If a mistake is made wait thirty (30) seconds and repeat steps 1 - 6.
• Old Code will remain valid if a mistake is made.
• In case of a mistake, display will show “CONFIRM CODE, NOT MATCH” and the old code will still be valid.
Wait thirty seconds and repeat steps 1 - 6.
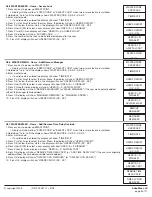
2.1 MASTER MEnU - Time/Date
1. Press any key to power up SMARTPOINT.
• Display will show either “ENTER CODE” or SELECT LOCK” when two or more locks are installed.
2. Hold down “zero” until the display shows “MASTER CODE, X-X-X-X-X-X-X-X”.
3. Enter master code.
• If a valid code is entered the display will show “TIME/DATE”
4. Press OK to select this function, the display will show current time and date.
5. Press OK to modify date and time, the display will show “HH:MM, MM/DD/YYYY”.
• Insert new values for the time and date. If a mistake is made Press the P key to return to current time
and date.
6. Press OK to confirm new time and date, display will show new time and date.
7. Press P to return MASTER MENU.
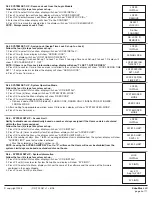
2.2 MASTER MEnU - VERIFY Time Lock Period
In this menu you can verify all stored opening periods.
1. Press any key to power up SMARTPOINT.
• Display will show either “ENTER CODE” or “SELECT LOCK” when two or more locks are installed.
2. Hold down “zero” until the display shows “MASTER CODE, X-X-X-X-X-X-X-X”.
3. Enter master code.
• If a valid code is entered the display will show “TIME/DATE”
4. Press P to select the next function, the display will show “TIME LOCK, STAND. WEEK”.
5. Press OK to select Time Lock Standard Week, the display will show “SELECT T.L SET = 1”.
6. Press 1 for Time Lock 1 or 2 for Time Lock 2.
7. Press OK to scroll through all stored open periods.
• Press P to go back to original screen, “TIME LOCK, STAND. WEEK”.
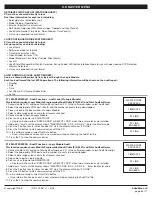
Master Menu allows access to the following functions:
• Time/Date (Set-up Time and Date)
• Time Lock Standard Week (Add, Modify, Verify opening period), if enabled (Can be viewed even during Time Lock period)
• Time Lock Special Events (Add, Modify, Verify closing period), if enabled (Can be viewed even during Time Lock period)
• View Audit
• PC Link (Open serial port to communicate with PC for set-up and audit)
• System Set-up (Enroll/Delete/Assign locks. Set System Operating Mode, Retrieve System Information)
• Users (Add/Delete Users, Enroll Fingerprint)
• Time Delay
• Open Offset (Set in seconds, minimum of 0 to 99 seconds for the firing of the solenoid on an interior lock)
© copyright 2008
(P/N)702.087 v1 • 8/08
Kaba Mas LLC
page 2 of 11
MASTER CODE
XXXXXXXX
MASTER CODE
XXXXXXXX
MASTER CODE
XXXXXXXX
OLD CODE
XXXXXXXX
TIME/DATE
TIME/DATE
NEW CODE
XXXXXXXX
18:30 SUN
07/10/2005
TIME LOCK
STAND. WEEK
CONFIRM NEW
XXXXXXXX
HH:MM
MM/DD/YYYY
SELECT
T.L SET = 1
MASTER CODE
UPDATED!
18:30
07/10/2005
08:00 MON
18:00
CONFIRM CODE
NOT MATCH
18:30 SUN
07/10/2005
2.0 MASTER MENU


