7
If the tower icon flashes, but does not set the time or the
WWVB tower does not appear at all, then please take note of
the following:
Recommended distance to any interfering sources like
computer monitors or TV sets is a minimum of 6 feet (2
meters).
Within ferro-concrete rooms (basements,
superstructures), the received signal is naturally
weakened. In extreme cases, please place the unit close
to a window and/ or point its front or back towards the
Fort Collins, Colorado, transmitter.
During nighttime, the atmospheric disturbances are
usually less severe and reception is possible in most
cases. A single daily reception is adequate to keep the
accuracy deviation below 1 second.
Note:
In case the solar atomic clock is not able to detect the
WWVB-signal (disturbances, transmitting distance, etc.), the
time can be manually set (please refer to notes on
Manual time
setting
).
FUNCTION KEYS
The radio-controlled clock has four easy to use keys:
SET
key
: To enter into the set mode for the following
functions: time zone, DST ON/OFF (daylight
saving time), language, hour, minute, year,
month, date, weekday, 12/24h time format
display, ºF/ ºC temperature unit, and solar mode
+
key
: To change any values in manual set mode
ALM
key
: To enter into the alarm set mode
To activate/deactivate the alarm
SNZ
key
: To activate the snooze function during alarm
To exit manual setting modes
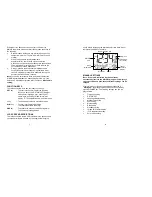
LCD SCREEN DESCRIPTIONS
The radio-controlled clock's LCD is divided into 2 sections and
once the batteries are inserted, all the segments will light up
8
Weekday
Indoor
temperature
Low battery
icon (clock)
briefly before displaying the information for time, date, indoor
temperature and indoor humidity.
MANUAL SETTINGS
Note:
If the radio-controlled clock has already
successfully received the WWVB time signal and displays
the correct time and date, then the Manual settings can be
skipped
.
After completion of the above described procedures in
“
Setting-up”
the manual setting modes can be entered by
pressing the
SET
key. The following settings can now be
programmed:
Time zone setting
DST
ON/OFF
Language
display
setting
Manual time setting
Year
setting
Month
setting
Date
setting
Weekday
setting
12/24h
time
format
display
ºF/ºC temperature setting
Solar mode setting
Date
Indoor
humidity
display
WWVB
time
Radio reception icon
Alarm icon


