background image


3

INVENTORY OF CONTENTS 


1.


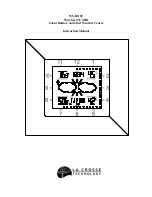
WS-8010U—Giant Radio Controlled Weather Center. 

2.


TX4U—Remote Thermo-Hygro (temperature-humidity) includes: mounting 
bracket/receptor, rain cover, and two mounting screws. 

3.


Instruction manual and warranty card. 


ADDITIONAL EQUIPMENT (not included) 
 

1.


Three fresh 1.5V C batteries. 

2.


Two fresh 1.5V AA batteries. 

3.


Philips screwdriver. 

4.


Three mounting screws. 


QUICK SET-UP


1.


Insert two AA batteries into the Remote Thermo-Hygro. 

2.


Insert three C batteries into the Weather Center. 

3.


Wait 5 minutes for the Weather Center to receive remote signals from the 
Remote Thermo-Hygro sensor. 

4.


Wait an additional 10 minutes for the WWVB signals to be received.  If the 
WWVB signal is not found in this time period, manually set the time (see 
complete instructions) or wait until the Weather Center conducts its nightly 
auto-search during the ideal reception time (12:00 am to 6:00 am). 

5.


Mount the units, ensuring that all units are sending and receiving signals. 
 

DETAILED SET-UP GUIDE 


I.


BATTERY INSTALLATION 


A.


REMOTE THERMO-HYGRO SENSOR 

 
1.


Pull the cylindrical rain cover off the sensor.  

2.


Remove the battery cover (located on the backside of the sensor, above the 
mounting post and bracket).  Press the arrow and push in the direction of the 

Battery 
Cover 

Mounting 
Bracket/Receptor 

Rain 
Cover 

Thermo-Hygro 
Sensor 

Summary of Contents for WS-8010U

Page 1: ...WS 8010U Wireless 433 MHz Giant Radio Controlled Weather Center Instruction Manual...

Page 2: ...4 hour Time Setting 7 Selecting F or C 7 World Time Setting 7 World Local Time Display Setting 8 Graphic Time Display Options Settings 8 9 Time and Date Settings 9 Features About WWVB 10 Weather Forec...

Page 3: ...ignals from the Remote Thermo Hygro sensor 4 Wait an additional 10 minutes for the WWVB signals to be received If the WWVB signal is not found in this time period manually set the time see complete in...

Page 4: ...s have been installed the LCD Liquid Crystal Display will flash Within a few seconds the indoor temperature and humidity will display along with the default settings for the time 12 00 the date 1 1 th...

Page 5: ...waiting for the 20 second time out to take effect I FUNCTION KEYS Note Figure 1 shows the left side view Buttons 1 2 and 3 are located to the left of the LCD screen Figure 2 shows the backside of the...

Page 6: ...codes The time will change simultaneously with time zone selection Atlantic AT 4 Eastern ET 5 Central CT 6 Mountain MT 7 Pacific PT 8 Alaska AL 9 4 Press the SET button to confirm and to advance to th...

Page 7: ...on to confirm and to advance to the World Time setting VIII WORLD TIME SETTING Note The World Time allows you to set a second time enabling you to keep track of the time in another part of the world W...

Page 8: ...ter of the LCD screen which corresponds to the local time hour The four options affect how the minutes are displayed The hour arrow and the minute dots encompass the outermost perimeter of the LCD scr...

Page 9: ...T button 10 times to enter the Local Time setting mode 2 The 12 00 default setting will flash in the TIME DISPLAY 3 To change the hour press the button 4 Press the SET button to confirm the hours and...

Page 10: ...regulates the WWVB sensor II WEATHER FORECAST The weather forecasting feature is estimated to be 75 accurate basing the weather forecast solely upon the change of air pressure over time The WS 8010U...

Page 11: ...sensors can be purchased through the same dealer as this Weather Center or by contacting La Crosse Technology directly contact information can be found at the end of this manual A TX4U will monitor t...

Page 12: ...he first sensor again press key 1 IV DATE DISPLAY Note The DATE DISPLAY defaults to the month date year format This display area can show an alternate way of displaying the date 1 Press key 2 This cha...

Page 13: ...ransmission range VII MINIMUM MAXIMUM TEMPERATURE HUMIDITY RECORDS The WS 8010U keeps a record of the MINIMUM and MAXIMUM temperatures and humidity and the time and date of their occurrence for both t...

Page 14: ...the MINIMUM MAXIMUM information will relate to the data received by sensor 1 If a boxed 2 is shown under the DATE DISPLAY then the MINIMUM MAXIMUM information will relate to the data received by senso...

Page 15: ...ntly mounting to ensure that there is proper reception The Weather Center should display a temperature in the OUTDOOR DISPLAY within 5 minutes of setting up If the Weather Center loses the signal from...

Page 16: ...protective strip from the other side of the tape and situate the mounting bracket Firmly press the mounting bracket onto the mounting surface 4 Fit the mounting post into the receptor of the mounting...

Page 17: ...lution 1 Remove all batteries reinsert into sensor first then Weather Center 2 Place remote sender closer to display 3 Be sure all batteries are fresh 4 No other interfering sources on a 433MHz freque...

Page 18: ...s product against manufacturing defects in materials and workmanship This limited warranty begins on the original date of purchase is valid only on products purchased and used in North America and onl...

Page 19: ...Crosse Technology Ltd authorized service center 6 units used for other than home use 7 applications and uses that this product was not intended or 8 the products inability to receive a signal due to a...

Page 20: ...CE COMPLIES WITH PART 15 OF THE FCC RULES OPERATION IS SUBJECT TO THE FOLLOWING TWO CONDITIONS 1 THIS DEVICE MAY NOT CAUSE HARMFUL INTERFERENCE AND 2 THIS DEVICE MUST ACCEPT INTERFERENCE RECEIVED INCL...

Reviews: