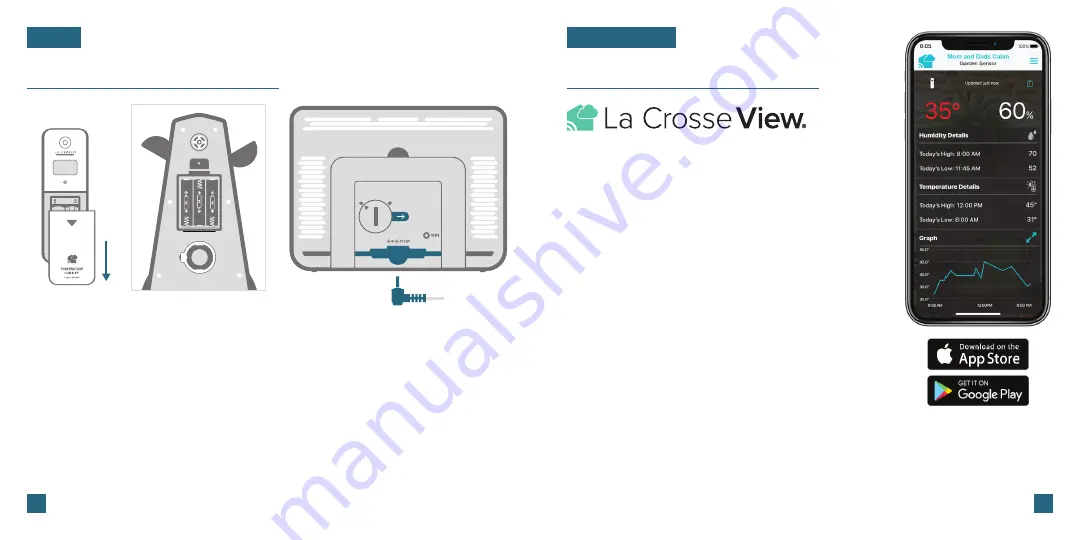
Power Jack
03
Initial Setup
Connecting to the App
BASICS
LA CROSSE VIEW
Power Up
Note:
It may take up to 10 minutes for the sensor data to appear on your station’s screen.
Thermo-Hygro Sensor:
Install 2 fresh “AA” batteries according to polarity and replace battery cover.
The blue LED light will flash when transmitting.
Cyclone Sensor:
Install 3 fresh “AA” batteries according to polarity and replace battery cover.
Weather Station:
Insert the 5V Power Adapter into an outlet, and then plug it into the Power Jack
on the bottom of the station. Next, remove the Insulation Tab from the Station’s Battery Compartment.
About 30 seconds after powering the station on, it will automatically enter the Settings Menu.
See page
07
for more details.
Back of Station (V42)
Bottom of Cyclone Sensor
(LTV-WSDR1)
Thermo-Hygro Sensor
(LTV-TH5i)
Download the La Crosse View App
Visit the App Store or Google Play Store to download the free
La Crosse View app onto your mobile device.
Launch the App
Connecting Your Station to the App
Open the La Crosse View app. Follow the on-screen setup
instructions to create an account, add new devices, and connect
your station to your Wi-Fi network.
Stay connected to your home anytime, anywhere with the
La Crosse View app.
Monitor your home environment and set custom alerts to notify
you when conditions change.
Connecting your station is optional and the display will function
as a standalone unit without the Wi-Fi connection. However, we
recommend connecting during the initial setup, as it will save you
time and allows access to some advanced features right away.
Stay Connected to Your Home
Anytime,
Anywhere.
Now that you’ve created your La Crosse View account, it’s time to add your station into your
account and connect it to your home router using the La Crosse View app.
NOTE:
For the steps listed on the next page, you’ll need your Wi-Fi network name (SSID)
and password. Make sure your mobile device is connected to the same Wi-Fi network.
04


