KUDO
®
MULTI-MODE WST
®
SYSTEM
Rigging Procedures
VERSION 1.0
KUDO_RM_ML_1.0
w w w . l - a c o u s t i c s . c o m
12 en
7.
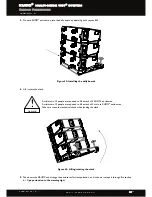
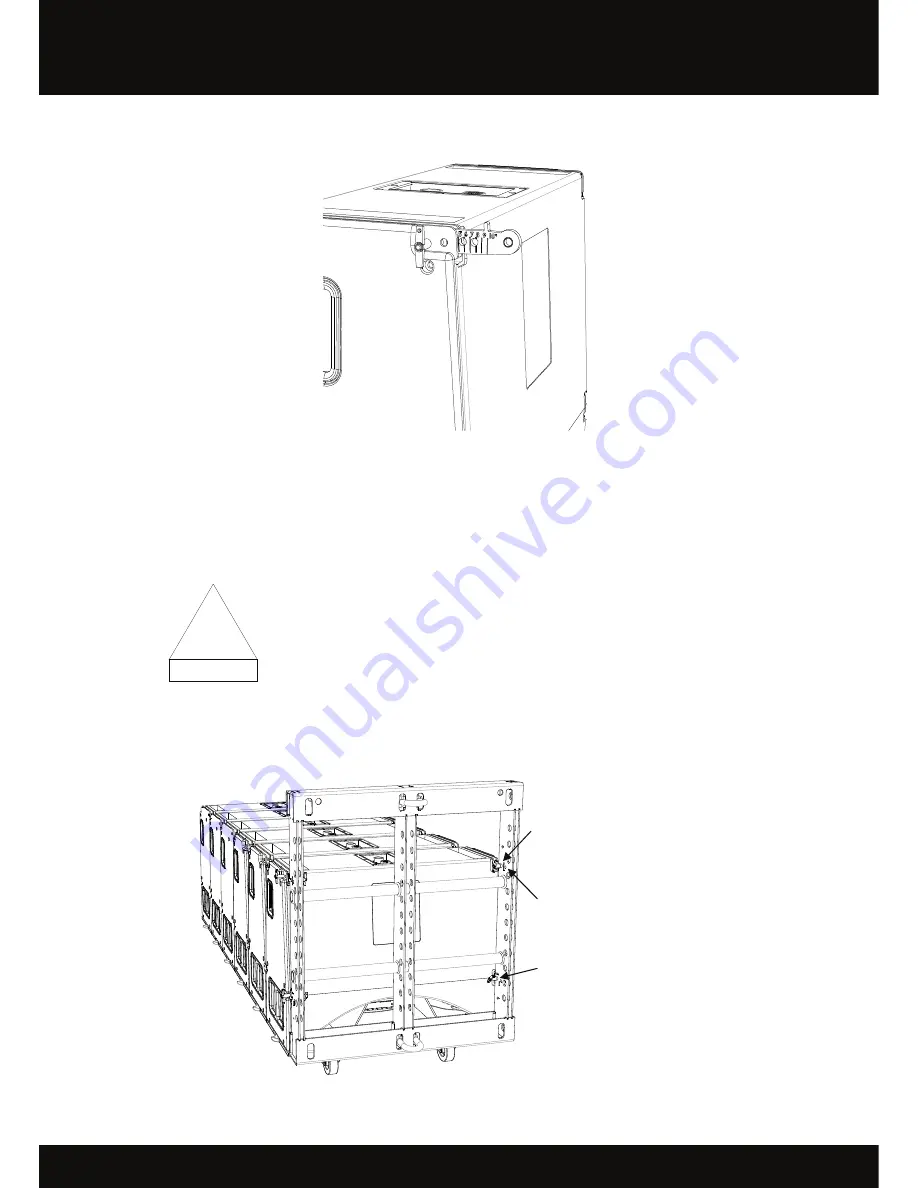
On both sides of the first KUDO
®
enclosure, select the 5° angle (the top enclosure will be parallel to the KBUMP).
Figure 10: First enclosure 5° angle setting
8.
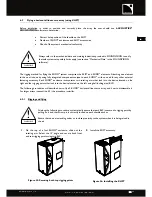
On the KBUMP structure, ensure that the 4 BLP are located in their inner storage holes.
9.
a.
Place the KBUMP in position by aligning both stop tabs with the top KUDO
®
enclosure’s front rigging points.
The KBUMP should be installed with the serial number tag oriented towards the
rear of the array.
Support the KBUMP in order to prevent it from falling.
b.
Attach the 4 BLP in the outer storage holes so as to secure the KBUMP to the top KUDO
®
enclosure.
10.
Attach the 22-shackles according to the specifications detailed in appendix 9.1.
Figure 11: Securing the KBUMP to the first KUDO
®
enclosure, positioning the shackles
Inner storage hole
Outer storage hole
Stop tab
!
WARNING


