15
8. Preparation for Measurement
8-1 Battery Voltage Check
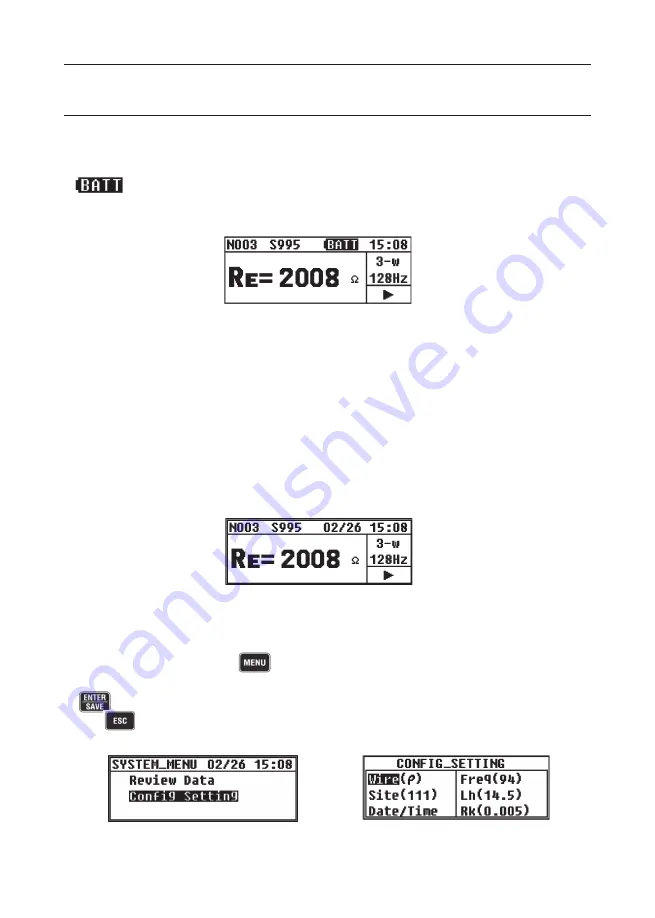
Power on the instrument. If the display is clear without the Low battery mark
"
" showing, battery voltage is sufficient. If the display blanks or the
Low battery mark is indicated (Fig.5), replace the batteries according to
11.
for Battery and Fuse Replacement
.
Note) Measurements cannot be made, even the Test Button is pressed,
while the Low Battery Mark is displayed on the LCD. Measurements
are hault when the Low Battery Mark appears on the LCD.
8-2 Settings
8-2-1 Setting Items
This instrument starts with Measurement mode (Fig.6 Main Screen) when
it is powered on while the Range Switch has been set to the position other
than OFF .
Measurement conditions should be set before starting measurements.
Setting the date and time enables a saving measured data with time
information. Press the
Key and enter into the SYSTEM̲MENU
(Fig.7). Then select CONFIG̲SETTING with Cursor Keys, and press the
Key to enter into the CONFIG̲SETTING mode. (Fig.8) Pressing
the
Key twice exits from the CONFIG̲SETTING mode and returns
to Measurement mode.
Fig. 6 Main Screen
Fig. 7
Fig. 8
Fig. 5 Low battery mark


