


3LL/3LK
1-5-9
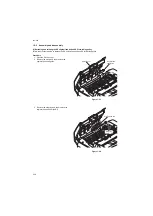
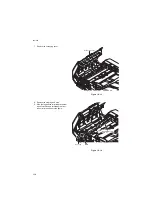
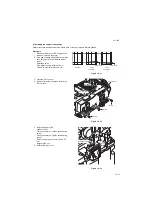
10. Remove the FFC (flexible flat cable) from
the connector of CIS.
11. Remove the connector from the DP inverter
PWB.
12. Remove the ground screw and then remove
the ground wire.
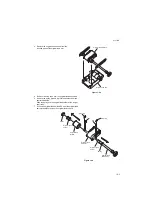
13. Remove three screws and then remove the
CIS.
Figure 1-5-15
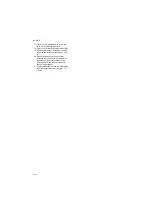
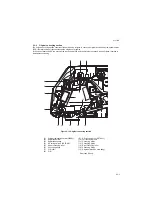
14. Remove the screw and then remove the CIS
guide from CIS.
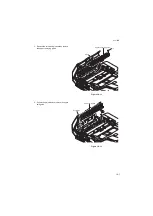
15. Replace the CIS and Install the CIS to the
DP.
Caution
Be sure to refit the ground wire that has
been removed in step 12.
16. Refit all the removed parts.
Figure 1-5-16
Connector
Screws
Screw
DP inverter PWB
Ground wire
Ground screw
Connector
CIS
FFC
CIS guide
Screw
CIS
Summary of Contents for DP-750
Page 4: ...This page is intentionally left blank ...
Page 10: ...This page is intentionally left blank ...
Page 16: ...3LL 3LK 1 1 4 This page is intentionally left blank ...
Page 20: ...3LL 3LK 1 2 4 This page is intentionally left blank ...
Page 78: ...3LL 3LK 1 4 12 This page is intentionally left blank ...
Page 94: ...3LL 3LK 1 6 2 This page is intentionally left blank ...
Page 102: ...3LL 3LK 2 1 8 This page is intentionally left blank ...
Page 120: ...3LL 3LK 2 4 4 This page is intentionally left blank ...
Page 123: ......
Page 124: ......