background image

xvi

Contents

Finding a phone number  . . . . . . . . . . . . . . . . . . . . . . . . . . . . . . 18
Setting up voicemail  . . . . . . . . . . . . . . . . . . . . . . . . . . . . . . . . . 18
Checking voicemail messages  . . . . . . . . . . . . . . . . . . . . . . . . . 19
Silencing an incoming call   . . . . . . . . . . . . . . . . . . . . . . . . . . . . 19
Locking the keypad  . . . . . . . . . . . . . . . . . . . . . . . . . . . . . . . . . . 20
Selecting digital or analog mode . . . . . . . . . . . . . . . . . . . . . . . . 22
Controlling network roaming  . . . . . . . . . . . . . . . . . . . . . . . . . . . 23
Setting an alert for roaming charges . . . . . . . . . . . . . . . . . . . . . 24
Calling emergency numbers  . . . . . . . . . . . . . . . . . . . . . . . . . . . 25

3

Storing Contacts. . . . . . . . . . . . . . . . . . . . . . . . . . . . . . . . .  26

Saving a new contact  . . . . . . . . . . . . . . . . . . . . . . . . . . . . . . . . 26
Adding a code or extension   . . . . . . . . . . . . . . . . . . . . . . . . . . . 27
Editing a contact  . . . . . . . . . . . . . . . . . . . . . . . . . . . . . . . . . . . . 28
Finding contact information . . . . . . . . . . . . . . . . . . . . . . . . . . . . 29
Entering letters, numbers, and symbols  . . . . . . . . . . . . . . . . . . 32

4

Sending and Receiving Text Messages . . . . . . . . . . . . . .  38

Sending a new text message  . . . . . . . . . . . . . . . . . . . . . . . . . . 38
Retrieving a text message   . . . . . . . . . . . . . . . . . . . . . . . . . . . . 47
Erasing text messages  . . . . . . . . . . . . . . . . . . . . . . . . . . . . . . . 49

Summary of Contents for 1155

Page 1: ......

Page 2: ...2 5 280 472 5 283 536 5 289 527 5 307 405 5 309 474 5 337 338 5 339 046 5 341 456 5 383 219 5 392 287 5 396 516 D356 560 5 408 697 5 414 728 5 414 796 5 416 797 5 426 392 5 437 055 D361 065 5 442 322 5 442 627 5 452 473 5 461 639 5 469 115 5 469 471 5 471 497 5 475 870 5 479 475 5 483 696 5 485 486 5 487 175 5 490 165 5 497 395 5 499 280 5 504 773 5 506 865 5 509 015 5 509 035 5 511 067 5 511 073 ...

Page 3: ...34 5 732 341 5 734 716 5 737 687 5 737 708 5 742 734 D393 856 5 748 104 5 751 725 5 751 761 5 751 901 5 754 533 5 754 542 5 754 733 5 757 767 5 757 858 5 758 266 5 761 204 5 764 687 5 774 496 5 777 990 5 778 024 5 778 338 5 781 543 5 781 856 5 781 867 5 784 406 5 784 532 5 790 589 5 790 632 5 793 338 D397 110 5 799 005 5 799 254 5 802 105 5 805 648 5 805 843 5 812 036 5 812 094 5 812 097 5 812 538...

Page 4: ... 917 812 5 917 837 5 920 284 D411 823 5 923 650 5 923 705 5 926 143 5 926 470 5 926 500 5 926 786 5 930 230 5 930 692 Other patents pending Kyocera is a registered trademark of Kyocera Corporation QUALCOMM is a registered trademark of QUALCOMM Incorporated Brick Attack is a trademark of Kyocera Wireless Corp All other trademarks are the property of their respective owners Copyright 2003 Kyocera Wi...

Page 5: ...ved by Kyocera Wireless Corp Other accessories used with this device for body worn operations must not contain any metallic components and must provide at least 22 5 mm separation distance including the antenna and the user s body Other accessories that have not been tested for body worn SAR may not comply with FCC radiation exposure limits and should be avoided THIS MODEL PHONE MEETS THE GOVERNME...

Page 6: ...1 6W kg Tests for SAR are conducted using standard operating positions specified by the FCC with the phone transmitting at its highest certified power level in all tested frequency bands Although the SAR is determined at the highest certified power level the actual SAR level of the phone while operating can be well below the maximum value This is because the phone is designed to operate at multipl...

Page 7: ...safe exposure In the United States and Canada the SAR limit for mobile phones used by the public is 1 6 watts kg W kg averaged over one gram of tissue The standard incorporates a substantial margin of safety to give additional protection for the public and to account for any variations in measurements The FCC has granted an Equipment Authorization for this model phone with all reported SAR levels ...

Page 8: ...s may be dangerous and will invalidate the phone warranty if said accessories cause damage or a defect to the phone Optimize your phone s performance Use the guidelines on see page 3 to learn how to optimize the performance and life of your phone antenna and battery Air bags If you have an air bag DO NOT place installed or portable phone equipment or other objects over the air bag or in the air ba...

Page 9: ...OHFWURQLF V VWHPV LQ PRWRU YHKLFOHV KHFN ZLWK WKH PDQXIDFWXUHU RI WKH GHYLFH WR GHWHUPLQH LI LW LV DGHTXDWHO VKLHOGHG IURP H WHUQDO 5 HQHUJ RXU SK VLFLDQ PD EH DEOH WR KHOS RX REWDLQ WKLV LQIRUPDWLRQ Blasting areas 7XUQ RII RXU SKRQH ZKHUH EODVWLQJ LV LQ SURJUHVV 2EVHUYH UHVWULFWLRQV DQG IROORZ DQ UHJXODWLRQV RU UXOHV Potentially explosive atmospheres 7XUQ RII RXU SKRQH ZKHQ RX DUH LQ DQ DUHD ZLWK...

Page 10: ...s gas stations below deck on boats transfer or storage facilities for fuel or chemicals vehicles using liquefied petroleum gas such as propane or butane areas where the air contains chemicals or particles such as grain dust or metal powders any other area where you would normally be advised to turn off your vehicle engine ...

Page 11: ... dropping hitting bending or sitting on the phone Keep phone dry If the phone gets wet turn the power off immediately and return it to the dealer for service Resetting the phone If the screen seems frozen and the keypad does not respond to keypresses reset the phone by completing the following steps 1 Remove the battery door 2 Remove and replace the battery If the problem persists return the phone...

Page 12: ...ries and packaging to the dealer for qualified service Accessories Use only Kyocera approved accessories with Kyocera phones Use of any unauthorized accessories may be dangerous and will invalidate the phone warranty if said accessories cause damage or a defect to the phone To shop online for a Hands free Car Kit and other phone accessories visit www kyocera wireless com store To order by phone ca...

Page 13: ...ons Commission FCC adopted RF exposure guidelines with safety levels for hand held wireless phones These guidelines are consistent with the safety standards previously set by both U S and international standards bodies in the following reports ANSI C95 1 American National Standards Institute 1992 NCRP Report 86 National Council on Radiation Protection and Measurements 1986 ICNIRP International Com...

Page 14: ...xiv 093 453 037 Kyocera Wireless Corp 10300 Campus Point Drive San Diego CA 92121 U S A Visit us at www kyocera wireless com To purchase accessories visit www kyocera wireless com stor ...

Page 15: ...Caring for the battery 3 General safety guidelines 3 Common causes of battery drain 4 Getting to know your phone 5 Understanding screen icons 7 Performing basic functions 9 Using menus 10 2 Making and Answering Calls 11 Making a call 11 Answering a call 12 Dealing with missed calls 13 Viewing recent call details 14 Setting up speed dialing 16 ...

Page 16: ...rolling network roaming 23 Setting an alert for roaming charges 24 Calling emergency numbers 25 3 Storing Contacts 26 Saving a new contact 26 Adding a code or extension 27 Editing a contact 28 Finding contact information 29 Entering letters numbers and symbols 32 4 Sending and Receiving Text Messages 38 Sending a new text message 38 Retrieving a text message 47 Erasing text messages 49 ...

Page 17: ...omizing Your Phone 51 Setting vibrate mode 51 Personalizing the home screen 54 Adjusting volume 55 Using shortcuts 56 Changing the look and feel 58 Creating a secure environment 62 Setting message alerts 65 6 Using Tools 67 7 Getting Help 72 Index 74 ...

Page 18: ...stalling the battery 1 Hold the phone face down 2 Place your thumb in the groove on the back of the phone and slide the battery door down until it stops 3 Lift the battery door off the phone 4 Place the battery into the phone with the metal contacts facing down 5 Align the battery door to the grooves on the top and side of the phone 6 Slide the battery door up until it clicks into place Repeat if ...

Page 19: ... or receive calls regardless of whether or not the AC adapter is connected to the phone To charge the battery connect the AC adapter to the proper jack on the bottom of the phone as shown then connect the adapter s plug to a wall outlet The battery icon in the upper right corner of the screen tells you whether the phone is Charging the icon is animated Partially charged Fully charged ...

Page 20: ...ety information and tips for improving battery performance General safety guidelines Do not take apart puncture or short circuit the battery If you have not used the battery for more than a month recharge it before using your phone Avoid exposing the battery to extreme temperatures direct sunlight or high humidity Never dispose of any battery in or near a fire It could explode ...

Page 21: ... Network Digital or Analog and choose from the options available You are far away from a base station or cell site when in digital mode Data cables or accessories such as the Hands free headset are connected to the phone No service is available or service is available intermittently The phone requires more power to acquire service than to maintain consistent service The earpiece and ringer volume ...

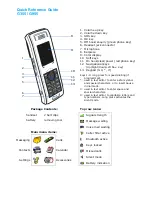
Page 22: ...ocks the keypad right turns off ringers down lists contacts up defines and accesses a personal shortcut see page 28 Send Talk key starts or answers a call OK key selects a menu item or option Use the keypad to enter numbers letters or symbols Text key changes the text mode in text entry Fully extend the antenna to make or answer a call Push in the antenna completely when the phone is not in use 1 ...

Page 23: ... home screen Clear key erases the last character in text entry or returns to the previous menu Space key enters a space during text entry Jacks for AC adapter included and data cable sold separately Warning Inserting an accessory into the incorrect jack will damage the phone 9 10 11 12 2 1 3 3 4 5 6 7 8 9 10 12 11 13 ...

Page 24: ...hone is receiving a signal You can make and receive calls Fewer bars indicate a weaker signal The phone is not receiving a signal You cannot make or receive calls A call is in progress The alarm clock is set The phone vibrates or lights up instead of ringing The phone is roaming outside of its home service area You have a text message voicemail or page indicates an urgent text message voicemail or...

Page 25: ...provider or you are in a secure web browser session Press up Press down Press to go back or clear an item Enter text using normal alpha text entry Capitalize the next letter when entering text Capitalize every letter when entering text Capitalize the first letter of each word when entering text or the first letter of each sentence in a text message Enter symbols Enter numbers ...

Page 26: ...all Extend the antenna enter the number then press End a call Press Answer a call Press Set up access voicemail Press and hold and follow the system prompts Contact your service provider for details Verify your phone number Select Menu Phone Info Silence the ringer Press then to answer Lock the keypad Press and hold left Access a contacts list Press down Set vibrate mode Press and hold right ...

Page 27: ... Calculator Calculator Countdown Stopwatch Brick AttackTM Recent Calls Lists 15 recent calls Phone Info Displays your phone number for reference To use menus Press to select Menu Press left or right to see menus Press to select a menu or menu item Press up or down to view menu items Press to go up a menu level Press to return to the home screen These instructions assume your menu appears in icons ...

Page 28: ...ion will be If there are no bars try to move to where the reception is better In some cases this can be as simple as changing the direction you re facing 2 Fully extend the antenna 3 Enter the phone number 4 Press Note If your phone cannot locate a signal it changes to power save mode If you see the message Power Save Mode and a on the screen press any key to return to normal operating mode and tr...

Page 29: ...directory the contact name appears To answer the call press If you do not wish to answer the call select either Silence or Ignore and press Silence mutes the ringer Ignore mutes the ringer and returns to the screen that was active when the call came in If you wish to change the ringer see page 55 Answering calls Hands Free If your phone is attached to a Hands free Car Kit sold separately you can s...

Page 30: ...ted with a flashing If the caller left a voicemail message Voice appears on the screen Press to dial your voicemail number If you have not yet set up your voicemail the caller cannot leave a message For help setting up voicemail see page 18 Setting missed call alerts You can set an alert to beep every five minutes after you have missed a call Select Menu Settings Sounds Missed Call Alert Enabled T...

Page 31: ...he last 15 calls you made or received are stored in the Recent Calls list You can get details on the caller s name and phone number along with the time and length of the call Icons indicate the types of calls in the list Call to Call from Three way call Forwarded call Missed call flashing ...

Page 32: ...Contacts directory Add to Allows you to add the number to an existing contact card View Contact Shows details on the contact if the caller s information is already in your Contacts directory Note Note If the number has been saved as secret you must enter a four digit lock code to view or edit the number For information on the lock code see page 62 For details about making a phone number secret tur...

Page 33: ...tering a one or two digit speed dialing location 1 Open a saved contact 2 Highlight the phone number and press 3 Select Speed Dialing 4 Select a speed dialing location Location 1 is reserved for your voicemail number 5 Press to select Assign To speed dial From the home screen enter the one or two digit speed dialing location and press ...

Page 34: ...s Using 1 Touch Dialing To dial a phone number simply press and hold the assigned speed dialing location for the phone number If it is a two digit number press the first number then press and hold the second Removing a speed dialing location 1 From the home screen select Menu Contacts Speed Dial List 2 Select a speed dialing location 3 Highlight the phone number and press 4 Select Speed Dialing 5 ...

Page 35: ...ion on finding contact information refer to page 27 Setting up voicemail Before your phone can record voicemail messages you must set up a password and record a personal greeting When you have set up your voicemail all unanswered calls to your phone are automatically transferred to voicemail even if your phone is in use or turned off 1 From the home screen press and hold 2 Follow the system prompt...

Page 36: ...e This initiates a call to your voicemail number 2 Follow the prompts to retrieve the message For specific information on getting voicemail messages contact your service provider If you see the symbol 1 Press and hold to call your voicemail number 2 Follow the prompts to retrieve the message For more information about getting voicemail messages contact your service provider Silencing an incoming c...

Page 37: ...u or the other person s voice volume level see Setting automatic volume adjustment on page 55 Locking the keypad Your phone has a keyguard function that locks your keypad to protect your phone against accidental keypresses when the phone is turned on and a call is not in progress With keyguard enabled you can still answer or silence an incoming call To lock the keypad from the home screen press le...

Page 38: ... timers that count the amount of calls you have made and received All Calls This timer displays the total number and duration of all calls you have made and received You cannot reset this timer Select Menu Settings Call Information All Calls Timer Recent Calls This timer displays the total number and duration of recent calls you have made and received since the last time you reset the timer 1 Sele...

Page 39: ...ther digital or analog mode This is useful if you are in an area that borders on digital service and the automatic feature is causing the phone to keep switching between modes 1 Select Menu Settings Network Digital or Analog 2 Select an option and press Automatic automatically switches the phone between digital and analog Analog only sets the phone to work in analog mode only Analog call forces a ...

Page 40: ...l accept 1 Select Menu Settings Network Roam Option 2 Select an option and press Automatic recommended setting accepts any system the phone service provides No Roaming prevents you from making or receiving calls outside of your home service area Note If your phone has more than one setting for Automatic contact your service provider to determine which one to use ...

Page 41: ...service area When no service alerts you with three tones decreasing in intensity when service is lost When service is acquired again you will hear three tones in increasing intensity On roam change alerts you with two tones decreasing in intensity when roaming service is acquired When home area service is acquired again you hear three tones increasing in intensity On any change alerts you with thr...

Page 42: ...l your phone goes into Emergency mode This enables the emergency service exclusive access to your phone so they can call you back if necessary In order to make or receive regular calls after dialing 911 you must first exit this mode When you have completed the 911 call press to select Exit Then press again to confirm your choice The phone returns you to the home screen and you are ready to make an...

Page 43: ...1 From the home screen enter the phone number you want to save 2 Press to select Save New 3 Enter a name for the contact If you need to know how to enter letters see page 27 4 Press to select Save or Press right then press to select Options Press up or down to select an option from the list Save Save information and return to the home screen Number Type Select work home mobile pager or fax Speed D...

Page 44: ...Press to select Save A message appears Contact Successfully Saved Adding a code or extension When you save the phone number of an automated service you may include a pause where you would select an option or enter a password You can enter multiple pauses in a phone number 1 Enter the first portion of the phone number 2 Press right to scroll through the options at the bottom of the screen 3 Press t...

Page 45: ... edit the entire contact or select the specific information such as the phone number you want to edit 5 Enter the new information 6 If finished press to select Save Erasing information from a contact 1 Select Menu Contacts View All 2 Press to select a card 3 Select Options Erase Contact to erase the entire contact or Select the phone number then select Erase Number to erase the phone number 4 Sele...

Page 46: ...arching the Contacts directory and using Fast Find Checking the Frequent Contacts list From the home screen press down to see up to 15 of the most frequently called contacts in order from most frequent to least frequent You also see the full Contacts List if you scroll down past the double line Tip You can enter the first letter of the name you are looking for to skip down the list ...

Page 47: ... select Find Name then enter part of the name and select Find 3 Scroll down until you find the name you want To call the contact select the number and press To display the full contact press Setting up Fast Find With Fast Find you press one or two keys to view close matches of the number you are looking for 1 From the home screen select Menu Settings Extras Fast Find 2 Select Enabled ...

Page 48: ...mple to look for Abe s contact entry you press for A However imagine there is a speed dial location associated with 2 the speed dial contact appears first To find Abe s number you would then press the key that corresponds to the next letter of his name 2 When you see the name you want you can press to call the number or press to view contact details 3 If you do not see the name you want press up o...

Page 49: ...etter Use mode and press a key until you see the letter you want For more information see page 34 Enter a number Use mode and press a key once to enter its number For more options see page 34 Enter a symbol Press until you find the symbol you want There are more symbols under the symbol text mode See page 35 Enter a space Press Erase a character Press Erase all characters Press and hold Move the c...

Page 50: ...letter Select mode Press and hold Choose Capitalize every letter Select mode Press and hold Choose Capitalize the first letter of each word Select mode Press and hold Choose Highlight an option at the bottom of the screen Press left or right ...

Page 51: ...f you are entering a phone number you start in number mode If you are entering a name for a contact you start in normal text mode Entering numbers In mode press a number key once In mode press and hold a number key until the number appears on the screen There are three modes Number mode Normal Text Symbol mode Enter Name O r Save Curr ...

Page 52: ...d so on 2 Wait for the cursor to move right and enter the next letter Note When your phone is set to Spanish additional accented characters become available Entering symbols While entering text you can enter symbols by pressing until you see the symbol you want Spanish A Á B C 2 D E É F 3 G H I Í 4 M N Ñ O Ó 6 T U Ü Ú V 8 ...

Page 53: ...e current text mode and press to enter the menu 2 Select Symbols 3 Press down to view the list of symbols 4 Press the number key corresponding to the symbol you want Changing text entry modes In order to enter characters belonging to another text entry mode you need to change modes For example to enter numbers in an email address while _ ...

Page 54: ...mode enter the number and then change back to mode to complete the address To change text entry modes you can either Press until the mode you want appears or Press right to highlight the current text entry mode press to enter the menu then select a different mode ...

Page 55: ... depending on services available in your area In addition usage charges may apply to each message For clarification on these issues check with your service provider Sending a new text message You can only send text messages to phones that are capable of receiving them or to email addresses 1 Select Menu Messages Send New 2 Enter the phone number or email address of the person to whom you are sendi...

Page 56: ...try modes 3 Press to select Next 4 You now have the option of writing your own message or sending a pre written message To send a pre written message see page 41 For help entering text see page 27 For help adding an emoticon like a smiley face to your message see page 43 5 When you are finished with the body of the message press to select Next 6 Choose one of the following options Send Message Sen...

Page 57: ...message later For help see page 43 Save Message Save the message in your Filed folder Exit Cancel the message without saving Receiving incoming calls while creating messages If you answer the call you can continue working on the message when you are finished with the call by selecting Menu Messages Text OutBox and opening the message If you don t wish to answer the call select Ignore The call is s...

Page 58: ...ages are sent one at a time once to each addressee You can send a message to up to 10 contacts at once Sending a pre written message Your Kyocera 1155 phone comes with a set of commonly used messages such as Call me Need directions or I m delayed 1 Select Menu Messages Send New and enter the recipient s phone number or email address and select Next 2 Press right and select AutoMsg 3 Press up or do...

Page 59: ...ge Options screen For help creating the message see page 38 2 Press to select Yes 3 Press up and select Send Message The message is sent and a copy is saved to your Text OutBox Including a specified phone number 1 Create the message and choose Callback Number from the message Options screen For help creating the message see page 38 2 Press right and select Other 3 Enter the phone number 4 Press to...

Page 60: ...e supports the same technology as your phone they appear as you see them If they are not supported the icons appear more simplistic To add an emoticon to a message 1 From the message entry screen place the cursor where you would like to enter the emoticon 2 Press right and select Emotion 3 Press up or down to move through the list of available icons 4 Press the key corresponding to the emoticon yo...

Page 61: ...ng a new text message on page 38 2 Select a time when you wish the message to be sent the options are 30 minutes 1 hour 2 hours 12 hours 1 day 2 days and 3 days The message is scheduled for delivery and stored in your Text OutBox 3 When you return to the Options screen press up and select Send Message The message is sent from your phone immediately but then held by your service provider s network ...

Page 62: ... Send To 4 Enter the phone number or email address of the person to whom you are sending the message or select Contact to select a phone number or email address from a contact 5 Press to select Next If you cannot send messages You may not be able to send or receive messages if your phone s memory is nearly full or if service is not available at that time To free up memory erase old messages ...

Page 63: ...ge is scheduled to be sent at a scheduled time You cannot cancel delivery of the message e The message cannot be sent because service is not available An alert appears on your phone if the message cannot be sent The scheduled message has been sent and will be delivered as scheduled You cannot cancel delivery of the message _ The message has been received by the recipient you have specified The mes...

Page 64: ...or labeling the message as urgent see page 38 4 When you are ready select Send Message A copy is saved to your Text OutBox Retrieving a text message When a text message is received it is sent to your Text Inbox and you are alerted by A note New Message 1 Text A symbol which flashes if the message is urgent If you see the New Message note You can choose to View the message Press Ignore the message ...

Page 65: ... press down to view the entire message 5 When you are finished select an option from the bottom of the screen Reply to the sender Erase the current message Save the message to your Filed folder Sender allows you to view the sender s information You can select an option to save it to the Contacts directory Forward the message Done returns you to the Text InBox 6 Press to see information such as cal...

Page 66: ...as you have limited memory on your phone Erasing single messages 1 Select Menu Messages 2 Press down and press to select the type of message you want to erase Text InBox Text OutBox or Filed 3 Press to select the message to erase 4 Select Erase to erase the message A notification appears Erase this message 5 Select Yes to erase the message Note You can erase a scheduled message from the Text OutBo...

Page 67: ...Old InBox Erase all read messages in your Text InBox Entire OutBox Erase all messages in your Text OutBox Filed Erase all messages in the Filed folder 3 A message appears Erase ALL Select Yes to erase messages or No to cancel Having messages automatically erased Auto Erase Text Use this setting to have old messages automatically erased when memory is low 1 Select Menu Settings Messaging Auto Erase...

Page 68: ...2 Choose an option Vibrate only Causes the phone to vibrate for the duration of the incoming call alert Vibrate then ring Causes the phone to vibrate for the first 10 seconds and then ring for the remainder of the incoming call alert 3 Press to return to the home screen Note The phone will ring when attached to an external power source such as a charger even if vibrate mode has been activated ...

Page 69: ...icating the phone has silenced all sounds Next time a call comes in the phone will vibrate and light up To turn sounds back on press right and hold again Note The phone will ring when attached to an external power source such as a charger even if the silence settings have been activated Specifying just vibration or just lights 1 Select Menu Settings Silence All 2 Select either Yes vibe only or Yes...

Page 70: ...different rings 3 Press to select a ringer from the list Specifying ringers for different calls You can set up your phone to ring differently depending on the type of call you get 1 If you have not already done so save the contact in your Contacts directory and specify it as business or personal For help see page 27 2 Select Menu Settings Sounds Business Call Ring or Personal Call Ring 3 Select a ...

Page 71: ...en above the time and date The banner can be up to 14 characters long 1 Select Menu Settings Display My Banner 2 Select Edit 3 Press to clear the screen 4 Enter your new text For help see Entering letters numbers and symbols on page 32 5 Press to save Choosing a different time date format 1 Select Menu Settings Display Time Date Format 2 Highlight the option you want ...

Page 72: ...ased on the surrounding noise level 1 Place a call from a quiet environment and set the volume to a comfortable level 2 When you are finished with the call select Menu Settings Sounds Smart Sound 3 Select Enabled The volume you have just set is now used as a baseline You can still manually adjust the volume during a call 4 Press to save the setting Adjusting the ringer volume 1 Select Menu Setting...

Page 73: ...e the various elements of the key beep Select Menu Settings Sounds and choose either Key Beep Volume Key Beep Length or Key Beep Sound Using shortcuts From the home screen you can access four shortcuts by pressing the navigation keys in any of four directions Press UP to define your own shortcut Press DOWN to access your saved contacts Press and hold RIGHT to set the phone to vibrate Press and hol...

Page 74: ...ecent Calls Business List Personal List Stopwatch or Calculator and their respective menu feature appears Choose Send New Msg to send a new text message Choose None to disable the shortcut Accessing a feature shortcut From the home screen press up and follow the prompts Re assigning a feature shortcut To change the shortcut you have assigned 1 Select Menu Settings Display Shortcut Key 2 Highlight ...

Page 75: ...the menus you see when you select Menu from the home screen To change the menu view Select Menu Settings Display Main Menu View then the option you want Note If you change to List Menus you will need to press up or down to see menus Small Icons Large Icons List Menus Contacts Main Menu a Messages l Recent Calls v Contacts Contacts Q ...

Page 76: ...isabled Turns backlighting off 10 seconds Turns backlighting on for 10 seconds after your last keypress 30 seconds Turns backlighting on for 30 seconds after your last keypress 10 sec in call Turns backlighting on during a call and for 10 seconds after your last keypress 30 sec in call Turns backlighting on during a call and for 30 seconds after your last keypress Note Keeping backlighting on duri...

Page 77: ...ighting 2 Select Always on to keep backlighting on The battery charges more slowly when power backlighting is on Changing the display contrast 1 Select Menu Settings Display Display Contrast 2 Select the level of contrast you want Highest High Medium Low and Lowest Setting numbers to auto hyphenate Auto hyphenation automatically inserts hyphens into your phone numbers to be consistent with the U S...

Page 78: ...een savers 1 Select Menu Settings Display Screen Saver 2 Select a screen saver 3 Press to return to the home screen and wait 10 seconds to view the screen saver you chose Choosing a different language Your phone supports English and Spanish 1 Select Menu Settings Display Language 2 Select the language and press Note For information about entering special characters in Spanish refer to Entering wor...

Page 79: ...nformation All security features are shielded by a four digit lock code Changing your lock code The lock code is typically 0000 or the last 4 digits of your phone number 1 Select Menu Settings Security 2 Enter your 4 digit lock code and select Change Lock Code A message appears Change Lock Code 3 Select Yes and enter a new 4 digit code then press Enter your new lock code again ...

Page 80: ... set up as an emergency number e g 911 You can still receive incoming calls 1 Select Menu Settings Security Lock Phone Use 2 Select an option Never Does not lock the phone On power up Locks the phone every time you turn it on Now Locks the phone immediately 3 Press Unlocking the phone 1 From the home screen select Unlock 2 Enter your four digit lock code ...

Page 81: ...tings Security Limit Calls Out 2 Select Yes to Contacts Clearing personal information To clear personal information from your phone you can erase all contacts from the Contacts directory and or erase the Recent Calls list Erasing all contacts 1 Select Menu Settings Security Erase All Contacts 2 Select Yes to erase all contacts A message appears Erase ALL contacts 3 Select Yes to erase all contacts...

Page 82: ...how you want be alerted of incoming voicemail pages or text messages 1 Select Menu Settings Messaging the type of alert Message Page or Voicemail 2 Press to select an option Disabled Does not alert you when a message is received Vibrate once Sets the phone to vibrate once when a new message is received Vibe remind Sets the phone to vibrate once when a new message is first received and once every f...

Page 83: ...p once Sets the phone to beep once loudly when a message is received Loud beeps Sets the phone to beep loudly approximately every five minutes To stop this reminder press to select Ignore Setting alerts for your headset When a headset sold separately is attached to the phone you can set alert sounds to originate from the headset 1 Select Menu Settings Accessories Headset Ringing 2 Select Out of he...

Page 84: ... time The alert occurs only if the phone is on 1 Select Menu Tools Alarm Clock Set Press up or down to select an hour and minutes Press left or right to switch between hours minutes and a m p m Enter numbers using the phone keypad 2 Press to save 3 When the alarm rings select Snooze to silence the alarm for 10 minutes or select Off to turn off the alarm ...

Page 85: ...de as a tip 15 18 20 10 5 Other and press Your total bill appears including tip 4 If you want to split the bill press right and press to select Split 5 Enter the number of guests and press The amount each guest pays appears Calculator Use the calculator for basic mathematical equations 1 Select Menu Tools Calculator 2 Use the keypad to enter numbers 3 Press to select mathematical operations equal ...

Page 86: ...digit to the value stored in memory MC Clear the value currently stored in memory Change the sign of the displayed number Clear one function or one digit from the screen and return the calculator to digit entry mode Hold down to clear all of the digits and operations and display a zero Exit the calculator and return to home screen ...

Page 87: ...p or down to set the hours minutes and seconds To move the cursor press left or right 4 Select Start to begin the countdown Select Stop to pause the countdown 5 When the alarm rings press to silence it Stopwatch 1 Select Menu Tools Stopwatch 2 Select Start to have the stopwatch begin counting 3 Select Stop to stop counting 4 Select Reset to set the counter back to zero and begin counting again 5 P...

Page 88: ...an incoming call alert is received while playing a game the game is paused and exited You can return to play once the incoming call alert has ended The game will not remain paused while the phone is off 1 Select Menu Tools Brick Attack 2 Press to select New To pause the game press then press to Resume To move the paddle press left or right 3 To exit the game highlight Exit and press ...

Page 89: ...one phone bill call coverage area and specific features available to you such as call forwarding or voicemail For questions about the phone features refer to the materials provided with your phone or visit www kyocera wireless com For additional questions you may contact the Kyocera Wireless Corp Customer Care Center in any of the following ways Web site www kyocera wireless com Email phone help k...

Page 90: ...e phone s electronic serial number ESN To find the ESN a Remove the battery b Locate the white label on the back of the phone Your phone s 11 digit ESN begins with D and is located under the bar code on the label Phone Accessories To shop for phone accessories visit www kyocera wireless com store or call 800 349 4188 U S A only or 858 882 1410 Become a product evaluator To participate in the testi...

Page 91: ...3 all calls timer 21 Auto Answer 12 auto hyphenation 60 B backlighting 59 banner 54 battery charging 2 icon 2 installing 1 safety guidelines 3 Brick Attack 71 C Calculator 68 callback number including in messages 42 Calling emergency numbers 22 CDMA enhanced voice privacy 8 contacts business 27 calling 30 classifying 27 editing 28 erasing 28 finding 29 personal 27 ...

Page 92: ...oticons 43 enhanced CDMA voice privacy 8 erasing all contacts 64 messages 49 recent calls list 65 single contact entries 28 F Fast Find 30 frequent contacts 18 29 H hard pause 27 I icons 7 K keyguard 21 keypad locking 20 L language 61 limiting calls out 63 lock code 62 locking keypad 20 phone 63 M menu view 58 messages erasing 49 ...

Page 93: ...ntacts directory phone number type of 26 verifying your own 9 phone unlocking 63 power backlighting 60 power save mode 11 priority of messages 40 privacy enhanced CDMA 8 R recent calls timer 21 redialing a number 12 resetting the phone xi ringers choosing types 53 for different calls 53 silencing 9 volume 55 roaming 7 S screen icons 7 screen savers 61 secret contacts 15 27 security 62 shortcuts ac...

Page 94: ...rstanding 34 Text OutBox 46 time date format 54 timed pause 27 timers all calls 21 recent calls 21 Tip Calculator 68 U unlocking the phone 63 V vibrate mode 52 voice privacy enhanced CDMA 8 voicemail accessing 18 setting up 9 18 volume adjusting during a call 20 automatic adjustment 55 earpiece 55 key beep 56 ringer 55 Smart Sound 55 ...

Reviews: