36
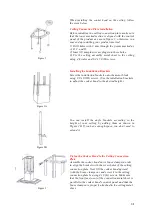
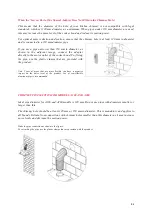
Figure 1
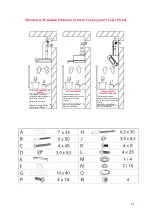
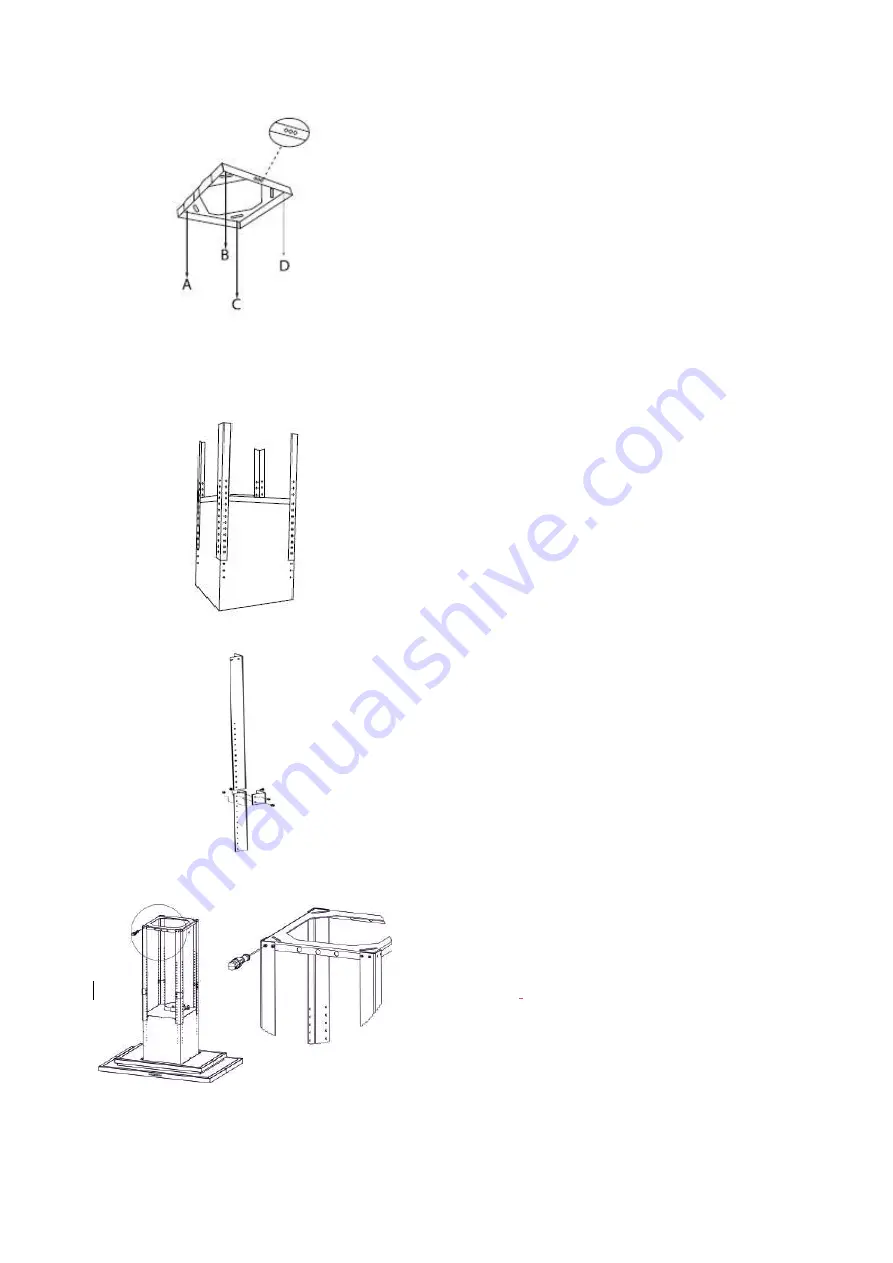
When installing the cooker hood on the ceiling, follow
the steps below.
Ceiling Connection Plate Installation
Before installing the ceiling connection plate, make sure
that the (ooo) marked section is aligned with the control
panel of the product as seen in figure 1; otherwise, you
may end up installing your product inverted.
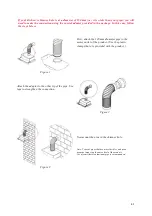
1) Drill holes with 9 mm through the points marked as
A, B, C, and D.
2) Insert 10 mm plastic raw plugs into these holes.
3) Fix the ceiling assembly metal sheet to the ceiling
using 4 ferrules and 6.3 x 50 (H) screws.
Figure 2A
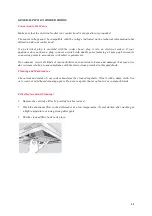
Figure 2B
Installing the Installation Brackets
Screw the installation brackets onto the motor block
using 3.9 x 9.5(D) screws. (Use the installation brackets
to adjust the cooker hood to the desired height.)
You can install the angle brackets according to the
height of your ceiling by adding them as shown in
Figure 2B. If you have enough space, you don’t need to
extend it.
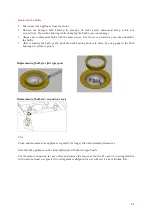
Figure 3
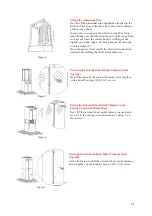
Fixing the Cooker Hood to the Ceiling Connection
Plate
Assemble the cooker hood on its brace clamps in order
to align the brackets with the screw holes of the ceiling
connection plate
.
Next, lift the cooker hood upward
(with the brace clamps on) and screw it to the ceiling
connection plate by using 4 x 8 (K) screws. Make sure
that the front face (ooo) of the connection metal sheet is
parallel to the cooker hood’s control panel and that the
brace clamps are properly attached to the ceiling metal
sheet.
.
Summary of Contents for D100 60
Page 1: ......
Page 2: ...1 INSTALLATIONS UND BEDIENUNGSANLEITUNG FÜR ALLE DUNSTABZUGSHAUBENMODELLE De De ...
Page 24: ......
Page 25: ......
Page 27: ...26 INSTRUCTIONS FOR INSTALLATION AND USE APPLIES TO ALL COOKER HOOD MODELS En US ...
Page 49: ...48 ...
Page 50: ...49 ...
Page 52: ......

