Section 1: Assembly & Set-up
AP-SC4060 & AP-SC4072 Skid Steer Rotary Cutters 326-765MK
12/14/18
13
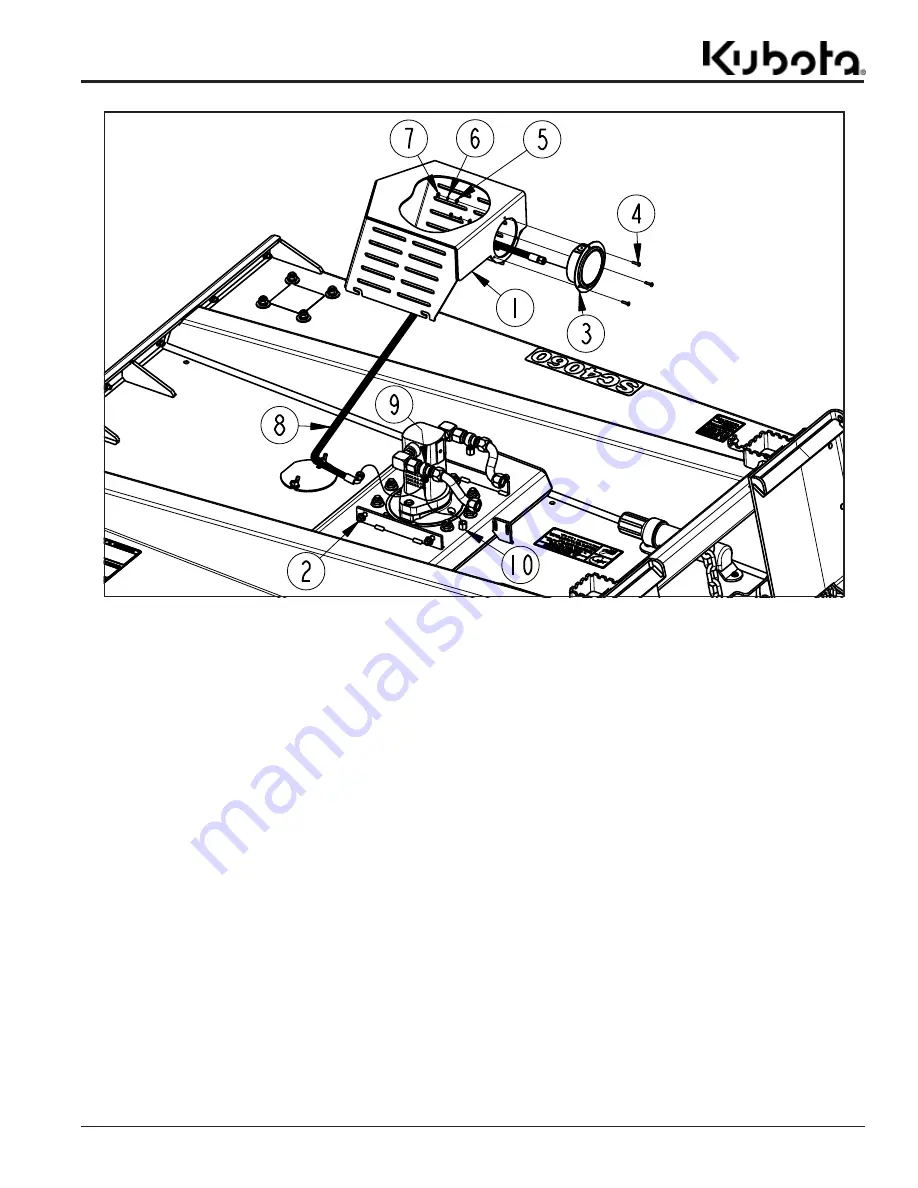
Pressure Gauge Assembly
Figure 1-9
39988
Pressure Gauge Assembly (Optional)
1.
Loosen four 3/8"-16 hex nuts (#2). Removing the hex
nuts is not necessary.
2. Remove the motor shroud (#1) by pushing it toward
the front of the unit then lifting it upward.
3. Remove 9/16" cap (#10) from tee fitting (#9).
4. Attach curved end of hydraulic hose (#8) to tee fitting
(#9) and tighten.
5. Route hydraulic hose (#8) through the hole in motor
shroud (#1) that is designated for the pressure
gauge (#3).
6. Attach hydraulic hose (#8) to the pressure gauge (#3)
and tighten.
7.
Attach the pressure gauge (#3) using three 8-32 X 3/4"
round head screws (#4). Put the screws through the
holes in the pressure gauge and motor shroud and
fasten them with three flat washers (#5), lock washers
(#6) and 8-32 hex nuts (#7). Tighten the hex nuts.
8. Place the motor shroud back in its designated place
and pull back to lock it in place. Tighten hex nuts (#2)
to correct torque.


