


21
Section 4: Adjustments
10/07/16
AP-SBL2566, AP-SBL2574, & AP-SBL2584 Snow Blowers 370-478MK
Discharge Chute & Spout Deflector
!
WARNING
To avoid serious injury or death:
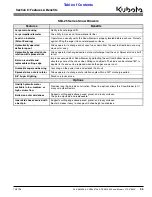
Control Switches for Chute Rotation & Spout Deflector
Figure 4-1
Spout Deflector Adjustment
Refer to Figure 4-1:
The end of the spout can be angled up or down to direct
blown snow close or far away.
1.
Stop skid steer/tractor and place in park before
adjusting spout deflector.
2.
Push on
“Tilt Up/Down”
toggle switch to tilt deflector
spout up and pull toggle switch to tilt deflector spout
down.
3.
Resume snow blowing once new angle is set.
IMPORTANT:
Never operate a Snow Blower with
Never operate a Snow Blower that can
IMPORTANT:
Adjustment screws on hydraulic motor
are preset at the factory. Do not change factory
settings. Changing factory settings can cause
structural damage to the Snow Blower.
35810
Connects to 12V
Power Source
Connects to Wire
Harness
Not Used
Section 4: Adjustments
Chute Rotation Gear Adjustment
Figure 4-2
Chute Rotation Gear Alignment
Refer to Figure 4-2:
1.
Stop skid steer/tractor, place in park, shut engine off
and remove switch key.
2.
Loosen all three hex head bolts (#6). Do not remove.
3.
Move hydraulic motor mount (#3) as needed until
drive gear (#2) has full tooth engagement with driven
gear (#1).
4.
Hold hydraulic motor mount (#3) in this position and
tighten all three 3/8"-16 GR5 hex head bolts (#6) to
the correct torque.
If removed, be sure to replace gear guard (#4) with
existing 10-24 pan screws (#5), star washer (#7), and flat
washer (#8). Tighten pan screws (#5).
Chute Rotation Adjustment
Refer to Figure 4-1:
1.
Stop skid steer/tractor and place in park before
adjusting chute rotation angle.
2.
Push on
“Rotate Left/Right”
toggle switch to rotate
chute to the left and pull toggle switch to rotate chute
to the right.
3.
Resume snow blowing once new chute angle is set.
37220
NOTE:
Gear guard (#4) is shown removed for clarity
only. This adjustment can be made without
removing the gear guard. Should the guard be
removed, make certain gear guard (#4) is replaced
before putting the Snow Blower back into service.


