background image

34

Instrukcja obsługi

PL

OPIS PRODUKTU

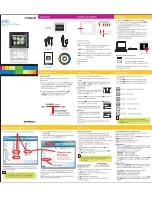
Panel boczny

1. Gniazdo zasilania

2. Slot karty microSD

3. 

Wejście AV

4. 

Gniazdo słuchawkowe

5. 

Włącznik

6. Port USB

7. 

Wejście anteny

Panel przedni

8. 

Wskaźnik ładowania

9. Czujnik IR

10. 

Wskaźnik zasilania

Panel górny

11. 

Przycisk MODE: wybór źródła wejściowego

12. 

Przycisk MENU: przejdź do menu głównego

13. 

Przycisk CH- : poprzedni kanał

14. 

Przycisk CH+ : następny kanał

15. 

Przycisk VOL- : zmniejsz głośność

16. 

Przycisk VOL+ : zwiększ głośność

17. 

Przycisk OK: potwierdź wybór

18. Podstawka

1

2
3

4

5

6

7

8

10

9

11 12 13 14 15 16 17

Summary of Contents for KM0196-2

Page 1: ...BEDIENUNGSANLEITUNG OWNER S MANUAL INSTRUKCJA OBSŁUGI MANUAL DE UTILIZARE RO PL EN DE KM0196 2 Portable TV set User s manual with DVB T tuner ...

Page 2: ......

Page 3: ...iden 8 Wenn der Stecker nicht in Ihre Steckdose passt beauftragen Sie einen Elektriker um die Steckdose auszutauschen 9 Trennen Sie das Gerät vom Stromnetz bei Gewitter oder wenn es für einen längeren Zeitraum nicht benutzt wird 10 Das Gerät kann von Kindern die älter als 8 Jahre sind und von Personen mit eingeschränkten physischen sensorischen oder geistigen Fähigkeiten oder Mangel an Erfahrung u...

Page 4: ...se 5 Taste Ein Aus 6 USB Steckplatz 7 Antenneneingang Frontpaneel 8 Ladeanzeige 9 IR Sensor 10 Betriebsanzeige Oberes Paneel 11 TasteMODE auswählenderEingangsquelle 12 Taste MENU aufrufen des Hauptmenüs 13 Taste CH vorheriger Sender 14 Taste CH nächster Sender 15 Taste VOL Lautstärke verringern 16 Taste VOL Lautstärke erhöhen 17 Taste OK Auswahl bestätigen 18 Ständer ...

Page 5: ...ogrammführer anzeigen 19 LCD SETUP Bildeinstellungen 20 Wiedergabe Pause 21 Stopp 22 Aufnahme beginnen 23 Schneller Rücklauf 24 Schneller Vorlauf 25 Gelbe Taste 26 Blaue Taste Fernbedienung BATTERIEN EINLEGEN 1 Gleiten Sie das Batteriefach hinaus 2 Legen Sie eine CR2025 Batterie ein unter Beachtung der korrekten Polarität 3 Gleiten Sie das Batteriefach wieder hinein so das es sich verriegelt AUFLA...

Page 6: ...und drücken danach die Taste OK um die Option aufzurufen SEDNDER Automatische Sendersuche Wählen Sie den Typ der Automatischen Sendersuche DTV ATV DTV ATV wählen danach Ihr Land aus und drücken die Taste OK um die Suche zu starten DTV Manuelle Sendersuche Wählen Sie die Sendernummer und drücken die Taste OK um die Suche zu starten Die Liste der Senderfrequenzen ist auf www emitel pl verfügbar ATV ...

Page 7: ...K oder die gelbe Taste Favoriten Wählen Sie den Sender aus den Sie als Favoriten markieren möchten Drücken Sie die Taste 2 auf der Fernbedienung Ein Herzsymbol erscheint neben dem ausgewählten Sender Es ist jetzt als Favorit markiert und wird automatisch zur Favoritenliste hinzugefügt die Liste ist nach Drücken der Taste FAV auf der Fernbedienung verfügbar Zum abzubrechen drücken Sie erneut die Ta...

Page 8: ...r beim Senderwechsel automatisch ausgeglichen Raumklang Wenn eingeschaltet hat der Benutzer ein erhöhtes Gefühl vom Klang umgeben zu sein SPDIF Modus Auswahl des digitalen Audioausgangs Auswahlmöglichkeiten PCM automatisch Farbtemperatur Passt die Farbtemperatur des Bildes an Verfügbare Optionen sind Benutzer Kalt Mittel Warm Nur die Option Benutzer ist zum Anpassen verfügbar Drücken Sie die Taste...

Page 9: ... zunächst mit den Tasten die Zeitintervalle für die Funktion aus Verfügbare Optionen sind Einmal Täglich Mo Fr Mo Sa Sa So Sonntag Stellen Sie mit den Tasten Stunden und Minuten ein an denen das Fernsehgerät automatisch in den Bereitschafts Modus wechselt Wählen Sie Aus um die Funktion zu deaktivieren Einschaltzeit Einstellen der Parameter für das automatische Einschalten Stunde Quelle Sender Laut...

Page 10: ... sie vom Sender bereitgestellt werden PVR Dateisystem In diesem Menü können Sie die Parameter des angeschlossenen Massenspeichers überprüfen um die Zeitversetzte Aufnahme und Aufnahmefunktion zu unterstützen Untertitel Bei Einstellung auf Ein werden die Untertitel angezeigt wenn sie vom Sender bereitgestellt werden Wiederherstellen der Werkseinstellungen Wiederherstellen der Werkseinstellungen Ihr...

Page 11: ...nen Sie durch die Dateien Fotos Musik Videos Text Dateien auf dem angeschlossenen Massenspeichergerät blättern 1 Verbinden Sie ein USB Flashspeicher mit dem USB Steckplatz oder fügen eine MikroSD Karte in den zugehörigen Steckplatz am TV Gerät ein 2 Drücken Sie die Taste MODE auf der Fernbedienung und wählen Multimedia 3 Wählen Sie das entsprechende Laufwerk aus und drücken die Taste OK um den Vor...

Page 12: ...r Einmal Wiederholen Ständiges Anzeigen eines Bildes Zufällig Aus Zufällig Ein Zufällig Aus Ausschalten der zufälligen Anzeige der Bilder Zufällig Ein Einschalten der zufälligen Anzeige der Bilder Musik Musikwiedergabe während der Diashow Wiedergabeliste Anzeigen der Dateiliste Info Anzeigen von Informationen über die Datei Drehen Drehen des Fotos nach links Drehen Drehen des Fotos nach rechts Ver...

Page 13: ...as Gerät wird den Titel in einer Schleife abspielen im eingestellten Zeitraum Wählen Sie Nichts um die Funktion auszuschalten Ton aus Ton Ein Ausschalten Wiedergabeliste Anzeigen der Dateiliste Info Anzeigen von Informationen über die Datei Gehe zur Zeit Gehe zur gewünschten Minute des Titels Wiedergabe Pause Video abspielen Pause Schneller Rücklauf Video zurückspulen wiederholt drücken um die Rüc...

Page 14: ...ein oder auszublenden Drücken Sie die Taste EXIT um die Optionsleiste zu verstecken Vorherige Seite Gehe zur vorherigen Seite Nächste Seite Gehe zur nächsten Seite Vorheriges Gehe zur vorherigen Textdatei Nächstes Gehe zur nächsten Textdatei Stopp Rückkehr zur Dateiliste Musik Musikwiedergabe während der Diashow Wiedergabeliste Anzeigen der Dateiliste Info Anzeigen von Informationen über die Datei...

Page 15: ...en Fernsehsender mit den Richtungstasten Wählen Sie das Fernsehprogramm das Sie aufnehmen möchten Drücken Sie zur Bestätigung die Taste OK Es erscheint ein Fenster Es müssen keine Optionen wie Sender Start oder Endzeit eingestellt werden wie sie vom EPG hochgeladen wurden Bestätigen durch drücken der Taste OK Drücken Sie im Menü EPG die gelbe Taste auf der Fernbedienung um das Zeitplan Menü aufzur...

Page 16: ... die Sättigung Probieren Sie einen anderen Sender aus es ist möglich dass ein Schwarz Weiß Programm gesendet wird Den Sender neu einstellen Überprüfen Sie ob das richtige Farbsystem eingestellt ist Normales Bild Kein Ton Kein Bild Kein Ton Keine Farbe Normaler Ton Bild zerbricht Normaler oder schwacher Ton Keine Farbe Lärm Bilder Ton Überprüfungsliste Regeln Sie die Position der Antenne Überprüfen...

Page 17: ...rmalen Haushaltsmüll entsorgt werden darf Entsorgen Sie dieses Gerät bitte getrennt von anderen Abfällen um der Umwelt bzw der menschilchen Gesundheit nicht durch unkontrollierte Müllbeseitigung zu schaden Recyceln Sie das Gerät um die nachhaltige Wiederverwertung von stofflichen Ressourcen zu fördern Private Nutzer sollten den Händler bei dem das Produkt gekauft wurde oder die zuständigen Behörde...

Page 18: ...ided plug does not fit into your outlet consult an electrician for replacement of the obsolete outlet 9 Disconnect the device from power mains during storm or when not in use for a long time 10 This appliance may be used by children who are above 8 years old and by persons with reduced physical sensory or mental capabilities or lack of experience and knowledge if they are supervised and guided by ...

Page 19: ...one socket 5 On off switch 6 USB port 7 Antenna input Front panel 8 Charging indicator 9 IR sensor 10 Power indicator Top panel 11 MODE button select input source 12 MENU button go to main menu 13 CH button previous channel 14 CH button next channel 15 VOL button decrease volume 16 VOL button increase volume 17 OK button confirm selection 18 Stand ...

Page 20: ...gram Guide 19 LCD SETUP enter picture settings 20 Play Pause 21 Stop 22 Start recording 23 Fast backward 24 Fast forward 25 Yellow button 26 Blue button BATTERY INSTALLATION 1 Slide out the battery tray 2 Insert CR2025 battery with correct polarization 3 Slide the tray in so that it locks in place Remote control CHARGING 1 Connect one plug of the AC charger to the power socket of the device then c...

Page 21: ... the options then press the OK button to enter or change setting Auto Tuning Select the type of automatic tuning DTV ATV DTV ATV then set your country and press the OK button to start scanning DTV Manual Tuning Select channel number and press the OK button to start scanning The list of channel frequencies is available at www emitel pl ATV Manual Tuning Search for analogue channels Program Edit Edi...

Page 22: ... its own power supply set this function at Off position in case of passive antenna Software Update OAD It is not suggested to update the software by OAD as software is not being broadcast through DVB T transmitters Update the software by the USB only Software Update USB Update software by a connected USB drive Do not turn off the device or unplug the flash drive when the update has not finished as...

Page 23: ...d out Surround Sound When on the user has increased feeling of being surrounded with sound SPDIF Mode Select the type of digital audio output Available options are PCM Auto Color Temperature Adjust the color temperature of the picture Available options are User Cool Medium Warm Only User option is available for adjusting Press the buttons to adjust red green blue color saturation according to your...

Page 24: ...ttons to select time intervals for the function to operate Available options are Once Every day Mon Fri Mon Sat Sat Sun Sunday Use the buttons to set the hour and minute when the TV will switch to standby automatically Set to Off to disable the function On Time Set the parameters of automatic switch on hour source channel volume frequency Set to Off to disable the function Sleep Timer Set the TV t...

Page 25: ...or hearing impaired will be display if they are provided by the broadcaster PVR File System This menu allows to check the parameters of the connected mass storage device in order to support Timeshift and recording function Subtitle When set to On subtitles will be displayed if they are provided by the broadcaster Restore Factory Default Restore factory settings of your TV Press the OK button then ...

Page 26: ...ULTIMEDIA This menu allows you to browse through files photos music videos text files on the connected mass storage device 1 Connect a USB flash drive to the USB port or insert microSD card to the appropriate slot of the TV set 2 Press the MODE button on the remote control and select Multimedia 3 Select the appropriate disc and press the OK button to enter Notes Make sure that the audio video pict...

Page 27: ...photo is zoomed in press Move view and then use the buttons to move the photo Slideshow Select slide effect Normal Random Blocks Diagonal blocks Wipe Slide Fade Music Enter to listen to music files available on the connected mass storage device Press the INFO or OK PLAY button on the remote control to display function bar Press the EXIT button to hide options bar Press the button on the remote con...

Page 28: ...epeat All Repeat None Repeat One Repeat All play all videos continuously Repeat None play all videos once Repeat One play one video continuously Random Off Random On Random Off turn off random playback Random On turn on random playback Set A Set B None Set A set start time for playback Set B set end time for playback The device will play the video in loop in preset time range Set None to turn off ...

Page 29: ...information about the file TIMESHIFT This function ensures a continuous background recording of the selected channel Make sure the flash drive is connected to the USB port of the device 1 Press the button on the remote control to activate Timeshift status bar with countdown will be displayed at the bottom of the screen 2 Further playback control from options bar 3 To turn off Timeshift press the b...

Page 30: ...nnel using direction buttons Select the TV program you want to record Press the OK button to confirm A window will appear There is no need to set options such as channel start or end time as they were uploaded from the EPG Confirm by pressing the OK button When in EPG menu press the yellow button on the remote control to enter schedule menu When in EPG menu press the blue button to set reminder Th...

Page 31: ...ctions Power cord is not connected properly Adjust contrast brightness and volume Check if correct input source is selected Adjust the saturation Try another channel it is possible that black and white program is broadcast Retune the channel Check the if the correct color system is set TROUBLESHOOTING Pixelation Intermittent sound Normal picture No sound No picture No sound No color Normal sound P...

Page 32: ...stainable reuse of material resources Household users should contact either the retailer where they purchased this product or their local government office for details of where and how they can take this item for environmentally safe recycling Business users should contact their supplier and check the terms and conditions of the purchase contract This product should not be mixed with other commerc...

Page 33: ...ć się z elektrykiem w celu jego wymiany 9 Urządzenie należy odłączyć od źródła zasilania podczas burzy oraz w przypadku nieużywania przez dłuższy okres czasu 10 Niniejszy sprzęt może być użytkowany przez dzieci w wieku co najmniej 8 lat i przez osoby o obniżonych możliwościach fizycznych czuciowych lub umysłowych a także te które nie posiadają doświadczenia i nie są zaznajomione ze sprzętem jeżeli...

Page 34: ... przedni 8 Wskaźnik ładowania 9 Czujnik IR 10 Wskaźnik zasilania Panel górny 11 Przycisk MODE wybór źródła wejściowego 12 Przycisk MENU przejdź do menu głównego 13 Przycisk CH poprzedni kanał 14 Przycisk CH następny kanał 15 Przycisk VOL zmniejsz głośność 16 Przycisk VOL zwiększ głośność 17 Przycisk OK potwierdź wybór 18 Podstawka 1 2 3 4 5 6 7 8 10 9 11 12 13 14 15 16 17 ...

Page 35: ...19 LCD SETUP przejdź do ustawień obrazu 20 Odtwarzanie Pauza 21 Stop 22 Nagrywanie 23 Przewijanie do tyłu 24 Przewijanie do przodu 25 Żółty przycisk 26 Niebieski przycisk Pilot zdalnego sterowania INSTALACJA BATERII 1 Należy wysunąć tackę baterii 2 Umieścić w niej baterię CR2025 zgodnie z zaznaczoną polaryzacją 3 Wsunąć tackę aż zablokuje się w miejscu ŁADOWANIE 1 Podłączyć wtyk ładowarki sieciowe...

Page 36: ...u główne 2 Za pomocą przycisków należy przełączać między dostępnymi menu Kanał Obraz Dźwięk Czas Opcje oraz Blokada 3 Za pomocą przycisków należy przełączać między dostępnymi opcjami 4 Należy nacisnąć przycisk OK aby przejść do wybranej opcji lub zmienić ustawienie 5 Należy nacisnąć przycisk MENU aby wrócić do poprzedniego menu 6 Należy nacisnąć przycisk EXIT aby wyjść z menu głównego MENU GŁÓWNE ...

Page 37: ...ć przycisk 2 na pilocie zdalnego sterowania symbol serca pojawi się obok wybranego kanału Kanał został oznaczony jako ulubiony i automatycznie dodany do listy ulubionych kanałów lista jest dostępna po naciśnięciu przycisku FAV na pilocie zdalnego sterowania Aby anulować należy ponownie nacisnąć przycisk 2 Zasilanie anteny Należy włączyć tę funkcję w przypadku posiadania anteny aktywnej jeśli nie p...

Page 38: ... kanału są automatycznie wyrównywane Dostosować można wyłącznie parametry trybu Użytkownik Za pomocą przycisków należy dostosować parametry kontrastu jasności koloru oraz ostrości do swoich preferencji Temperatura kolorów Dostosowanie temperatury koloru obrazu Dostępne opcje to Użytkownik Zimna Normalna Ciepła Dostosować można wyłącznie parametry trybu Użytkownik Za pomocą przycisków należy dostos...

Page 39: ...ł urządzenie Ustaw parametry automatycznego włączenia telewizora godzina źródło kanał głośność częstotliwość Należy wybrać Wył aby wyłączyć funkcję Wyłącznik czasowy Ustaw czas po upływie którego telewizor automatycznie przejdzie do trybu czuwania Dostępne opcje to 10 Min 20 Min 30 Min 60 Min 90 Min 120 Min 180 Min 240 Min Należy wybrać Wył aby wyłączyć funkcję Dźwięk przestrzenny Gdy funkcja jest...

Page 40: ...enu Jęzki audio Wybór języka ścieżki audio dla oglądanego programu Język napisów Wybór języka napisów dla oglądanego programu Jeśli dostępne są napisy w wybranym języku zostaną automatycznie ustawione przez telewizor Niedosłyszący Wyłącznie dla kanałów cyfrowych Kiedy funkcja jest włączona napisy przeznaczone dla niesłyszących zostaną wyświetlone jeśli są nadawane przez nadawcę System plików PVR M...

Page 41: ...uj program Kontrola rodzicielska Aby uchronić dzieci przed obejrzeniem programu nieodpowiedniego dla ich wieku możliwe jest ustawienie klasyfikacji wiekowej Kanały cyfrowe mogą mieć klasyfikację wiekową Kiedy klasyfikacja wiekowa programu jest równa lub wyższa niż ustawiony wiek program zostanie zablokowany Aby móc obejrzeć program wymagane jest wpisanie hasła MULTIMEDIA Menu Multimedia pozwala na...

Page 42: ... Brak Losowo Pasy Ukośne pasy Ścieranie Slajd Zanikanie Zdjęcia Menu Zdjęcia pozwala na oglądanie obrazów i zdjęć dostępnych na podłączonym nośniku danych Należy nacisnąć przycisk INFO lub OK PLAY na pilocie zdalnego sterowania aby wyświetlić pasek opcji Aby ukryć pasek opcji należy nacisnąć przycisk EXIT Należy nacisnąć przycisk na pilocie zdalnego sterowania aby wstrzymać pokaz slajdów Należy na...

Page 43: ...ania Urządzenie będzie odtwarzało utwór w pętli w ustawionym przedziale czasowym Wybierz Wyłącz aby wyłączyć funkcję Losowo wył Losowo wł Losowo wył wyłącz losowe odtwarzanie utworów Losowo wł włącz losowe odtwarzanie utworów Wycisz Wycisz włącz dźwięk Playlista Wyświetl listę plików Info Wyświetl informacje o pliku Przejdź do Przejdź do konkretnej minuty utworu Film Podczas odtwarzania wideo z wy...

Page 44: ...s rozpoczęcia odtwarzania Koniec ustaw czas zakończenia odtwarzania Urządzenie będzie odtwarzało film w pętli w ustawionym przedziale czasowym Wybierz Wyłącz aby wyłączyć funkcję Playlista Wyświetl listę plików Info Wyświetl informacje o pliku Powolne odtwarzanie Odtwarzaj film w zwolnionym tempie Krok naprzód Przejdź do konkretnej minuty filmu Przybliż Naciskaj aby przybliżyć Oddal Naciskaj aby o...

Page 45: ...ycisk Aby zakończyć nagrywanie należy nacisnąć przycisk 2 Programowanie nagrywania EPG Należy nacisnąć przycisk EPG na pilocie zdalnego sterowania Następnie wybrać kanał za pomocą przycisków kierunkowych Wybrać program który ma zostać nagrany Nacisnąć przycisk OK aby potwierdzić wybór Pojawi się okno Ustawianie opcji takich jak czas rozpoczęcia lub zakończenia nie jest konieczne ponieważ zostały a...

Page 46: ... systemu audio Sprawdzić podłączenie przewodu zasilającego Dostosować kontrast jasność oraz głośność Sprawdzić czy wybrane zostało prawidłowe źródło wejściowe Dostosować poziom nasycenia Wybrać inny kanał możliwe że nadawany jest czarno biały program Dostroić kanał Sprawdzić system nadawania obrazu Pikselizacja Przerywany dźwięk Normalny obraz Brak dźwięku Brak obrazu Brak dźwięku Brak koloru Norm...

Page 47: ...a informacji na temat miejsca i sposobu bezpiecznego dla środowiska recyklingu tego produktu użytkownicy w gospodarstwach domowych powinni skontaktować się z punktem sprzedaży detalicznej w którym dokonali zakupu produkt lub z organem władz lokalnych Użytkownicy w firmach powinni skontaktować się ze swoim dostawcą i sprawdzić warunki umowy zakupu Produkt nie należy usuwać razem z innymi odpadami k...

Page 48: ...rician pentru a inlocui priza veche 9 Deconectati aparatul de la sursa de alimentare in timpul furtunilor sau atunci cand nu este folosit pentru o perioada mai lunga de timp 10 Acest aparat nu poate fi utilizat de copii cu vârsta de peste 8 ani sau de catre persoane cu capacități fizice senzoriale sau mentale reduse sau lipsite de experiență și cunoștințe decat daca aceștia sunt supravegheați sau ...

Page 49: ...nă Panoul frontal 8 Indicator de încărcare 9 Senzor IR 10 Indicator alimentare Panoul de sus 11 Butonul MODE selectați sursa de intrare 12 Butonul MENU intrați în meniul principal 13 Butonul CH canalul anterior 14 Butonul CH canalul următor 15 Butonul VOL reduceți volumul 16 Butonul VOL creșteți volumul 17 Butonul OK confirmă selectarea 18 Stand 1 2 3 4 5 6 7 8 10 9 11 12 13 14 15 16 17 ...

Page 50: ... 19 LCD SETUP accesați setările de imagine 20 Redare Pauză 21 Stop 22 Începeți înregistrarea 23 Derulare înapoi în timpul redării 24 Derulare înainte în timpul redării 25 Buton galben 26 Buton albastru Telecomandă 2 1 3 4 5 8 10 12 16 15 20 19 24 23 6 7 9 11 13 14 17 18 21 22 26 25 INSTALAREA BATEREI 1 Scoateți suportul bateriei 2 Intreoduceți o baterie tip CR2025 respectând polaritatea coorectă 3...

Page 51: ...a Canal 2 Apăsați butoanele pentru a comuta între opțiuni apoi apăsați butonul OK pentru a intra în opțiunea dorită Reglare automată Selectați tipul de reglare automată DTV ATV DTV ATV apoi setați țara dumneavoastră și apăsați OK pentru a începe scanarea Reglare manuală DTV Selectați numărul canalului și apăsați OK pentru a începe scanarea Lista cu frecvențele canalelor este disponibilă pe www emi...

Page 52: ...ben pentru a confirma Preferate Selectați canalul pe care doriți să îl marcați ca favorit Apăsați butonul 2 de pe telecomandă o pictogramă inimă va apărea lângă canalul selectat Acum este marcat ca preferat și va fi adăugat automat în lista canalelor preferate lista este disponibilă după ce apăsați butonul FAV de pe telecomandă Pentru a anula apăsați butonul 2 încă o dată Alimentarea antenei Activ...

Page 53: ...va funcția Reducere zgomot MPEG Reducerea zgomotului imaginii în videoclipurile comprimate SUNET 1 Apăsați butoanele pentru a selecta Sunet 2 Apăsați butoanele pentru a comuta între opțiuni apoi apăsați butonul OK pentru a intra sau a modifica setarea Mod Sunet Selectați unul din modurile de sunet prestabilite care se potrivește cel mai bine cu programul vizionat și cu preferințele dumneavoastră O...

Page 54: ...e automată oră sursă canal volum frecvență Setați pe Off pentru a dezactiva funcția Sleep Timer Setați televizorul să se comute automat la modul standby după o perioadă prestabilită Opțiunile disponibile sunt 10 Min 20 Min 30 Min 60 Min 90 Min 120 Min 180 Min 240 Min Setați Off pentru a dezactiva funcția Oprire automată Setați televizorul să se comute automat la modul standby dacă nu se efectuează...

Page 55: ...riți Dacă este disponibilă subtitrarea în limba aleasă pe televizor va fi afișată subtitrarea Deficiențe de auz Doar pentru canale digitale Când este setat pe On subtitrările adaptate pentru persoane cu deficiențe de auz vor fi afișate dacă sunt furnizate de broadcaster Sistem fișiere PVR Acest meniu vă permite să verificați parametrii dispozitivului de stocare conectat pentru a susține funcția Ti...

Page 56: ... vizionarea neautorizată de către copii a conținutului unui canal puteți seta vârsta pentru a bloca vizionarea canalului control parental Canalele digitale au canalele lor cu rata de vârstă Când rata vârstei este mai mare sau egală cu cea presetată canalul este blocat Pentru vizionare trebuie furnizață o parolă pentru deblocarea canalului MULTIMEDIA Acest meniu vă permite să navigați printre fișie...

Page 57: ...aleatoriu Aleatoriu pornit activează afișarea fotografiilor în mod aleatoriu Muzica Redare muzică în timpul unei prezentări Listă de redare Afișare listă fișiere Info Afișare informații despre fișier Rotire Rotiți fotografia spre stânga Rotire Rotiți fotografia spre dreapta Zoom In Apăsați în mod repetat pentru a mări poza Zoom Out Apăsați în mod repetat pentru a micșora poza Mutați vizualizarea C...

Page 58: ...gi la melodia anterioară Următor Mergi la melodia următooare Stop Oprire melodie și revenire la lista de fișiere Repetă tot Nu repeta niciuna Repetă una Repetă tot redă toate melodiie continuu Nu repeta niciunul redă toate melodiie o dată Repetă unul redă o melodie continuu Set A Set B None Set A setează ora de pornire pentru redare Set B setează ora de oprire pentru redare Dispozitivul va reda în...

Page 59: ...rulare pas cu pas Redare videoclip cadru cu cadru Zoom In Apăsați în mod repetat pentru a mări videoclip Zoom Out Apăsați în mod repetat pentru a micșora videoclip Raport aspect Setează dimensiunea iamginii Auto 16 9 4 3 Mutați vizualizarea Când videoclipul este mărit apăsați Move view și apoi utilizați butoanele pentru a muta videoclipul Text Introduceți pentru a afișa fișierele text disponibile ...

Page 60: ...ăsați butonul un punct din colțul din stânga sus pâlpâie Apăsați butonul pentru a opri înregistrarea 2 Programarea unei înregistrări EPG Apăsați butonul EPG pentru a deschide lista completă Selectați canalul TV Selectați programul TV pe care doriți să îl înregistrați Apăsați butonul OK pentru a confirma Va apărea o fereastră Nu este necesar să setați opțiunile cum ar fi canalul ora de începere sau...

Page 61: ...Cablul de alimentare nu este conectat corect Verificați contrastul strălucirea și volumul Verificați dacă este selectată corect sursa de intrare Reglați saturația Încercați alt canal nu este posibil la o transmisie alb negru Căutați din nou canalul Verificați dacă este setat corect sistemul de culoare DEPANARE Pixelare Sunet intermitent Inagine normala Fără sunet Fără imagine Fără sunet Fără culoa...

Page 62: ...resurselor materiale Utilizatorii casnici sunt rugati să ia legatura fie cu distribuitorul de la care au achizitionat acest produs fie cu autoritatile locale pentru a primi informatii cu privire la locul si modul in care pot depozita acest produs in vederea reciclarii sale ecologice Utilizatorii institutionali sunt rugati să ia legatura cu furnizorul și să verifice condițiile stipulate in contract...

Page 63: ......

Page 64: ...www krugermatz com is a registered trademark ...

Reviews: