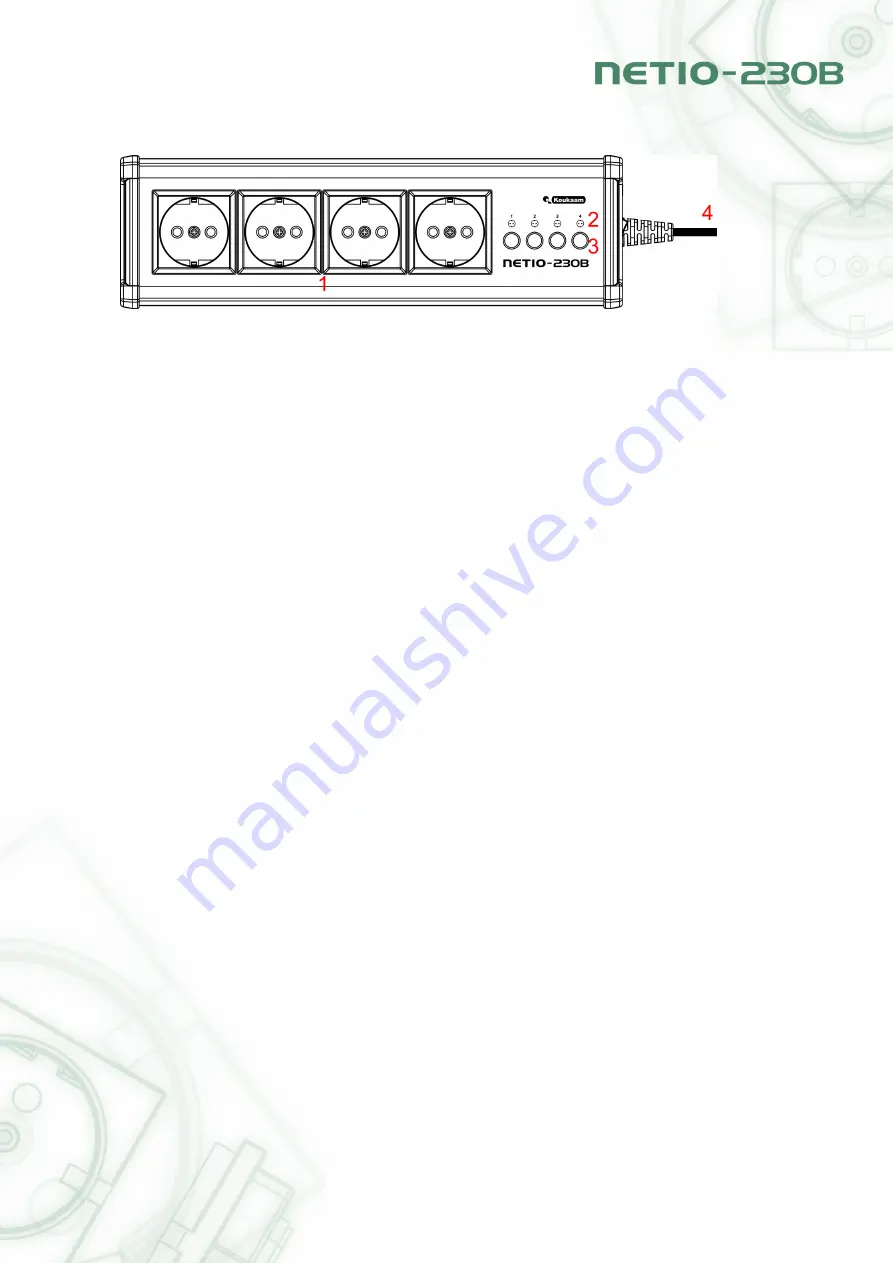
Figure 2: front view
3. Buttons for manual output control
4. Power supply 230 V AC
3
Installation
Before the first use, please make sure that: the power supply is 230 V AC.
3.1
Hardware connection of the device
1. Connect your NETIO-230B to the computer network (switch, router) using the Ethernet cable with
RJ-45 connectors. Use cross cable when the device is directly connected to the PC.
2. Connect the power cable to power outlet.
3. Connect devices that you want to control to OUT1 – OUT4 outputs.
4. Turn on your NETIO-230B using the main switch on the side of the device.
4
Initial Configuration
1. Run file
NetioDiscover.exe
from the supplied CD.
2. Click on the
Discover
button. List of all NETIO units present in your network will appear. (figure 3)
5
Summary of Contents for NETIO-230B
Page 1: ......
Page 10: ...Figure 7 set up ports Figure 8 output configuration 9...


