88
English
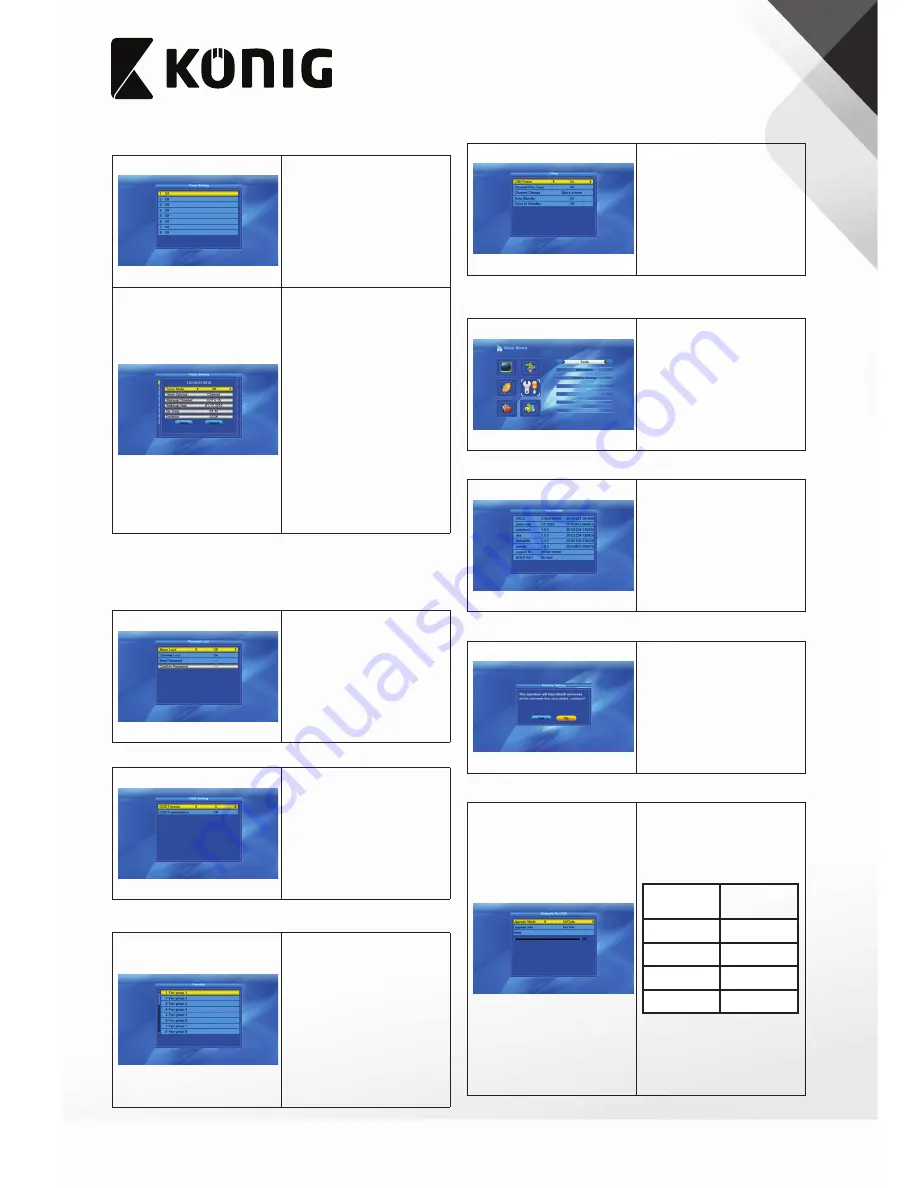
“Timer Setting”
If there is no programme, you cannot access the menu.
1. Select the timer.
2. Press the OK button.
1. “Timer Mode“: Select “On” or “Off”.
2. “Timer Service”: Select “Channel”
or “Record”.
Notes:
•
If you select “Channel”, the next
menu item will be “Wakeup
Channel”.
•
If you select “Record”, the next
menu item will be “Wakeup
Message”.
3. - “Wakeup Channel”: Select the
wake-up channel.
- “Wakeup Message”: Select the
wake-up message.
4. “Wakeup Date“: Press the digit
buttons to enter the date.
5. “On Time“: Press the digit buttons
to enter the time.
6. “Duration”: Press the digit
buttons to enter the duration.
“Parental Lock”
You cannot access the menu without entering the correct password.
1. Open the “Input Password” window.
2. Enter the password: “0000”.
3. Press the OK button.
1. “Menu Lock“: Select “On” or “Off”.
2. “Channel Lock“: Select “On” or
“Off”.
3. “New Password“: Press the digit
buttons to enter the password.
4. “Confirm Password“: Press the
digit buttons to enter the
password again.
“OSD Setting”
1. “OSD Timeout“: Select from 1 to
10.
2. “OSD Transparency“: Select “Off”,
“10%”, “20%”, “30%” or “40%”.
“Favorite”
1. Select the favourite. Press the OK
button.
2. Edit the favourite.
•
“Name”: Press the digit buttons
to edit the name. Press the OK
button.
•
“Longitude”: Select west
longitude or east longitude. Press
the digit buttons to edit the
longitude. Press the OK button.
3. - Press the yellow button to save
and exit.
- Press the blue button to exit
without saving.
“Other”
1. “LNB Power“: Select “On” or “Off”.
2. “Channel Play Type“: Select “All”,
“Free” or “Scramble”.
3. “Channel Change“: Select “Black
Screen” or “Freeze”.
4. “Auto Standby“: Select “On” or
“Off”.
5. “Clock In Standby“: Select “On” or
“Off”.
“Tools”
You cannot access the menu without entering the correct password.
1. Open the “Input Password”
window.
2. Enter the password: “0000”.
3. Press the OK button.
“Information”
1. Open the “Information” window
to view the information.
“Factory Setting”
1. - Select “Yes” to return to the
factory settings. All channels and
settings will be deleted.
- Select “No” to cancel.
“Upgrade by USB”
1. “Upgrade Mode”: Select “allcode”,
“maincode”, “userdb”, “defaultdb”
or “Dump“.
When changing the upgrade mode,
“Upgrade File” will show the
corresponding file as follows:
Upgrade
mode
File format
allcode
*.abs
maincode
*.abs
userdb
*.abs
defaultdb
*.abs
Note: The menu item becomes grey
when the USB device is not
connected.
2. “Upgrade File”: Select the
upgrade file. Press the OK button.
3. “Start”: Start upgrading by USB.


