background image

8

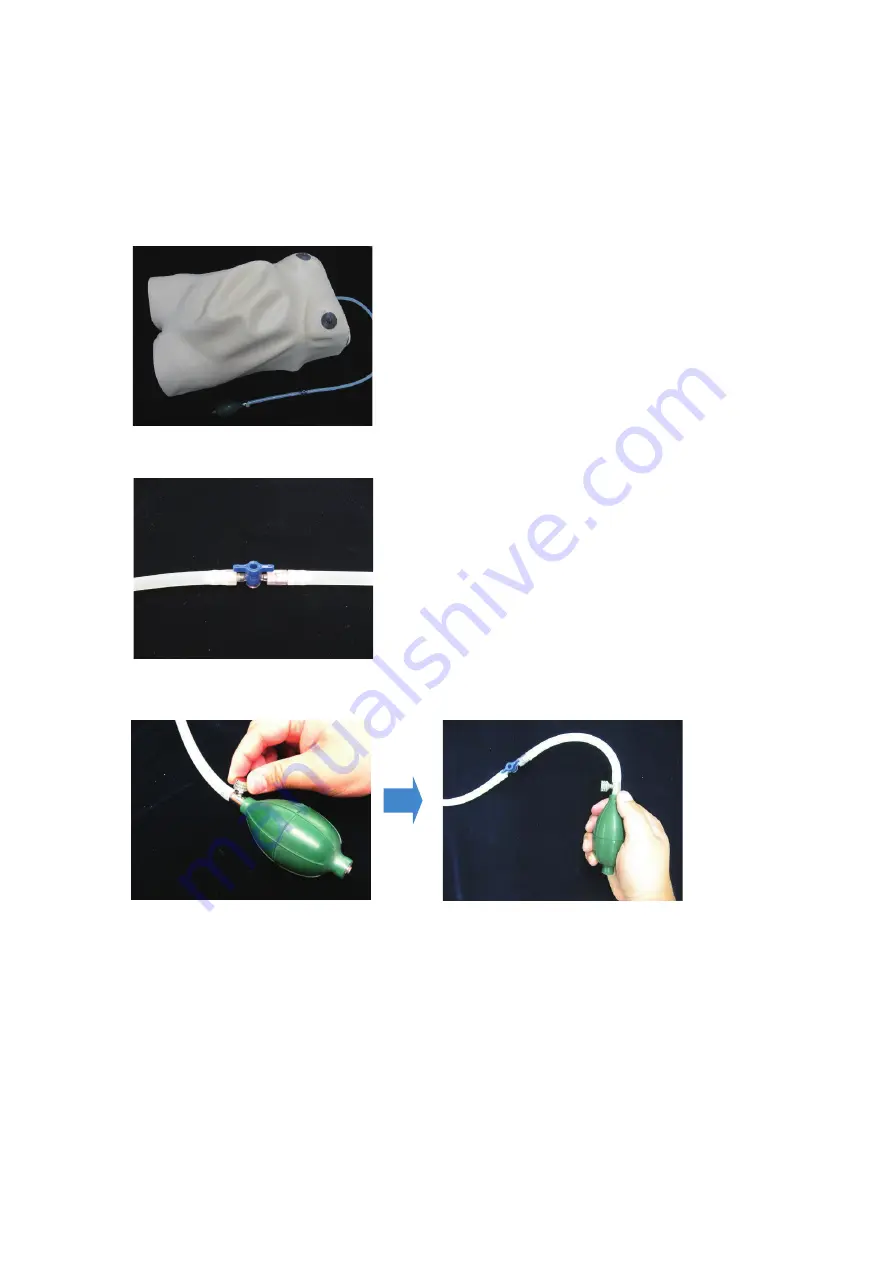
3-3. Attach the skin

1)  After anchoring the abdominal wall piece to the fixation pins, place the skin over the main
  body.
    *Do not secure the hook and loop fasteners on the sides at this time.

2)  Open the two-way stopcock.

3)  Twist the valve on the rubber bladder clockwise to close it, and fill the rubber bladder with air.

[Caution]
  When an excessive amount of air is injected into the amnion, the amnion may burst. When 

injecting air, feel the abdomen of the model to check the tension in the amnion.

[REFERENCE]
  As the volume of air in the amnion becomes larger, the situation where palpation is more 

difficult can be simulated. Using a smaller volume of air simulates the situation where 
palpation is easier. Adjust to suit the situation.


Summary of Contents for LM-043N

Page 1: ...ure correct use of the product and store it in a safe place for easy access Manufacturer KOKEN CO LTD 1 4 14 Koraku Bunkyo ku Tokyo 112 0004 JAPAN URL http www kokenmpc co jp E mail customer kokenmpc co jp EU Authorized Representative for KOKEN CO LTD EC REP MDSS GmbH Schiffgraben 41 30175 Hannover Germany www mdss com 2015 2021 KOKEN CO LTD C 1 1014 2 01 05 ...

Page 2: ...e or after washing it may be difficult to set the skin in place In these cases apply baby powder provided as an accessory liberally to the abdominal wall piece See Caring for the Model on page 10 4 The skin may become sticky from the oil component in the abdominal wall piece If this happens wash the skin in water to remove the oil before use To prevent the oil from getting onto the skin always pla...

Page 3: ...ension in the amnion 13 When setting the skin on the body the skin may have wrinkles or sags due to the construction of the model Please note that it may not always be possible to completely remove these wrinkles and sags 14 Storing the model for an extended period in a high or low temperature environment or under exposure to direct sunlight may cause the oil component in the abdominal wall piece ...

Page 4: ...Outline and Features 2 Components and Configuration 3 Setting up the Model 3 1 Attach the fetus in amnion 3 2 Attach the abdominal wall piece 3 3 Attach the skin 3 4 Turn on the power 4 Caring for the Model 5 Specifications ...

Page 5: ...al silicone rubber with an appearance and texture that closely simulates human skin for realistic practice 2 The model contains a pelvis that enables realistic palpation to check the pubic symphysis and the ilium during uterine fundal height measurement and external pelvimetry with a sensation that closely resembles an actual human body 3 The amnion can be filled with air to make handling and cont...

Page 6: ...pads 1 small 1 large 2 Baby powder 1 Abdominal wall protective sheet 1 Storage bag 1 Instruction Manual this document 1 large small About the AC Adapter This model does not come with an AC adapter Please use an AC adapter with the following specifications Rated Output 15VDC 1 2A Rated Input AC100 240V 50 60Hz Plug Shape Inner diameter ø2 1mm Outer diameter ø5 5mm Center minus ...

Page 7: ... place a birth canal pad as shown below Connect the fetal heartbeat cable No birth canal pad Seitz method Birth canal pad small normal Birth canal pad large Seitz method 3 As shown in the illustration thread the air feed tube through the panel from the inside of the body to outside the body and set the fetus in amnion in the body The position and orientation of the fetus in amnion can be readily a...

Page 8: ...part marks on the abdominal wall piece are positioned as shown below 2 Anchor the abdominal wall piece onto the fixation pins on the body Four fixation pins are supplied 8 Chest side Leg side s Near the left and right armp Fixation pin wall piece Upper part Lower part Chest side Leg side Near the solar plexus Near the left and right armpit Near the groin Fixation pin Abdominal wall piece Upper par...

Page 9: ...kwise to close it and fill the rubber bladder with air Caution When an excessive amount of air is injected into the amnion the amnion may burst When injecting air feel the abdomen of the model to check the tension in the amnion REFERENCE As the volume of air in the amnion becomes larger the situation where palpation is more difficult can be simulated Using a smaller volume of air simulates the sit...

Page 10: ...k and loop fasteners Depending on the volume of air injected it may not always be possible to completely remove these wrinkles and sags 3 4 Turn on the power 1 Connect the AC adapter connector to the AC adapter jack on the panel Plug in the cord and press the power switch on the panel 2 Adjust the fetal heartbeat volume with the VOLUME dial on the panel and the speed of the fetal heartbeat with th...

Page 11: ...ap the abdominal wall piece in the abdominal wall protective sheet for storage 3 If the abdominal wall piece becomes sticky apply the baby powder provided as an accessory generously to the piece 3 If the model becomes dirty wipe it with a moist gauze or similar soft material using a neutral solvent diluted with water Do not clean it with rubbing alcohol thinners benzene or other organic solvents 4...

Page 12: ...5 Specifications Product name Length Width Height Weight Maternity Model Type II Main Body Approx 35 cm Approx 52 cm Approx 23 cm Approx 11 Kg Storage bag Approx 35 cm Approx 63 cm Approx 35 cm Approx 1 Kg ...

Reviews: