8
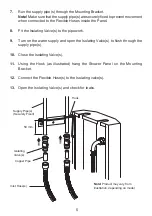
Securing Screws
Finish the Installation
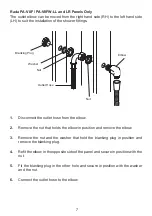
1.
Remove the Shower Panel and the Hook and locate the Shower Panel onto
the Mounting Bracket.
Note!
Retain the Hook inside the Shower Panel for servicing purposes.
2.
Fix the bottom of the Shower Panel to the wall using the Securing Screws
(supplied).
3.
This completes the installation of your Rada Shower Panel.
Refer to the separate Product Manual for details on the commissioning and
operating procedures for the individual product requirements.
Rada PA-V8F / PA-V8FW-LL and LR Panels
Only
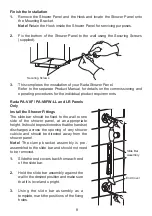
Install the Shower Fittings
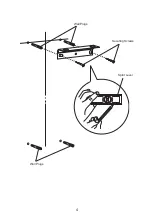
The slide bar should be fixed to the wall to one
side of the shower panel, at an appropriate
height. It should be positioned so that the handset
discharges across the opening of any shower
cubicle and should be directed away from the
shower panel.
Note!
The clamp bracket assembly is pre-
assembled to the slide bar and should not need
to be removed.
End Cover
Slide Bar
Assembly
1.
Slide the end covers back from each end
of the slide bar.
2.
Hold the slide bar assembly against the
wall in the desired position and make sure
that it is level and upright.
3.
Using the slide bar assembly as a
template, mark the positions of the fixing
holes.

