Product Operations
Battery Charging
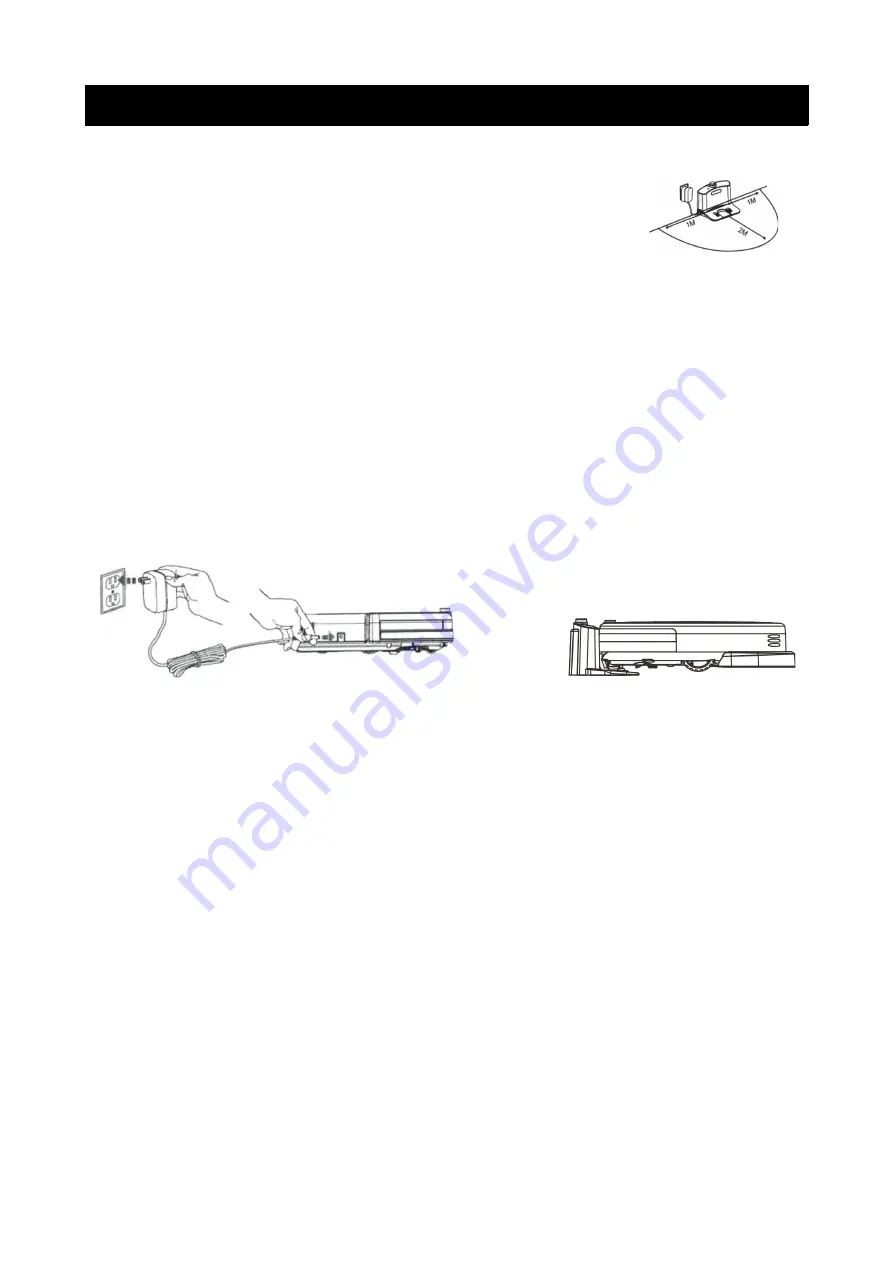
1. Place the Self charging base
Note: place the self charging base against the wall. Please
remove any obstacles from approximately 1m from the sides
and 2m to the front.
2. Turn on the Power Switch
Once turned on, the display will flash. If the unit does not receive any commands
for 20 seconds after being switched on, it will go into Sleep mode.
◦
If the power switch is turned off, scheduling data will be erased.
◦
If the power switch is turned off, the unit will not charge at the charging
station.
3. Manual Battery Charge
A: Plug the adapter power cord into the unit power socket first, then plug the
AC adapter into a wall outlet.
B: Then connect the charging base with the AC adapter to the wall outlet and
power on. Press HOME on the vacuum unit or the remote to make the vacuum
return to its charging base.
Notes:
◦
Turn the power switch ON before starting to charge the battery.
◦
When the cleaner is charging, it will display 1 to 5. Once fully charged, all
of the numbers “1 2 3 4 5” will be displayed.
◦
Before the first use, charge the vacuum robot for 12 hours. When charging
is finished, the display will show “1 2 3 4 5”.
◦
Before first time use, let the cleaner do cleaning until the battery is all used
up.
◦
After the battery is used up, recharge the unit as quickly as possible.
◦
If the cleaner is not to be used for a long time, please turn the power
switch off.
◦
Do not operate the cleaner while it is charging.
4. Auto Charging
The cleaner will automatically return to the charging station once cleaning is
done, or the battery is running low.
◦
When the battery is running low, the display will show “1 2” and the unit
will beep. Please keep the self-charging base plugged in, otherwise the
unit will not be able to locate the base to perform auto battery charging.
7
A
B
Summary of Contents for KAROBOTVACCA
Page 1: ......
Page 13: ...Exploded Product Diagram 12...


