4
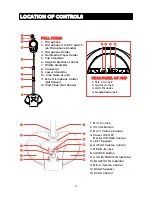
1. Screw the Lower Stand Bar into the Amp and rotate
clockwise until tight.
2. Insert the Middle Stand Bar into the Lower Stand Bar and
tighten the Height Adjustment Collar.
3. Insert the Multimedia Player Holder onto the Top Stand Bar
and rotate clockwise until tight.
4. Insert the Microphone into the top Microphone Holder.
5. Insert the Microphone’s plug into the MIC 1 In Jack on the top of the
Amp.
6. Adjust the desired height of the stand using the Height Adjustment
Collar.
HEADPHONES JACKS
For private listening, connect 3.5mm (32 ohm) stereo headphones (not included)
to the Headphone Jack. The speakers are automatically disconnected when the
headphones plug is inserted in this jack.
ASSEMBLY AND CONNECTIONS
ASSEMBLY AND CONNECTIONS
CONNECTING A GUITAR
Insert a cable from the Audio Out jack on your Guitar to the Guitar In Jack on the
rear of this unit.
USING THE SECOND MICROPHONE (INCLUDED)
To use a second microphone (included), connect the Extra Microphone Holder to
the bar to hold the microphone, then insert the Microphone's Plug into the MIC-2
In Jack on the rear of the Amp.
CONNECTING AN EXTERNAL UNIT
You can connect an external unit to this unit, such as a CD/CD+G player, etc.
Simply connect an audio cable (not included) from the AUX-IN Jacks on this unit
to the external unit's AUX OUT jacks. This will allow you to broadcast the external
unit's sound through this unit's speakers. Make sure both units are turned on,
press the SOURCE Button repeatedly until the red indicator will stay lit to switch
to AUX IN mode. Adjust the volume using the Master Volume.
NOTES: Connecting the unit to an external audio source will allow you to
broadcast the external unit's sound through this unit's speakers.


