background image

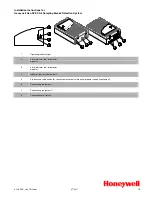
arrow. (see Figure 9) The tamper resist feature is now active and the battery
carrier can not be opened until the tamper resist feature is deactivated.

NOTE: Before activating the battery carrier tamper resist
feature, make sure a fresh battery is installed in the
unit and that the battery carrier is properly closed. If
the battery carrier tamper resist feature is activated
while the battery carrier is open, the battery carrier will
not close and the unit will be inoperable during the
loss of AC power.

To deactivate the battery carrier tamper resist, in order to
change the smoke alarm battery, remove the unit from the trim plate (see Smoke
Alarm Tamper Resist Feature if activated), disconnect the AC quick connector and
locate the small cut-out in the middle of the product label. Using a screwdriver, or
similar tool, move the slider away from the lock position  (opposite the direction
indicated by the arrow). The battery carrier can now be opened and the battery
changed.

4. OPERATION AND TESTING

OPERATION: The smoke alarm is operating once A.C. power is applied, fresh
batteries are installed and testing is complete.  When the smoke alarm ionization
chamber senses products of combustion, the horn will sound a loud (85db)
temporal alarm until the sensing chamber is cleared of smoke particles.

HUSH

TM

CONTROL: The “HUSH” feature has the capability of temporarily

desensitizing the alarm circuit for up to 8 minutes. This feature is to be used
only when a known alarm condition, such as smoke from cooking, activates the
alarm.The smoke alarm is desensitized by pushing the “TEST/HUSH” button on
the smoke alarm cover. If the smoke is not too dense, the alarm will silence
immediately. The red LED will illuminate for 1.5 seconds every 8-10 seconds
while in hush. This indicates that the alarm is in a temporarily desensitized condi-
tion. The smoke alarm will automatically reset after approximately 8 minutes and
sound the alarm if particles of combustion are still present. The “HUSH” feature
can be used repeatedly until the air has been cleared of the condition causing the
alarm. Pushing the Test/Hush button on the alarm will end the hush period.

This alarm has a low battery HUSH feature. If the alarm is sounding a low
battery warning chirp, you can silence this chirp for approximately 13 hours by
pressing the Test/Hush button.

NOTE: DENSE SMOKE WILL OVERRIDE THE HUSH CONTROL FEATURE AND
SOUND A CONTINUOUS ALARM.

CAUTION: BEFORE USING THE ALARM HUSH FEATURE, IDENTIFY THE
SOURCE OF THE SMOKE AND BE CERTAIN A SAFE CONDITION EXISTS.

FIGURE 9

1260-7205-01(820-0394G-EN)_v1.qxd:_  2011.5.16  10:15 AM  Page 9

Summary of Contents for i12060A

Page 1: ...ment from another manufacturer into an existing Kidde system could result in nuisance alarming fail ure to alarm or damage to one or all of the devices in the interconnect system Refer to the User s G...

Page 2: ...REFERENCE CONTENTS OF THIS MANUAL 1 RECOMMENDED LOCATIONS FOR SMOKE ALARMS 2 LOCATIONS TO AVOID 3 INSTALLATION INSTRUCTIONS 4 OPERATION AND TESTING 5 NUISANCE ALARMS 6 MAINTENANCE 7 LIMITATIONS OF SMO...

Page 3: ...cate it at a minimum of 4 10 cm from the side wall see FIGURE 1 When mounting the alarm on the wall use an inside wall with the top edge of the alarm at a minimum of 4 10 cm and a maximum of 12 30 5 c...

Page 4: ...HICLE HAS BEEN IN STORAGE BEFORE EACH TRIP AND AT LEAST ONCE A WEEK DURING USE 2 LOCATIONS TO AVOID In the garage Products of combustion are present when you start your auto mobile Less than 4 10cm fr...

Page 5: ...e the alarm WIRING INSTRUCTIONS FOR A C QUICK CONNECT HARNESS CAUTION TURN OFF THE MAIN POWER TO THE CIRCUIT BEFORE WIRING THE ALARM For alarms that are used as single station DO NOT CONNECT THE RED W...

Page 6: ...TED TO Black Hot Side of A C Line White Neutral Side of A C Line Red Interconnect Lines Red Wires of Other Units in the Multiple Station Set up BATTERY INSTALLATION See MAINTENANCE Section 6 for batte...

Page 7: ...larm see Figure 7 making sure that the locks on the connector snap into place Then push the excess wire back into the electrical box through the hole in the center of the mounting bracket 5 Install th...

Page 8: ...acket until you hear the tamper resist tab snap into place locking the alarm on the mounting bracket Using the tamper resist feature will help deter children and others from removing the alarm from th...

Page 9: ...ill sound a loud 85db temporal alarm until the sensing chamber is cleared of smoke particles HUSHTM CONTROL The HUSH feature has the capability of temporarily desensitizing the alarm circuit for up to...

Page 10: ...activated until pushing the Test Hush Button resets it or will time out between 11 to 13 hours In an interconnected installation only the memory of the originating alarm will be activated Hush mode T...

Page 11: ...T FEATURE IN SECTION 3 FOR REMOVAL INSTRUCTIONS To remove the alarm from the trim ring rotate the alarm counter clockwise in the direction of the OFF arrow on the cover To disconnect the A C power har...

Page 12: ...it is not necessary USE ONLY THE FOLLOWING 9 VOLT BATTERIES FOR SMOKE ALARM BATTERY REPLACEMENT Carbon zinc type EVEREADY 1222 GOLD PEAK 1604P OR 1604S Alkaline type ENERGIZER 522 DURACELL MN1604 OR M...

Page 13: ...the fire too old or young or physically or mentally impaired such that they cannot escape even when warned early enough that escape should be possible For these people other strategies such as protect...

Page 14: ...lan indicating all doors and windows and at least two 2 escape routes from each room Second story windows may need a rope or chain ladder Have a family meeting and discuss your escape plan showing eve...

Page 15: ...uations where a smoke alarm may not be effective to protect against fire For instance Smoking in bed Leaving children unsupervised Cleaning with flammable liquids such as gasoline Fires where the vict...

Page 16: ...smoke alarms for those areas for increased protection The additional areas include the basement bedrooms dining room furnace room utility room and hallways not protected by the required smoke alarms...

Page 17: ...l that your smoke alarm is defective in any way do not tamper with the unit Return it for servicing to KIDDE 1016 Corporate Park Dr Mebane NC 27302 1 800 880 6788 See Warranty for in warranty returns...

Page 18: ...ED WARRANTY SHALL NOT IN ANY CASE EXCEED THE COST OF REPLACEMENT OF SMOKE ALARM AND IN NO CASE SHALL KIDDE OR ANY OF ITS PARENT OR SUB SIDIARY CORPORATIONS BE LIABLE FOR CONSEQUENTIAL LOSS OR DAMAGES...

Reviews: