


TM0064
Page 48 of 91
Issue 2.01
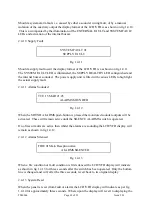
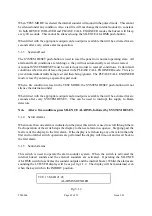
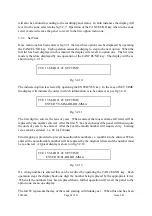
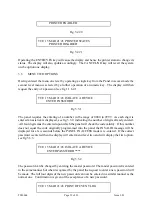
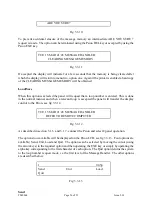
will also be actioned according to the resulting panel status. In both instances the display will
revert to the zone select status fig 3.2.7. Operation of the CANCEL/NO key when in the zone
select mode will cause the panel to revert to the first option menu one.
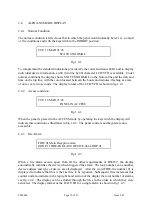
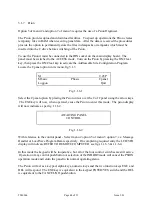
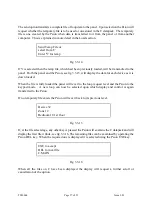
3.2.2 Set Time
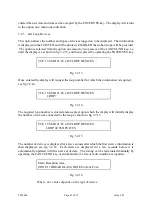
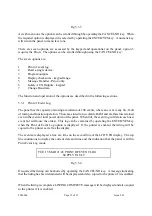
Once menu one has been entered, fig 3.2.1 the next three options can be displayed by operating
the CANCEL/NO key. Each operation causes the display to step to the next option. When the
full list has been displayed in this manner the display will revert to option one. The Set time
mode is therefore displayed by one operation of the CANCEL/NO key. The display will be as
shown in fig 3.2.10.
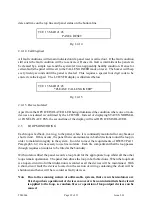
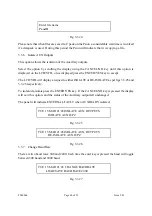
TUE 15 MAR 21:45 SET TIME
Fig 3.2.10
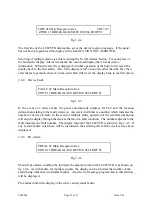
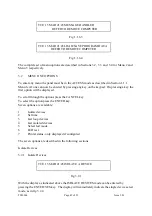
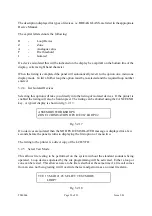
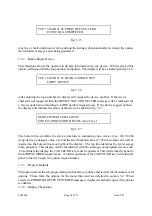
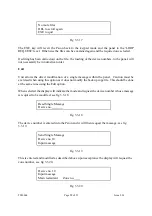
The indicated option is selected by operating the ENTER/YES key. In the case of SET TIME
the display will indicate the order in which information is to be entered, as per fig 3.2.11.
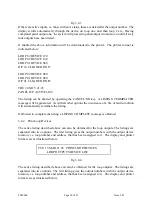
TUE 15 MAR 21:45 SET TIME
ENTER YY-MM-DD-HH-MM-w
Fig 3.2.11
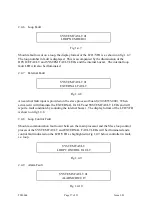
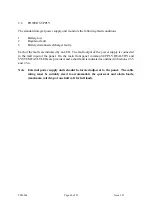
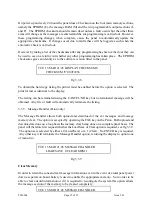
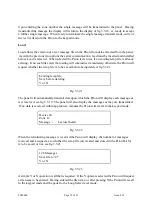
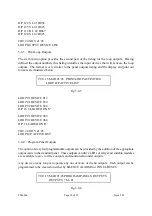
The first digit to enter is the tens of years. When entered, the most extreme left letter will be
replaced by the number entered. After the first 'Y' has been changed the panel will then require
the units of years to be entered. After the year the month number will require entry. Leading
zeros must be entered , i.e. 02 for February.
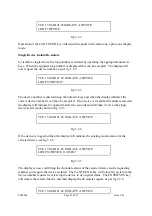
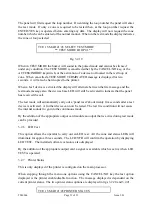
Error trapping is provided to prevent non-allowable numbers, i.e. month 14 to be entered. When
entered the non-allowable number will be replaced by the original letters and the number must
be re-entered. A typical display is shown in fig 3.2.12.
TUE 15 MAR 21:45 SET TIME
ENTER 90-01-DD-HH-MM-w
Fig 3.2.12
If a wrong number is entered this can be rectified by operating the CANCEL/NO key. Each
operation steps the display back one digit the number being replaced by the appropriate letter.
When all the numbers have been replaced then a further operation will revert the panel to the
option one, menu one display.
The last W represents the day of the week starting with Sunday as 1. When this unit has been


