TK-7360/7360H/7360H
(
V
)
8
■
Installation Procedure: Method A
1. Remove the two screws on both the right and left sides
of the transceiver, then remove the cabinet and top pack-
ing from the transceiver.
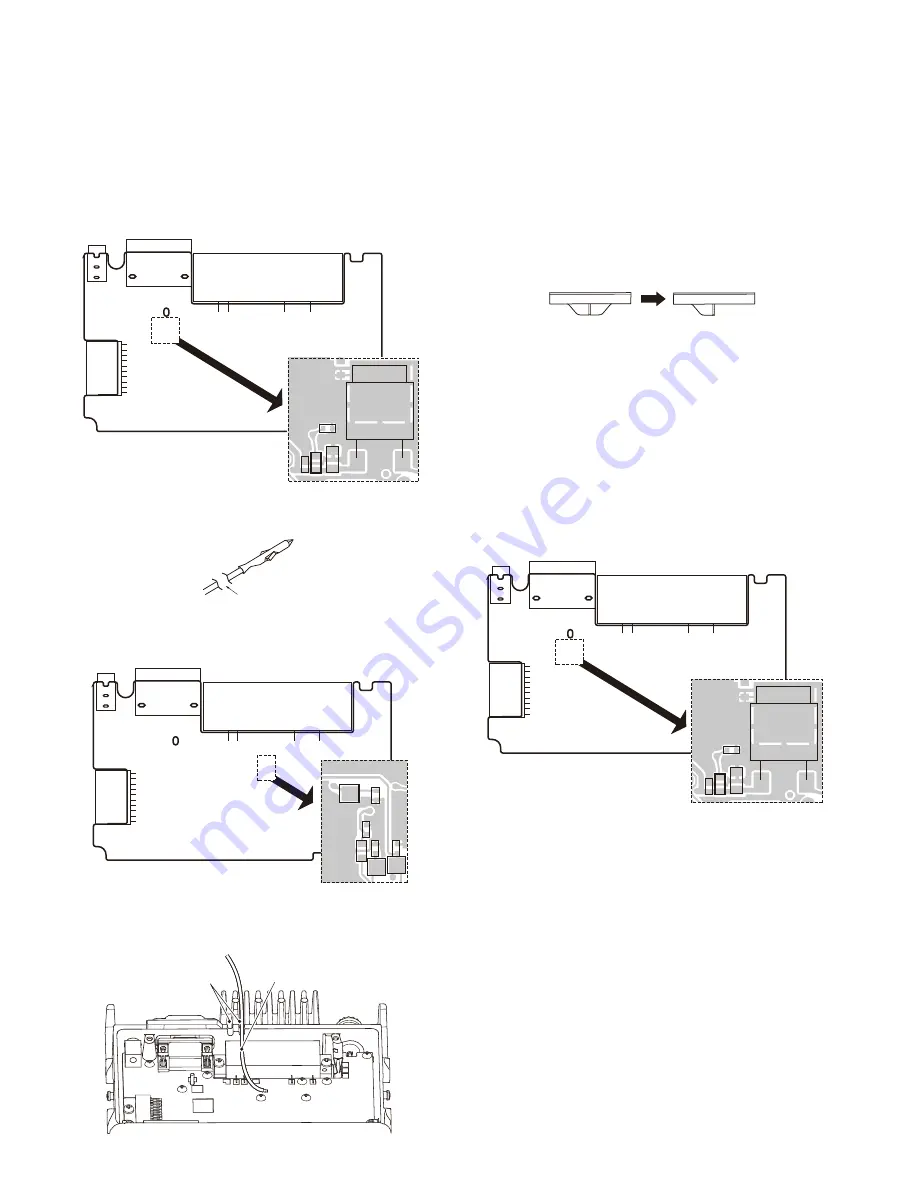
2. Remove the chip resistor R863 (4.7k
Ω
) on the TX-RX
unit.
TX-RX unit
Component side
R863
3. Cut the crimp terminal side of the KCT-18 using a pair of
nippers or similar tool.
Cut
4. Solder the cable side cut in the above step 3 to the “IGN”
pad on the TX-RX unit.
TX-RX unit
Component side
IGN
5. Dress the KCT-18 cable as shown in the fi gure. The KCT-
18 cable needs to pass through one of two indentations
located on the rear panel of the transceiver.
KCT-18
Indentation part
6. Cut off the projection of the top packing using a pair of
nippers or similar tool.
If the KCT-18 cable is dressed to be routed through the
indentations on the right side in step 5, the right side of
the projection needs to be cut off. If the KCT-18 cable is
dressed to be routed through the indentations on the left
side, the left side of the projection needs to be cut off.
Following is a fi gure presenting an example for when the
right side of the projection is cut off.
7. Reinstall the top packing. Check the correct fi tting of the
top packing, then reinstall the cabinet and two screws
for the right and left sides.
8. Connect the other side of the KCT-18 to the ignition line
of the car.
■
Installation Procedure: Method B
1. Remove the two screws on both the right and left sides
of the transceiver, then remove the cabinet and top pack-
ing from the transceiver.
2. Remove the chip resistor R863 (4.7k
Ω
) on the TX-RX
unit.
TX-RX unit
Component side
R863
3. Remove the ACC. cap on the rear of the transceiver.
4. Connect the D-sub connector of the KCT-60 to the D-sub
15-pin terminal of the transceiver.
5. Insert the crimp terminal side of the KCT-18 to pin 2 of
the square plug.
6. Connect the square plug to the 15-pin connector of the
KCT-60.
7. Connect the other side of the KCT-18 to the ignition line
of the car.
Note:
You must set up using the KPG-135D(K) or KPG-
135D(M).
INSTALLATION


