background image

5

Preparations

DVT-6200 (EN/K,E,X)

Caution : Read this page carefully to ensure

safe operation.

6. Temperature

  – The appliance may not function

p r o p e r l y   i f   u s e d   a t   e x t r e m e l y   l o w ,   o r   f r e e z i n g
temperatures. The ideal ambient temperature is
above +5°C (41°F).

7. Heat

 – The appliance should be situated away from

heat sources such as radiators, heat registers, stoves,
or other appliances (including amplifiers) that produce
heat.

8. Electric shock

 – Care should be taken so that objects

do not fall and liquid is not spilled into the enclosure
through openings.  If a metal objects, such as a hair
pin or a needle, comes into contact with the inside of
this appliance, a dangerous electric shock may result.
For families with children, never permit children to
put anything, especially metal, inside this appliance.

9. Enclosure removal

 – Never remove the enclosure.

If the internal parts are touched accidentally, a serious
electric shock might occur.

10.Magnetic fields

  – Keep the appliance away from

sources of magnetic fields such as TV sets, speaker
systems, radios, motorized toys or magnetized
objects.

11.Cleaning

  – Unplug this appliance from the wall

outlet before cleaning.  Do not use volatile solvents
such as alcohol, paint thinner, gasoline, or benzine,
etc. to clean the cabinet.  Use a clean dry cloth.

12.Accessories

 – Do not place this appliance on an unstable

cart, stand, tripod, bracket, or table. The appliance may fall,
causing serious injury to a child or adult, and serious
damage to the appliance. Use only with a cart, stand,
tripod, bracket, or table recommended by the manufacturer,
or sold with the appliance. Any mounting of the appliance
should follow the manufacturer’s instructions, and should
use a mounting accessory recommended by the
manufacturer. An appliance and cart combination should
be moved with care. Quick stops, excessive force, and
uneven surfaces may cause the appliance and cart
combination to overturn.

Please read all of the safety and operating instructions
before operating this appliance. Adhere to all warnings on
the appliance and in the instruction manual. Follow all the
safety and operating instructions.    T h e s e   s a f e t y   a n d
operating instructions should be retained for future
reference.

1. Power sources

 – The appliance should be connected to

a power supply only of the type described in the instruction
manual or as marked on the appliance.  If you are not sure
of the type of power supply to your home, consult your
appliance dealer or local power company. For appliances
intended to operate from battery power, or other sources,
refer to the instruction manual.

2. Power-cord protection

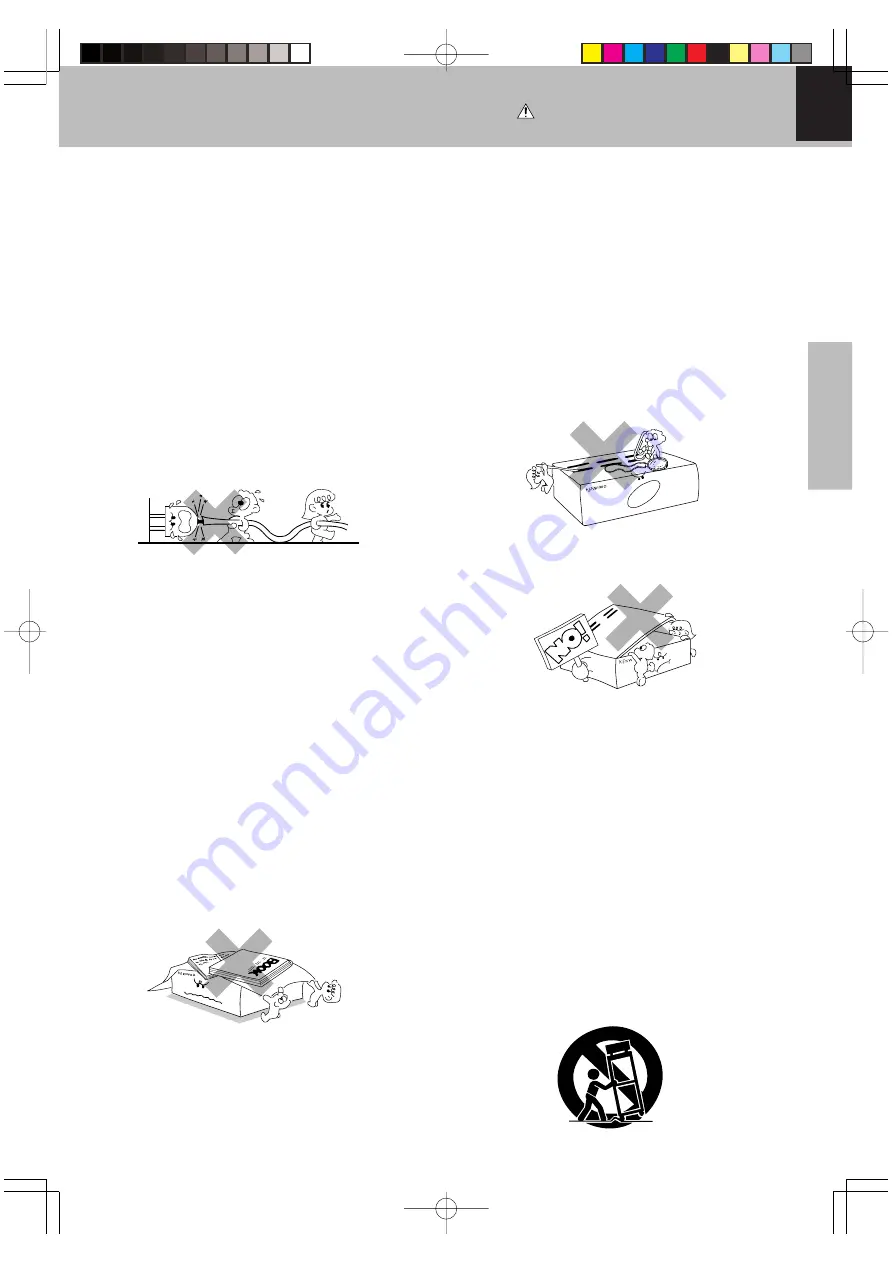
 – Power-supply cords should

be routed so that they are not likely to be walked on
or pinched by items placed upon or against them,
pay particular attention to cords at plugs, convenience
receptacles, and the point where they exit from the
appliance.

3.

CAUTION 

– Polarization

 – This appliance may

be equipped with a polarized alternating-current line plug (a
plug having one blade wider than the other). This plug will
fit into the power outlet only one way. This is a safety
feature. If you are unable to insert the plug fully into the
outlet, try reversing the plug. If the plug should still fail to
fit, contact your electrician to replace your obsolete outlet.
Do not defeat the safety purpose of the polarized plug.

4. Ventilation

  –  Slots and openings in the cabinet are

provided for ventilation and to ensure reliable operation of
the appliance and to protect it from overheating, and these
openings must not be blocked or covered. The appliance
should be situated so that its location or position does not
interfere with its proper ventilation.
To maintain good ventilation, do not put records or a table-
cloth on the appliance. Place the appliance at least 10 cm
away from the walls.
Do not use the appliance on a bed, sofa, rug or similar
surface that may block the ventilation openings.  This
appliance should not be placed in a built-in installation such
as a bookcase or rack unless proper ventilation is provided
or the manufacturer’s instructions have been adhered to.

5. Water and moisture

 – The appliance should not be

used near water - for example, near a bathtub,
w a s h b o w l ,   k i t c h e n   s i n k ,   l a u n d r y   t u b ,   i n   a   w e t
basement, or near a swimming pool, etc.

IMPORTANT SAFEGUARDS

*5386/01-17/EN/J

03.7.8, 11:04 AM

Page 5

Adobe PageMaker 6.5J/PPC

Summary of Contents for DVT-6200

Page 1: ...DVT 6200 DVD HOME THEATER SYSTEM INSTRUCTION MANUAL B60 5386 08 00 K E X OC 03 04 5386 01 17 EN J 03 7 8 11 04 AM Page 1 Adobe PageMaker 6 5J PPC ...

Page 2: ...MOISTURE Beforeapplyingpower Introduction Caution Read this page carefully to ensure safe operation CAUTION RISK OF ELECTRIC SHOCK DO NOT OPEN The marking of products using lasers For countries other than U S A and U S Military Inside this laser product a laser diode classified as Class 2 laser radia tion is contained as alerted by the internal caution label shown above Do not stare into beam or v...

Page 3: ...26 Put back to the Defalt Setting 26 DVD menu language code list 27 Setting up LISTEN mode 28 What are LISTEN modes 28 To set the LISTEN mode manually 29 Speaker setting 30 Speaker level setting 30 Delay time setting 31 Level setting using a music source 32 Let s put out some sound 34 Basic use method 34 Receiving broadcast station 36 Storing the broadcast stations one by one presetting 37 Using R...

Page 4: ...se harmful interference unless the modifications are expressly approved in the instruction manual The user could lose the authority to operate this equipment if an unauthorized change or modification is made NOTE This equipment has been tested and found to comply with the limits for a Class B digital device pursuant to Part 15 of the FCC Rules These limits are designed to provide reasonable protec...

Page 5: ...al Follow all the safety and operating instructions These safety and operating instructions should be retained for future reference 1 Power sources The appliance should be connected to a power supply only of the type described in the instruction manual or as marked on the appliance If you are not sure of the type of power supply to your home consult your appliance dealer or local power company For...

Page 6: ...s location of antenna discharge unit connection to grounding electrodes and requirements for the grounding electrode See Figure 18 Power lines An outside antenna system should not be located in the vicinity of overhead power lines or other electric light or power circuits or where it can fall into such power lines or circuits When installing an outside antenna system extreme care should be taken t...

Page 7: ...that the display shown appears 3 Set the POWER ON OFF switch to OFF Maintenance of the unit Do not use contact cleaners because it could cause a malfunction Be specially careful not to use contact cleaners containing oil for they may deform the plastic component During playback the disc rotates at high speed in the player There fore to avoid danger never use a cracked or deformed disc or a disc re...

Page 8: ...n In case of an SVCD the possible play back time becomes shorter Indicates the region code where the disc can be played Number of voice languages recorded with the audio function The number in the icon indicates the number of voice languages Max 8 languages Number of subtitle languages recorded with the subtitle function The number in the icon indicates the number of subtitle languages Max 32 lang...

Page 9: ...IDEO disc does not carry any indication of the region code it may sometimes unable to be played on this player due to certain restrictions Regioncodesintheworld The DVD players are given a region code according to the country or area it is marketed as shown in the follow ing map Professional use disc Air Line cabin service Restrictions due to difference between discs Inhibition icon Some DVD and V...

Page 10: ... shown below Top and bottom areas are dark Top and bottom edges are not displayed Picture turbulence due to sync unmatching Major Countries Areas China U K Germany Australia New Zealand Kuwait Singapore etc Japan Taiwan Korea USA Canada Mexico Philippines Chile etc For Europe and Australia This unit has a function for changing the video format according to the TV type The initial setting of this u...

Page 11: ...op of unit Leave a space around the unit from the largest outside dimension including pro jection equal or greater than shown below Top panel 50 cm Side panel 10 cm Back panel 10 cm Malfunction of microcomputer If operation is not possible or erroneous display appears even though all connec tions have been made properly reset the microcomputer referring to In case of difficulty Y Loudspeakers Fron...

Page 12: ...ecommend using an out door antenna Remove the indoor antenna if you con nect one outdoors 1 Connect to the antenna terminal 2 Locate the position providing good reception condition 3 Fix the antenna FM outdoor antenna commercially available Lead the 75 Ω coaxial cable connected to the FM outdoor antenna into the room and con nect it to the FM 75 Ω terminal Caution Read this page carefully to ensur...

Page 13: ...he accessory SCART plug to the SCART terminal of the TV and connect the COMPOSITE video cord TV Satellite tuner System Connections Note Note Note 0nly for some areas Depressed and keep pressing the key Each time the key is being held down the setting changes as follows 1 ON 2 OFF ON When progressive scanning is unavailable with certain discs the scanning method is switched automatically to interla...

Page 14: ...yer excessive noise will be exhibited To avoid possible damage to the audio system proper precautions should be taken by the consumer if the analog outputs are connected directly to an amplification system To enjoy DTS Digital Surround playback an external 5 1 channel DTS Digital Surround decoder system must be connected to the digital output S P DIF AES EBU or TosLink of the CD LD or DVD player T...

Page 15: ...ion Controls and indicators TITLE indicator TRACK indicator CHAP CHAPTER indicator ST Stereo indicator TUNED indicator RDS indicator only for Europe Standby mode While the standby indicator is lit a small amount of power in supplied to the system to back up the memory This is called standby mode Under the condition the system can be turned ON by the remote control unit DOLBY DIGITAL indicator DOLB...

Page 16: ...ly press the keys securely by leaving an interval of 1 second or more between pressing of keys Operating range approx Remote sensor 1 The provided batteries are intended for use in operation checking and their service life may be short 2 When the remote controllable distance becomes short replace both of the batteries with new ones 3 If direct sunlight or the light of a high frequency fluorescent ...

Page 17: ...17 Preparations DVT 6200 EN K E X 5386 01 17 EN J 03 7 8 11 05 AM Page 17 Adobe PageMaker 6 5J PPC ...

Page 18: ...y Choose this setting to reproduce the picture quality of FILM material Choose this setting to reproduce the picture quality of VIDEO material This switches the language for the on screen display When this is set to ON the ANGLE mark will be displayed when a multiangle scene is reached during playback of a DVD This switches the CLOSED CAPTION ON or OFF closed caption is a subtitle display system d...

Page 19: ...EO OUTPUT only for some areas AUDIO SUB TITLE DISC MENU PARENTAL This can restrict playback of adult oriented DVD discs that you do not want to be seen by children However even when a DVD disc is marked Adult oriented or so on the label its viewing cannot be restricted unless the restriction level is recorded in the disc itself 8 Parental lock level Level 8 All DVDs can be played back Factory pres...

Page 20: ...y 7 Press Cursor up down 5 keys on the remote to select EXIT SETUP then press the ENTER key 3 Press Cursor up down 5 keys on the remote to select PIC MODE then press the Cursor right 3 key to access the sub features 1 During stop mode press MENU key on the re mote 2 Press Cursor up down 5 keys on the re mote to select the GENERAL SETUP then press the ENTER key to access the sub fea tures 4 Press C...

Page 21: ... down 5 keys on the remote to select MAIN PAGE then press the ENTER key Please refer to pages 18 and 19 for setup 3 Press Cursor up down 5 keys on the remote to select OSD LANG then press the Cursor right 3 key to access the sub features 1 During stop mode press MENU key on the re mote 2 Press Cursor up down 5 keys on the re mote to select the GENERAL SETUP then press the ENTER key to access the s...

Page 22: ...down 5 keys on the remote to select MAIN PAGE then press the ENTER key Please refer to pages 18 and 19 for setup 3 Press Cursor up down 5 keys on the remote to select CAPTIONS then press the Cursor right 3 key to access the sub features 1 During stop mode press MENU key on the re mote 2 Press Cursor up down 5 keys on the re mote to select the GENERAL SETUP then press the ENTER key to access the su...

Page 23: ...s on the remote to select MAIN PAGE then press the ENTER key This function operates only at the time of playback of DVDs recorded with Dolby Digital 3 Press Cursor up down 5 keys on the remote to select VIDEO OUTPUT then press the Cursor right 3 key to access the sub features 1 During stop mode press MENU key on the re mote 2 Press Cursor up down 5 keys on the re mote to select the PREFERENCE then...

Page 24: ...t 4 digit code by press numeric keys on the remote 3 Press the ENTER key DVD menu language code list 3 Press Cursor up down 5 keys on the remote to select SUBTITLE then press the Cursor right 3 key to access the sub features 1 During stop mode press MENU key on the re mote 2 Press Cursor up down 5 keys on the re mote to select the PREFERENCE then press the ENTER key to access the sub features 4 Pr...

Page 25: ...d 19 for setup 3 Press Cursor up down 5 keys on the remote to select PARENTAL then press the Cursor right 3 key to access the sub features 1 During stop mode press MENU key on the re mote 2 Press Cursor up down 5 keys on the re mote to select the PREFERENCE then press the ENTER key to access the sub features 4 Press Cursor up down 5 keys on the remote to select specific level then press the ENTER ...

Page 26: ...d password new password and enter new password again to confirm then press the ENTER key The password set at the time of ship ping from the factory is 0000 4 press the ENTER key to select CHANGE Please refer to pages 18 and 19 for setup 3 Press Cursor up down 5 keys on the remote to select DEFAULTS then press the Cursor right 3 key to access the sub features 1 During stop mode press MENU key on th...

Page 27: ...andic 1299 Cambodian 1300 Kannada 1301 Korean 1305 Kashmiri 1307 Kurdish 1311 Kirghiz 1313 Latin 1326 Lingala 1327 Laothian 1332 Lithuanian 1334 Latvian Lettish 1345 Malagasy 1347 Maori 1349 Macedonian 1350 Malayalam 1352 Mongolian 1353 Moldavian 1356 Marathi 1357 Malay 1358 Maltese 1363 Burmese 1365 Nauru 1369 Nepali 1376 Dutch 1379 Norwegian 1393 Occitan 1403 Afan Oromo 1408 Oriya 1417 Punjabi 1...

Page 28: ...advanced version of the decoding technology used with Dolby Pro Logic It inputs 2 channel signals from a Dolby Surround encoded source and reproduces 5 channel signals in which the surround channel is divided into independent channels for the left and right Dolby Pro Logic II has the MOVIE mode and MUSIC mode and the MUSIC mode enables independent adjustment of three parameters including Panorama ...

Page 29: ...y Pro Logic II Music mode Display the PANOR OFF or ON then press the TRIM 5 keys to select on or off Dimension This controls the balance between the Front and Rear in 2 steps on the front and 2 steps on the rear Set this parameter to one of the Front steps if the surround effect is too strong or to one of the Back steps if it is too weak To change the Dimension press SET UP key twice at the time o...

Page 30: ...ter channel Cch C 0dB Right Front channel Rch R 0dB Right Surround channel RSch RS 0dB Left Surround channel LSch LS 0dB Subwoofer SW 0dB Reset as follows to match your listening environment The test tone is played back from the Left Front speaker Adjust the VOLUME CONTROL so that it is slightly loud and fix it there L Blinks L C R RS LS SW The speakers will be switched as follows in intervals of ...

Page 31: ...e delay time Delay time setting sets the delay time converted to the distance from the speaker to the listening position The front speakers L R can be adjusted between 40 feet 12 m and 3 feet 0 9 m The range which can be set for the center speaker C and the surround speakers LS RS duffers according to the setting for the front speakers A longer distance than for the front speakers can not be set T...

Page 32: ...essing the keys FRONT CENTER REAR and SW FRONT Front speakers Switching is done as follows each time the switch is pressed 1 L ch Left speaker 2 R ch Right speaker CENTER Center speaker REAR Rear Surround speakers Switching is done as follows each time the switch is pressed 1 LS ch Left surround speaker 2 RS ch Right surround speaker SW Subwoofer The speaker level can be changed in the range from ...

Page 33: ...DVT 6200 EN K E X Set Up functions 33 Preparations 5386 18 33 EN J 03 7 8 11 06 AM Page 33 Adobe PageMaker 6 5J PPC ...

Page 34: ...formed also when the EJECT key the PLAY PAUSE key the BAND key or the INPUT keys on the main unit is pressed during STANDBY mode When a disc is set in the disc tray and the DVD CD key is pressed disc playback will start automatically In case of operation with the remote control unit first select the input or device to be operated wit the INPUT SELECTOR keys etc and then perform the desired operati...

Page 35: ...sound Selecting the ACTIVE EQ Press the ACTIVE EQ key repeatedly Each press switches the mode 1 CINEMA 2 MUSIC 3 OFF This function provides for better playback of movies CINEMA etc REMOTE 5386 34 39 EN J 03 7 8 11 07 AM Page 35 Adobe PageMaker 6 5J PPC ...

Page 36: ...equency is changed by one step When a key is pressed continuously the frequency changes continuously Use the manual tuning mode when re ception is noisy due to weak reception In the manual mode stereo broadcasts are received in monaural Press the TUNING keys to receive the next tuned station automatically Press the 4 keys to select a preset station REMOTE Band display Preset number Tuning indicati...

Page 37: ...red preset number 3 REMOTE Press the ENTER key 4 REMOTE Repeat steps 1 to 4 to preset other sta tions Blinks In case of input with the numeric keys a preset number will be decided simply by input of a 2 digit number without pressing the ENTER key Presetting can be done with mixing of FM and AM stations Example 01 FM 90 00 02 AM 531 03 FM 88 00 Please perform the next operation while the indicator ...

Page 38: ...RT display 5 Current FM frequency display PS NAME If the PS information is being received the PS name BBC AFO NDR etc is shown on the display If the PS information is not received the original FM fre quency is shown Even though no RDS key is pressed the reception of PS information ensues the PS name is displayed RT display Text data accompanying the RDS broadcast scrolls across the display 64 char...

Page 39: ...UMENT Program Type Name Receiver Display PTY function The PTY information is composed of an identification sym bol which helps the FM radio to recognize the program type of each FM station The 29 PTY modes are shown in the display by pressing the PTY key Using the PTY search function Select the FM band fl 1 Press the PTY key 2 The PTY MODE POP M ROCK M etc ap pears on the display When the program t...

Page 40: ...REMOTE 1 Open the tray 2 Place a disc When the 6 key 3 key or open close 0 key is pressed while a tray is open the tray closes automatically and then playback begins Label side 3 PLAY key 7 Stop key TOP MENU key POWER ON OFF switch 7 STOP key 0 OPEN CLOSE key 6 PLAY PAUSE key Disc tray Note Note Note or When a Disc Menu appears on the screen In case of interactive DVDs a Disc Menu appears on the s...

Page 41: ...inning When the 4 key is pressed once during playback the chap ter or track being played will be played from the beginning Searching Press the 3 key at any time to resume normal playback 1 FF 2 X key or FR 2 X 1 key 2 FF 4 X key or FR 4 X 1 key 3 FF 8 X key or FR 8 X 1 key 4 FF 16X key or FR 16X 1 key 5 Normal playback 4 To skip backward To skip forward 1 1 1 1 1 To search backward FR To search fo...

Page 42: ... SCREEN key on the remote Each press the key switches the display At the time of DVD playback 1 Title number and chapter number display Example TITLE 01 02 CHAPTER 005 015 00 05 12 elapsed time of the title 2 TITLE REMAIN Remaining time of the title being played 3 CHAPTER ELAPSED Elapsed time of the chapter being played 4 CHAPTER REMAIN Remaining time of the chapter being played 5 OFF At the time ...

Page 43: ... press the AUDIO key on the re mote During playback press the SUBTITLE key on the remote Notes Notes Notes 1 The subtitle feature only works if the disc was cre ated with multiple subtitle tracks 2 The subtitle menu of the disc appears in some discs Notes Notes Various playback functions SUBTITLE 03 03 FRENCH The display is switched off when no operation is per formed for about 2 seconds Selectthe...

Page 44: ...ter all tracks of a disc have been played in random order playback will stop When playing a DVD the Random mode does not work When switching to RANDOM mode with a VCD in P B C ON mode the P B C mode will become OFF 1 During stop mode press the RANDOM key on the remote MP3 JPEG Random play R To repeat random play During random playback press the REPEAT key on the remote Each press the key switches ...

Page 45: ...nd the TITLE display blinks 3 REPEAT OFF Display 1 Press the A B key on the remote when you want to choose a scene sound as the beginning point 2 Press the A B key again to choose a scene sound as the end point Lit Lit The Repeat B Repeat A B display appears Display Display Example for the CHAPTER REPEAT To cancel repeat playback press the REPEAT key re peatedly until the REPEAT display goes out T...

Page 46: ...O SCAN key is pressed during introScan of a track the unit will return to normal playback starting with that track P B C on mode of VCD the IntroScan function does not work p 2 Press Cursor up down 5 keys on the re mote to select desired bookmark number Up to 14 bookmarks can be applied in the same way for one disc When the ENTER key is pressed at a previously marked bookmark that mark will be cha...

Page 47: ...ADD icon Add value onto PROGRAM LIST DELETE icon Delete value from PROGRAM LIST INSERT icon Insert value in PROGRAM LIST PLAY icon Play program play CLEAR icon When this icon is selected and the ENTER key is pressed the entire contents of the PROGRAM LIST will be deleted and the Program edit screen also will disappear 2 Select specific track by Press Cursor up down 5 keys 3 Select ADD icon on the ...

Page 48: ...he PROGRAM LIST and select the column to be deleted with the Cursor up down 5 keys The color of the column where the Cursor is lo cated will change 2 Press the Cursor left 2 key use the Cursor up down 5 keys to move the Cursor to the DE LETE icon and press the ENTER key P B C on mode of VCD the Progam play function does not work p In following case Program play would be released 1 When you open an...

Page 49: ... Depending on the software the jacket indication may differ from the above 4 Examples of operation keys and indications used during VCD playback KENWOOD operation key RETURN 4 3 Select ENTER Advancing Each time the RETURN key is pressed return is made to the next higher menu When an item is selected on the menu screen with the ENTER Select key or the numeric keys advance is made to the next lower ...

Page 50: ...U P B C key on the remote control unit To return to menu playback P B C on mode P B C off mode Press the MENU P B C key again Playbackwithoutusingthemenuplaybackfunction In case of a P B C compatible VCD To P B C On or Off Menu playback Note Note Note Playback will stop when P B C is switched on or off during playback 5386 49 55 EN J 03 7 8 11 03 AM Page 50 Adobe PageMaker 6 5J PPC ...

Page 51: ...te normally Confirming media and files Check to ascertain that MP3 files can be played back correctly on the personal computer in use prior to saving them onto the media Check to ensure that the saved file can be played back normally It is not possible to confirm that files can be played back correctly while they are being saved onto the media When saving files onto media Ensure that the session i...

Page 52: ...skipping to out side the folder being played is not possible ROOT MP3_MUSIC_1 MP3_MUSIC_2 JPEG_TRAVEL_1 JPEG_TRAVEL_2 1 2 3 4 N AV I Root folder Folders and files in the root folder Play mode display Program window SINGLE MP3_MUSIC_1 02 MY SONG 2 03 MY SONG 3 04 MY SONG 4 1 2 3 4 05 MY SONG 5 5 06 MY SONG 6 6 07 MY SONG 7 7 N AV I 0 0 0 3 2 8 01 MY SONG 1 PLAY Selected file Time display 1 During s...

Page 53: ...sible to rotating a picture During JPEG file playback press the Cursor 2 3 5 keys on the remote ROTATING ROTATING ROTATING ROTATING ROTATING ROTATING ROTATING ROTATING Display examples Press 3 key Press 2 key Press 5 key Press key Switching as shown below is done when the cursor keys are pressed 3 key 90 rotation in clockwise direction 2 key 90 rotation in counterclockwise direction 5 key Vertical...

Page 54: ...3 FAVORITE 6 24 FAVORITE 7 25 N AV I FAVORITE 1 RANDOM ON In case of RANDOM ON mode playback will stop after all files in the folder have been played back once To cancel random play 1 Press the stop 7 key to stop playback 2 Press the RANDOM key to cancel random play back To random repeat play During stop mode press the RANDOM key then press the REPEAT key on the remote In case of RANDOM REP mode a...

Page 55: ...V I PROG EDIT 01 MY SONG 1 01 MY SONG 1 03 MY SONG 3 FAVORITE 4 FAVORITE 8 2 1 3 4 5 05 MY SONG 5 6 06 MY SONG 6 0 0 0 8 1 4 PLAY MP3_MUSIC_1 02 MY SONG 2 03 MY SONG 3 04 MY SONG 4 11 12 13 14 05 MY SONG 5 15 06 MY SONG 6 16 07 MY SONG 7 17 N AV I PROG EDIT 01 MY SONG 1 01 MY SONG 1 03 MY SONG 3 FAVORITE 4 FAVORITE 8 2 1 3 4 5 05 MY SONG 5 6 FAVORITE 1 7 07 MY SONG 7 8 06 MY SONG 6 Selected file S...

Page 56: ... Tune to the frequency of the desired sta tion Install the outdoor antenna in an apart posi tion from the road Switch the suspected electric appliance OFF Install the TV or the system at an increased distance between them Preset stations with tunable frequencies Preset stations again Check the speaker connection Check the speaker connection If this does not help contact your dealer for service Sel...

Page 57: ... not turned on The connection cords are not properly con nected The picture is slightly disrupted during fast forward and fast reverse operations The audio output cords are not properly con nected The volume control of the TV or amplifier is not adjusted properly The player is in a special playback mode A nearby device is generating noise The disc is dirty The disc is damaged There is condensation...

Page 58: ...UBTITLE or the AUDIO key on the remote and select the language Select at the menu screen of the disc Select disc menu language Menu playback is available only with VCD discs recorded with P B C Press the MENU key of the remote control for several seconds while holding the stop 7 key on the main unit pressed THE PLAYER IS UNLOCKED will be dis played the mark will not be lit and op eration will beco...

Page 59: ...TSC PAL VIDEO OUTPUT Composite video output level impedance 1 Vp p 75 Ω S video output Y output level impedance 1 Vp p 75 Ω C output level impedance NTSC 0 286 Vp p 75 Ω PAL 0 3 Vp p 75 Ω Component video output only for some areas Y output level impedance 1 Vp p 75 Ω C b output level impedance 0 684 Vp p 75 Ω C r output level impedance 0 684 Vp p 75 Ω RGB output level SCART 0 7 Vp p 75 Ω Compressi...

Page 60: ... the spaces designated on the warranty card and in the space provided below Refer to the model and serial numbers whenever you call upon your dealer for information or service on this product Model Serial Number 5386 56 60 EN J 03 7 8 11 04 AM Page 60 Adobe PageMaker 6 5J PPC ...

Reviews: