

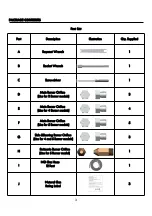
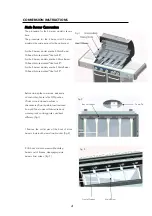
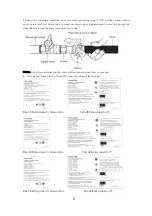


CONVERSION INSTRUCTIONS
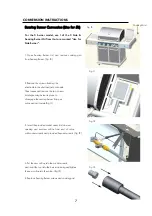
Before starting the conversion, make sure
all control knobs are in the OFF position,
LP tank valve is closed, and tank is
disconnected from regulator and removed
from grill. Next, open all lids and remove
warming rack, cooking grates, and heat
diffusers. (Fig. 1)
Fig. 1
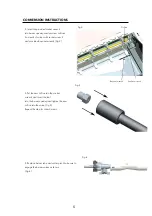
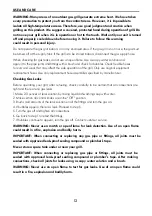
Main Burner Conversion
The procedure for the 5 burner model is shown
here.
The procedure for the 4 burner and 3 burner
models
is
the same, except for the parts used:
For the 5 burner model, use the 5 Main Burner
Orifices that are marked "Use for 5B".
For the 4 burner models, use the 4 Main Burner
Orifices that are marked "Use for 4B".
For the 3 burner models, use the 3 Main Burner
Orifices that are marked "Use for 3B".
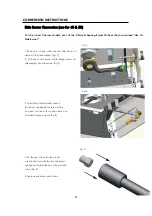
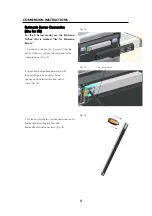
1. Remove the cotter pins at the back of main
burners to detach burners from bracket. (Fig. 2)
Cotter Pin
Back of Firebox
2. Lift back of main burners while sliding
burners out of firebox, disengaging main
burners from valves. (Fig. 3)
Fig. 2
Fig. 3
Front of Firebox
Main Burner
4