


HD PTZ Camera User Manual
19
1) Select a method from the dropdown list of VMS Method, "IP Address" or "Domain". If selecting
"IP Address", input VMS address in "VMS Address (IPv4)"; if selecting "Domain", input VMS
domain name in "Registered VMS Domain";
2) Input "VMS Port Number", 5510 by default;
3) Input "Camera UUID" and "Camera Password". Camera UUID is distributed by VMS and the
password needs no verification so you don't have to input;
4) When the camera is in NAT, select "Send NAT Probe Packets"; you can select "Auto
Networking" to enable function of auto networking;
5) After finish, click "
Save
" to validate setting.
Note: VSIP protocol only supports registering to VMS of this company or other SDK-integrated
back-end platforms.
4.2.2
ONVIF
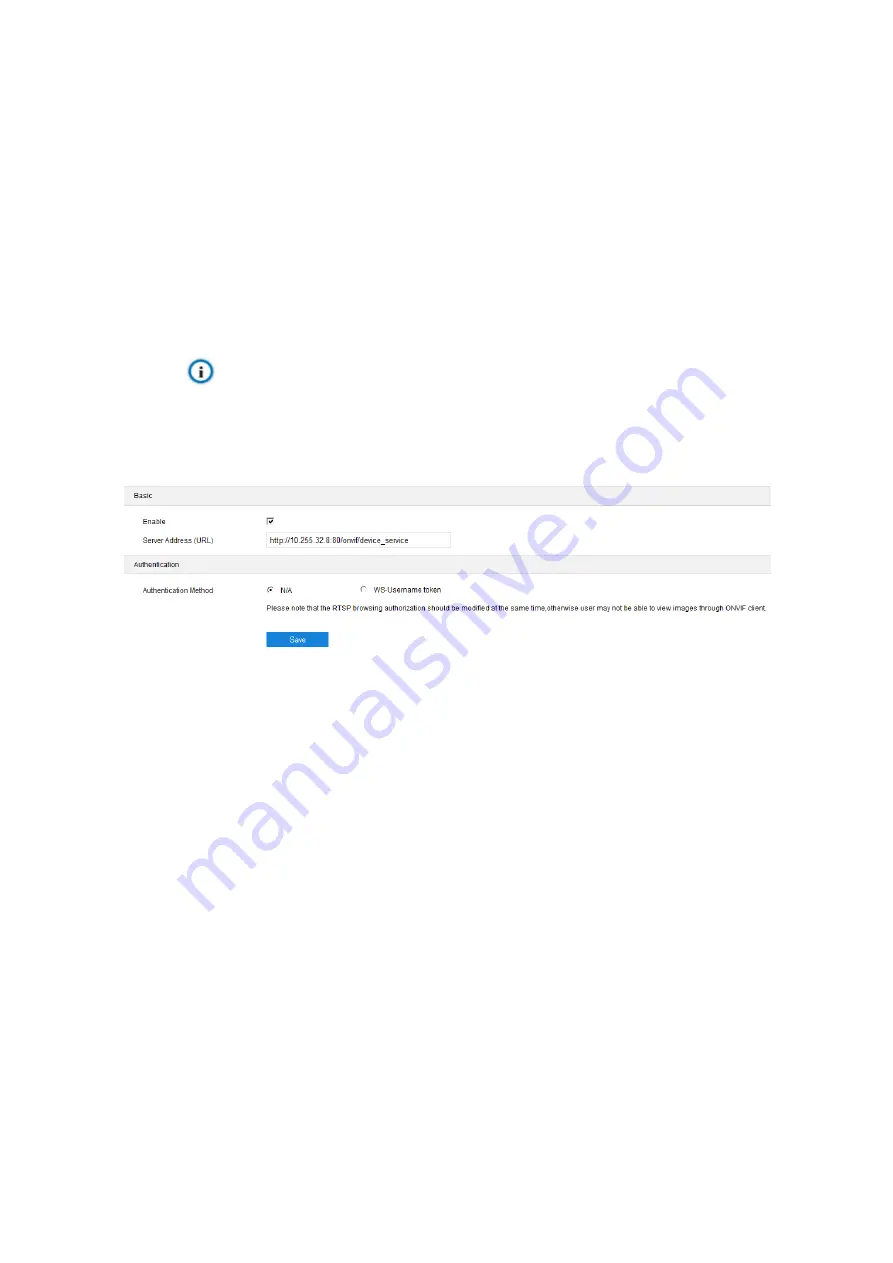
Picture 4-4 ONVIF
Basic
: ONVIF protocol is enabled by default. User can register camera to ONVIF-supported VMS,
VMS port being 80 by default. The camera will generate "Server Address (URL)" automatically.
Authentication
: Set authentication method for ONVIF login. When selecting "N/A", user can login
freely; when selecting "WS-Usernamer token", user needs to verify username and password
before login.
4.2.3
GB28181
On GB28181 interface, add the camera to GB platform according to the requirements of
GB/T28181. Configuration steps:


