background image

11

Control Panel Installation

STEP ONE

Inspect the panel for any damage and any components 

that may have loosened during shipping.

Control panel must be installed a minimum of 5ft (3m 

in Canada) from the inside wall of the pond, unless 

separated from the body of water by a fence wall, 

or other permanent barrier that will make the unit 

inaccessible to persons in the water.

Install the control panel to a post structure, side of a 

building, or other reliable means.  This structure must 

support the panel and prevent movement/flexing of the 

panel.  Use #10 x 1” or longer screws in the mounting 

points of the control panel to secure to the post 

structure.  NOTE:  The control panel must be hung 

upright in order to be waterproof.  It is also advised 

to mount the panel out of direct sunlight if possible.  

Mounting the panel in a North direction will prevent 

heat buildup inside the panel.  Also, mount the panel 

above the potential flood plain to prevent water entry 

during a possible flood event.

STEP TWO

Set Timer in the control panel to desired ON and OFF 

times per the Instructions for each specific timer.  

STEP THREE 

Follow all local and national electrical codes for 

this installation and Consult a qualified electrician 

or service person if needed.

(For 120V Installations)

Plug the aerator cord into the C-25 outlet labeled 

“UNIT”.  If lights are included, plug the Transformer 

cord into the C-25 outlet labeled “LIGHT”.  Now you 

are ready to plug the C-25 into the 120V power supply 

on the post and ENJOY YOUR NEW KASCO AERA-

TOR!

STEP THREE (For 240V Installation)

All electrical connections to this panel must be made 

with proper strain relief cord grip fittings or with 

conduit connections as required by local and national 

electric codes.  The bottom of the enclosure is reserved 

for field installation of these connections.

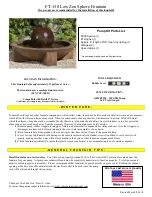
Installation Instructions

Use the ropes to position the Fountain in the desired 

location in the pond/lake.  Anchor the ropes or secure 

them to the shoreline so the ropes are free of slack, but 

not tight.  To prevent twisting of the unit due to torque, 

you should place the anchor at least 3 feet from the 

float for each foot of depth (Ex. A 6 foot deep pond 

would require an anchor 18 feet horizontally from the 

float.)  

ALTERNATE INSTALLATION

In ponds where the water level fluctuates significantly, 

you may need to suspend a small weight (12” of 1” 

galvanize pipe works well) at the mid-point of the 

rope to take up any slack as the water level drops.  The 

weight should be light enough so the Fountain can rise 

as the water level rises.  This can also help hide ropes 

by sinking them further below the surface.

Summary of Contents for 3400JF

Page 1: ...l Panel Installation pg11 C 25 Timer Control Instructions pg13 C85 non metallic Wiring Diagram pg14 C85 C95 non metallic Control Panel Timer pg15 Maintenance Recommendations pg16 Warranty Policy pg17...

Page 2: ...not use boats that tip easily for fountain in stallation such as a canoe and follow all boating safety rules and regulations including wearing a PFD Personal Flotation Device The fountain is supplied...

Page 3: ...ady for immediate use after installation The motor and ball bearings are submerged in oil and no further lubrication is needed Make sure to keep the motor housing clean from hard water deposits and or...

Page 4: ...r screw s for mounting the C 25 3 or C 85 4 7 16 Socket and Ratchet 7 16 Wrench 11 32 wrench for 8 fasteners 3400JF 3400HJF Parts Included Item Part Qty 1 3400JF Aerator 1 2 Float 242001 1 3 1 4 20 x...

Page 5: ...bolt holes with legs 2 Lock washer goes between bolt and flat washer Tighten down in 4 places 3 Turn over Bring bottom screen sections together 4 Tighten down in 6 places to hold the screen together...

Page 6: ...one of the pump 7 Thread one rope through one weighted tube rope Weight and position it approximately 6 from the float Next thread the end of the rope back through the opening facing the float as show...

Page 7: ...ond on a post with room for mounting the C 25 or C 85 Two 12 pieces of 1 galvanized pipe or weighted tubing for weighting ropes optional 10 x 1 long or longer screw s for mounting the C 25 3 or C 85 4...

Page 8: ...bolt and flat washer Tighten down in 4 places to the float retaining clips 3 Turn over Bring bottom screen sections together 4 Tighten down in 6 places to hold the screen together For quicker assembl...

Page 9: ...Without Strain Relief 6 Choose Nozzle Fit bolt into the molded socket on the nozzle and thread into the inner cone of the pump 7 If ready to install in the pond go to Installation instructions Light...

Page 10: ...by regional electrical differenc es or voltage drop due to long power cords may result in reduced pattern sizes The Cypress is the only nozzle that uses the sepa rate collar labeled C2 The Cypress Lin...

Page 11: ...ctrician or service person if needed For 120V Installations Plug the aerator cord into the C 25 outlet labeled UNIT If lights are included plug the Transformer cord into the C 25 outlet labeled LIGHT...

Page 12: ...provided with this panel L1 connects to Terminal 1 L2 connects to Terminal 2 N connects to Terminal N G connects to Terminal GROUND located on hassis plate Be sure to provide adequate sized power cond...

Page 13: ...2 If the G F C I tests okay restore power by pushing the RESET button back in THE RESET BUTTON MUST BE PUSHED FIRMLY AND FULLY INTO PLACE UNTIL IT LOCKS AND RE MAINS DEPRESSED AFTER PRES SURE HAS BEE...

Page 14: ...14 C85 non metallic Wiring Diagram...

Page 15: ...r and the minute dial will show exac ly 10 30 PROGRAMMING Dimensions FM 1 synchronous quartz TIME SETTING TO SET THE CURRENT TIME AND DAY OF WEEK ON 7 DAY UNITS TURN THE MINUTE HAND CLOCKWISE DO NOT S...

Page 16: ...ll installations at least every two to three months Seal replacement and all other repair services should be performed by Kasco Marine or a Kasco trained Authorized Repair Center Any alterations or ch...

Page 17: ...r local distributor with the shipment If no Repair Form is available include your name and physical address for return delivery of the repaired unit and a daytime phone number and or e mail ad void th...

Page 18: ...off and back on without the timer and without tripping the GFI breaker Each Kasco Fountain has a Thermal Overload built in that will turn the unit off when it overheats Once the unit has cooled down i...

Page 19: ...ed of water If the unit does not have the proper amount of water the flow or pattern will fluc tuate up and down and look sporadic If you are see ing these symptoms unplug the unit and clean away the...

Page 20: ...5 MAIN HOUSING 2400J 3400J 1 7 241005 V TUBE WITH LEGS 1 8 342050 IMPELLER 3400J 1 9 990275 O RING CORD 1 10 475643 SHAFT WASHER 2 11 243475 ZINC ASSEMBLY 1 12 990280 SEALING PLUG 1 13 990281 O RING 1...

Page 21: ...21 4400J Replacement Parts...

Page 22: ...panel with unit unless otherwise instructed A fee of 60 per hour will be assessed for cleaning excessively dirty units and float disassembly Refer to the Owner s manual for easy to follow troubleshoot...

Page 23: ...23...

Page 24: ...______ Serial Ex 5101J341725 ______________________________ Purchase Date _____________________ Purchased From ___________________________________ Registration Date ___________________________ Kasco M...

Reviews: