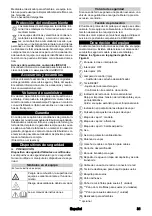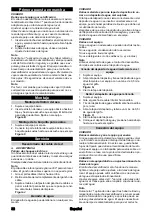
Français
17
Troubleshooting guide
Malfunctions often have simple causes that you can
remedy yourself using the following overview. When in
doubt, or in the case of malfunctions not mentioned
here, please contact your authorised Customer Service.
몇
WARNING
Risk of electric shock and burns
Trying to eliminate faults while the appliance is connect-
ed to the mains or has not yet cooled down is always
dangerous.
Remove the mains plug.
Allow the appliance to cool down.
No steam / little steam although there is water in the
reservoir
The decalcification cartridge has not been inserted or
has been inserted incorrectly.
Fit the decalcification cartridge and/or check that
the decalcification cartridge sits tightly in the reser-
voir and press in again if necessary.
The decalcification cartridge has been removed when
filling with water and/or a new decalcification cartridge
has been fitted
Always leave the decalcification cartridge in the wa-
ter reservoir when filling with water.
Press and hold the steam lever constantly.
The full steam output is reached after approximately
30 seconds.
The red "Replace decalcification cartridge" indica-
tor light flashes but the device still functions cor-
rectly
Run time of the decalcification cartridge ends soon.
Fit a new decalcification cartridge, see chapter
placing the decalcification cartridge
No steam despite sufficient water in the reservoir,
the indicator light and LED operating indicator on
the device light up continuously red, the floor cov-
ering symbols on the handle do not light up
Run time for the decalcification cartridge has expired
Fit a new decalcification cartridge, see chapter
placing the decalcification cartridge
If a new decalcification cartridge has already been
fitted and this fault still occurs, the RESET button
has probably not been pressed after replacing the
decalcification cartridge. Press and hold the RESET
button for 4 seconds after inserting the decalcifica-
tion cartridge, see chapter
.
Technical data
Subject to technical modifications.
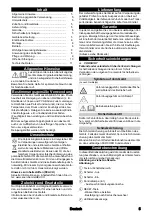
Contenu
Remarques générales
Veuillez lire le présent le manuel d'ins-
tructions original et les consignes de sé-
curité jointes avant la première
utilisation de l'appareil. Suivez ces instructions.
Conservez les deux manuels pour une utilisation ulté-
rieure ou pour le propriétaire suivant.
Utilisation conforme
Utiliser l'appareil exclusivement pour un usage domes-
tique pour le nettoyage de sols durs plats (par ex. sols
en pierre, carrelages et sols PVC ainsi que des sols en
bois scellés comme des parquets et revêtements de sol
stratifié), qui résistent à la température élevée, à la
pression et à l'humidité de l'appareil. Ne pas nettoyer de
revêtements sensibles à l'eau tels que, p.ex., les sols en
liège (l'humidité peut pénétrer et endommager le sol).
L'appareil peut être utilisé avec le patin à moquette pour
rafraîchir les moquettes et tapis de couloir à poils courts
etc.
Les détergents ne sont pas nécessaires.
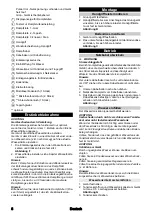
Protection de l'environnement
Les matériaux d'emballage sont recyclables.
Veuillez éliminer les emballages dans le respect
de l'environnement.
Les appareils électriques et électroniques
contiennent des matériaux précieux recyclables
et souvent des composants tels que des piles,
batteries ou de l'huile représentant un danger po-
tentiel pour la santé humaine et l'environnement, s'ils ne
sont pas manipulés ou éliminés correctement. Ces
composants sont cependant nécessaires pour le fonc-
tionnement correct de l'appareil. Les appareils marqués
par ce symbole ne doivent pas être jetés dans les or-
dures ménagères.
Remarques concernant les matières composantes
(REACH)
Les informations actuelles concernant les matières
composantes sont disponibles sous :
www.kaercher.de/
REACH
Electrical connection
Voltage
V
220-240
Phase
~
1
Frequency
Hz
50-60
Degree of protection
IPX4
Protection class
I
Device performance data
Heating capacity
W
1600
Heating-up time
Seconds 30
Continuous steaming
g/min
40
Filling quantity
Water reservoir
l
0,5
Dimensions and weights
Weight (without accessories)
kg
3,1
Length
mm
314
Width
mm
207
Height
mm
1185
Remarques générales.........................................
Utilisation conforme.............................................
Protection de l'environnement.............................
Accessoires et pièces de rechange ....................
Etendue de livraison............................................
Garantie ..............................................................
Dispositifs de sécurité .........................................
Description de l'appareil ......................................
Première mise en service....................................
Montage ..............................................................
Utilisation.............................................................
Consignes d'utilisation importantes.....................
Utilisation des accessoires..................................
Entretien et maintenance ....................................
Dépannage en cas de pannes ............................
Caractéristiques techniques................................
Summary of Contents for SC 3
Page 2: ...6 1 7 2 3 4 5 11 10 9 8 13 16 19 20 23 26 22 24 18 14 7 1 12 15 17 21 25 A 2...
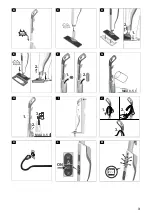
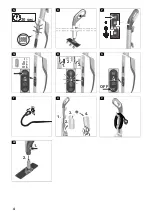
Page 3: ...B C 1 2 D 1 2 E 2 1 F MAX 0 5 l G MAX 0 5 l 1 2 3 H I 1 2 3 J K ON L M 3...
Page 4: ...30 sec N O P I II III IV Q 1 2 3 1 3 3 R OFF S T 1 2 3 4 U V 1 2 W 4...
Page 150: ...150 5 6 1 1 30 3 1 I 2 K 3 L 4 LED M 5 30 LED N P 3 O 0 5 G 0 5 H 20 1 OFF S 1 OFF S 2 T 2 3 U...
Page 151: ...151 1 D E 2 3 V 4 I 5 PVC laminate 1 a b D PVC laminate 1 D 1 OFF S 2 T 3 U 4 5...
Page 152: ...152 6 W 7 5 1 D 2 E 3 1 2 E 2 1 OFF 2 3 4 U III IV I II 2 R 1 LED 1 30 1 OFF 2 3...
Page 156: ...156 26 1 1 F 2 1 30 3 1 2 B 1 2 C 360 1 2 3 J 1 2 0 5 G 3 1 2 3 4 0 5 H 5 6...
Page 157: ...157 1 1 30 3 1 I 2 K 3 L 4 M 5 30 N P 3 O 0 5 G 0 5 H 20 1 S 1 S 2 T 2 3 U 1 D E 2 3 V 4 I...
Page 158: ...158 5 1 a b D 1 D 1 S 2 T 3 U 4 5 6 W 7...
Page 159: ...159 5 1 D 2 E 3 1 2 E 2 1 2 3 4 U III IV I II 2 R 1 1 30 1...
Page 163: ...163 1 F 2 30 3 1 2 B 1 2 C 360 1 2 3 J 1 2 0 5 G 3 1 2 3 4 0 5 H 5 6...
Page 164: ...164 1 30 3 1 I 2 K 3 L 4 M 5 30 N P 3 O 0 5 G 0 5 H 20 1 S 1 S 2 T 2 3 U 1 D E 2 3 V 4 I 5...
Page 165: ...165 1 a b D 1 D 1 S 2 T 3 U 4 5 6 W 7...
Page 166: ...166 5 1 D 2 E 3 1 2 E 2 1 2 3 4 U III IV I II 2 R 1 30 1 2 3 4...
Page 170: ...170 1 1 F 2 1 30 3 1 2 B 1 2 C 360 1 2 3 J 1 2 0 5 G 3 1 2 3 4 0 5 H 5 6...
Page 171: ...171 1 30 3 1 I 2 K 3 L 4 M 5 30 N P 3 O 0 5 G 0 5 H 20 1 S 1 S 2 T 2 3 U 1 D E 2 3 V 4 I 5...
Page 172: ...172 1 a b D 1 D 1 S 2 T 3 U 4 5 6 W 7...
Page 173: ...173 5 1 D 2 E 3 1 2 E 2 1 2 3 4 U III IV I II 2 R 1 1 30 1 2 3 4 5 6 RESET 4 Q 7 8 30...
Page 177: ...177 3 1 2 B 1 2 C 360 1 2 3 J 1 2 0 5 l G 3 1 2 3 4 0 5 l H 5 6 1 1 30 3...
Page 178: ...178 1 I 2 K 3 L 4 M 5 30 N P 3 O 0 5 l G 0 5 l H 20 1 S 1 S 2 T 2 3 U 1 D E 2 3 V 4 I 5...
Page 179: ...179 PVC 1 a b D PVC 1 D 1 S 2 T 3 U 4 5 6 W 7...
Page 180: ...180 5 1 D 2 E 3 1 2 E 2 1 2 3 4 U III IV I II 2 R 1 1 30 1 2 3 4 5 6 RESET 4 Q 7 8 30...
Page 185: ...185 PVC 1 a b D PVC 1 D 1 S 2 T 3 U 4 5 6 W 7 5 1 D 2 E 3 1 2 E 1 2 3...
Page 186: ...186 30 3 1 I 2 K 3 L 4 LED M 5 30 LED N P 3 O 0 5 G 0 5 H 20 1 S 1 S 2 T 3 U 1 D E 2 3 V 4 I 5...
Page 189: ......
Page 190: ......
Page 191: ......

