background image


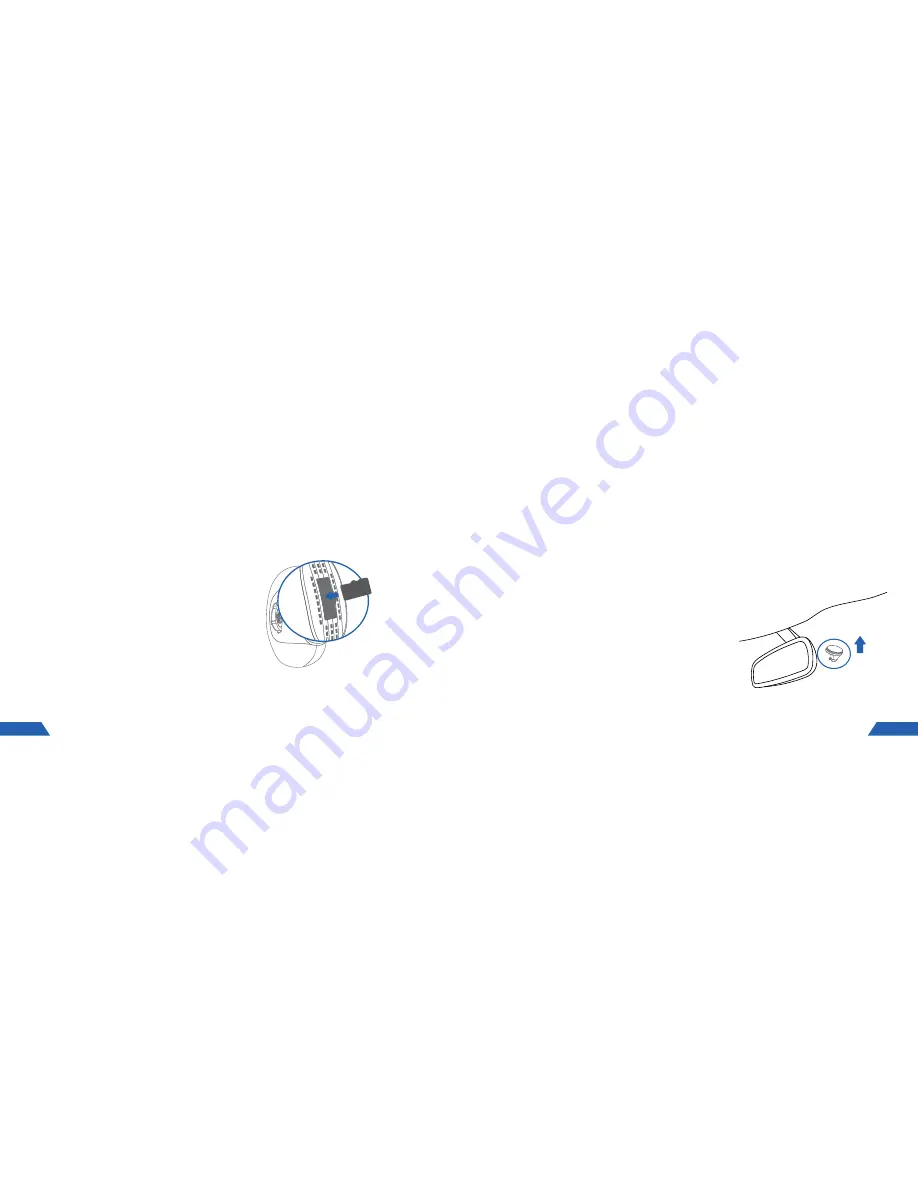
  2.2 INSERTING A MEMORY CARD


  Ensure that your KPT-860 is powered off. With the lens facing away from you remove the protective  


  cap on the rear of the camera using your fingernail to pry off the cap from the top. Insert your Micro  


  SD card (not included) into the slot on the rear of the camera with the text face of the Micro SD 


  card facing up. Use your fingernail to press the card into the slot until a click is heard and replace  


  the protective cap.

NOTE:
1.

  Do not insert or remove a Micro SD card while your 

KPT-860 

is  

powered up. This may damage your Micro SD card.

2.

  Please use class 10 or higher rated Micro SD cards, 16GB or  

above (up to 128GB).

3.

  Please format the Micro SD card before initial use (in FAT 32  

format if you are using a computer to format your Micro SD card).


  2.3 REMOVING A MEMORY CARD


  Ensure that your KPT-860 is powered off. Using your fingernail press the SD card until a click is    


  heard and release. The card should eject from the slot.

GETTING STARTED

8


  2.4 MOUNTING YOUR KPT-860


  Please read through all mounting instructions before attempting to install the KPT-860. It is  


  recommended that you install the KPT-860 behind your rear view mirror. Once you have mounted  


  your camera using your preferred method it is recommended that you run the power cable  


  around your windscreen under your vehicles interior trim using the included tool and cable clips.  


  If your vehicle has side curtain air bags, please be very careful when running cables along your 


  vehicles windows. Please ensure that you do not run the cables past any of these air bags as this 


  can prevent the air bags from deploying in an emergency. When mounting the Snapshot Button, 


  please avoid attaching this to any of your vehicles airbags.


2.5 INSTALLING YOUR KPT-860 MAGNETIC MOUNT


1. 

 To install the Magnetic Mount, ensure the 3M 


mounting plate is securely attached to the  

magnetic mount.


2. 

 Clean windshield with an Alcohol Wipe, making 


sure there is no dust, moisture, or oil on the 


desired mounting point of the windscreen.


3.

  Remove the protective film on the adhesive 


pad and place the Magnetic Mount in the  

desired position on your windscreen.


4. 

 Firmly press and hold the Magnetic Mount  

against your windscreen for 60 seconds to  

ensure that the adhesive sets.

9

Summary of Contents for KPT 860

Page 1: ...USER MANUAL YOUR EYEWITNESS ON THE ROAD...

Page 2: ...OUR KPT 860 11 2 7 POWERING UP YOUR KPT 860 11 2 8 SMARTPHONE CONNECTION 11 2 9 DOWNLOADING THE APP 11 2 10 WIFI CONNECTION 12 3 3 0 USING THE APP 13 3 2 INTRODUCTION 13 3 3 CAMERA SETUP 13 3 4 CAMERA...

Page 3: ...f any devices that emit radio interference e g Microwave Ovens It is considered normal operation for the Car Dash Cam to get warm during use 4 BATTERY WARNING Always charge the Car Dash Cam using the...

Page 4: ...Built in GPS WiFi Smart Device Connectivity 140 field of view Snapshot Remote Automatic Emergency recording and collision detection App allowing video transfer and playback alongside GPS tracking PROD...

Page 5: ...ll mounting instructions before attempting to install the KPT 860 It is recommended that you install the KPT 860 behind your rear view mirror Once you have mounted your camera using your preferred met...

Page 6: ...ttery in the KPT 860 is designed to hold settings and dates and is not designed for long term use Please ensure that the KPT 860 is installed correctly and is using your vehicles power when recording...

Page 7: ...d 1234567890 4 Once connected open the KPT 860 App 12 USING THE APP 3 2 INTRODUCTION Once you open the KPT 860 App the front page will give you access to your connected camera albums and profile 3 3 C...

Page 8: ...ur KPT 860 must be connected to your smart device via WiFi to access the live view 2 The KPT 860 must be connected to power to maintain a WiFi connection 3 Do not attempt to use the app or connect you...

Page 9: ...the Album page of the App item 5 page 14 NOTE 1 Your KPT 860 must be connected to your smart device via WiFi to access the live view 2 Your KPT 860 must be connected to power to maintain a WiFi connec...

Page 10: ...e operating your vehicle NOTE 1 Your KPT 860 must be connected to your smart device via WiFi to access video transfer 2 Your KPT 860 must be connected to power to maintain a WiFi connection 3 Do not a...

Page 11: ...ent location and speed and saves this information to your video files as it is being recorded This data is then played back via the KPT 860 smartphone app showing your mapped location and speed at the...

Page 12: ...repaired or replaced if the goods fail to be of acceptable quality and the failure does not amount to a major failure This warranty is provided in addition to your rights under the Australian New Zea...

Page 13: ...w directed co nz www kapturecam com au www kapturecam co nz YOUR EYEWITNESS ON THE ROAD Directed Electronics Address 44 Translink Drive Keilor Park Victoria Australia 3042 Ph 61 03 8331 4800 Email ser...

Reviews: