or IDE 1. There should be a second connector close by labeled
SEC. or IDE 2. If there is a cable plugged into the SEC - IDE 2
connector follow it and identify the drives connected to it. From
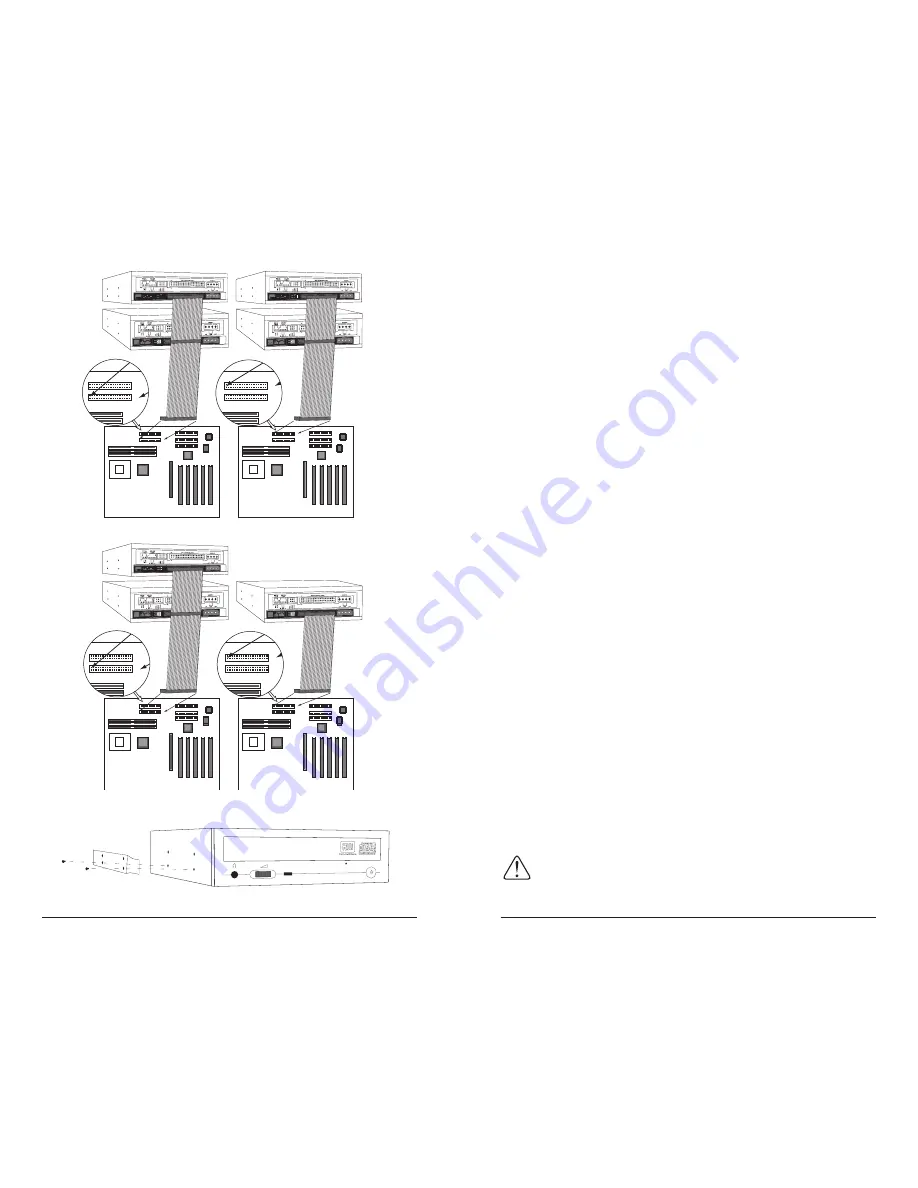
Fig 3 A/B
select the drive IDE configuration that you will use for
connecting the Kano DVD+RW/R drive to your system. We
recommend that all hard drives be connected on PRI - IDE1 and
your optical drives (cd-rom , cdrw , dvd ext.) be connected on
SEC - IDE 2.
This configuration will give you the best performance. Now you
are ready to set your drive jumper. If your Kano DVD+RW will
be plugged into the first connector on the IDE 2 cable you will
place the jumper on the pins marked MASTER. If the drive will
be plugged into the last connector you will place the jumper on
the pins marked SLAVE
Fig 2
. If you have no drives connected to
the SEC – IDE 2 mother board connector use the cable supplied
in the Kano drive kit. If this cable is too short, purchase a longer
cable from your local computer store. Plug the end connecter on
the longest section into the SEC-IDE 2 motherboard connector.
Make sure that you plug the pin 1 of the cable connector into pin
1 of the mother board connector. The pin 1 end of the cable is
marked with a color strip or band usually RED.
NOTE: If you have changed the position of any of your
existing IDE drives you may need to change there
Master/Slave jumper setting.
STEP 3.
Prepare the drive for mounting in your system Fig4.
If you removed a drive and it had special mounting hardware
(rails) or your computer requires (rails) attach them to the Kano
DVD+RW/R drive with the screws included with the drive.
CAUTION: Using any other screws other than the ones
supplied with your drive will void your warranty.
Fig. 4
IDE 2
IDE 1
1
1
IDE 4
IDE 3
PCI Slot #1
PCI Slot #2
PCI Slot #3
PCI Slot #4
PCI Slot #5
1
FDC1
1
1
SLAVE
HARD DRIVE
MASTER
BOOT HARD
DRIVE
IDE 2
IDE 1
1
1
IDE 4
IDE 3
PCI Slot #1
PCI Slot #2
PCI Slot #3
PCI Slot #4
PCI Slot #5
1
FDC1
1
1
SLAVE
CD-ROM, CDRW,
DVD-ROM
KANO DVD + RW
DRIVE MASTER
IDE 2
IDE 1
11
IDE 2
IDE 1
11
Fig. 3A
IDE 2
IDE 1
1
1
IDE 4
IDE 3
PCI Slot #1
PCI Slot #2
PCI Slot #3
PCI Slot #4
PCI Slot #5
1
FDC1
1
1
SLAVE IDE
HARD DRIVE
MASTER
IDE HARD
DRIVE
IDE 2
IDE 1
1
1
IDE 4
IDE 3
PCI Slot #1
PCI Slot #2
PCI Slot #3
PCI Slot #4
PCI Slot #5
1
FDC1
1
1
KANO DVD + RW
DRIVE MASTER
IDE 2
IDE 1
11
IDE 2
IDE 1
11
Fig. 3B
9
8


