background image

6

Technical Specifications

1.1 Technical Specifications

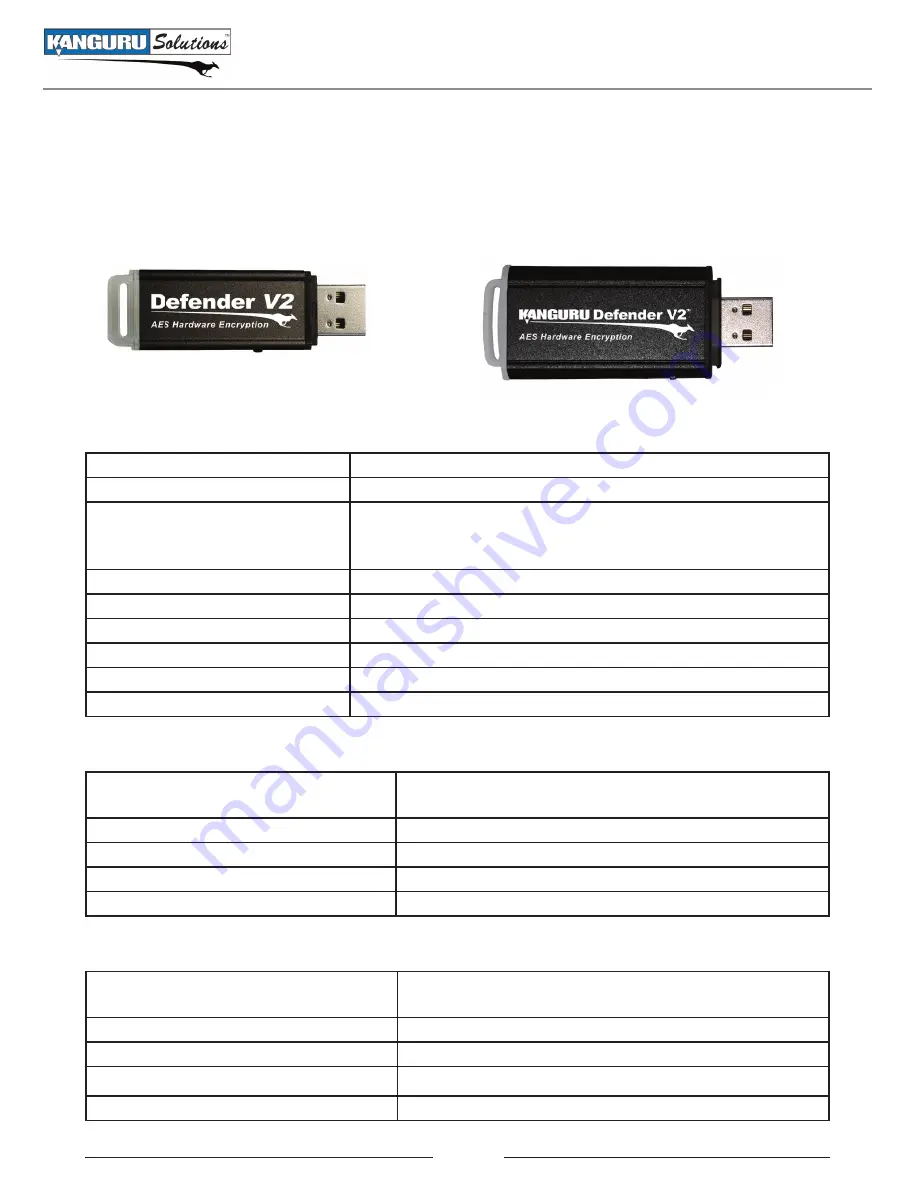
The Kanguru Defender V2 comes in two models, depending on your drive’s capacity. Technical 

specifications are different depending on your model. 


1GB - 16GB Model   


32GB - 128GB Model


General Specifications

Interface

USB 2.0 (USB 1.1 compatible)

Encryption Features

Hardware based 256-bit AES encryption

OS Compatibility

Windows 2000 SP4, XP SP3, Server 2003, Vista,7

Mac OS X 10.5 and above (Intel based only)

32 and 64 bit compatible

Write Cycles

10,000 write cycles / block

Data Retention

10 years or more

Operating Temp

0°C – 70°C

Humidity Range

20% - 90%

Shock Resistance

1000G Max

Vibration

15G Peak to Peak Max

1GB - 16GB  Defender V2 Specifications

Data Transfer Rate

Read: 20 - 33 MB/s

Write: 10 - 13 MB/s

Weight

10g

Dimensions

64mm x 18.5mm x 9mm

Power (Read)

Max Read: 5 VDC @ 122mA

Power (Write)

Max Write: 5 VDC @ 182mA

32GB - 64GB Defender V2 Specifications

Data Transfer Rate

Read: 31 MB/s

Write: 10 MB/s

Weight

15g

Dimensions

71mm x 27mm x 9mm

Power (Read)

Max Read: 5 VDC @ 150mA

Power (Write)

Max Write: 5 VDC @ 266mA

Summary of Contents for Defender V2

Page 1: ...Kanguru Defender V2 Rev 2 User Manual Copyright 2012 All Rights Reserved Model no KDV2 ...

Page 2: ...n expressed implied or statutory with respect to its products or the contents or use of this documentation and all accompanying software and specifically disclaims its quality performance merchantability or fitness for any particular purpose Kanguru Solutions reserves the right to revise or update its products software or documentation without obligation to notify any individual or entity Export L...

Page 3: ...13 2 2 5 KRMC Cloud 14 2 2 6 Contact Info 15 2 2 7 Resetting from the Setup Wizard 16 2 3 Logging into KDMV2 17 2 3 1 Resetting from the Login Screen 18 2 4 Encrypting Files and Folders 19 2 5 On board Antivirus Windows Only 20 2 5 1 Device Scan 21 2 5 2 Path Scan 22 2 5 3 File Scan 23 2 5 4 License 24 2 6 Changing Your Password 25 2 7 Changing Languages 26 2 8 Online Documentation 27 2 9 About KD...

Page 4: ...der V2 USB Flash Drive Quick Start Guide Registration Form Lanyard Caution The through hole at the bottom of the drive is designed for use with the provided lanyard only Features 256 bit AES hardware encryption FIPS 197 Validated Password protected data partition for your secure files Does NOT require Admin privileges Driverless installation Plug Play High strength aluminum housing Write protect s...

Page 5: ...stname Create remote policy modifications like Password Strength and Length e g 10 characters 2 upper 2 numbers etc Limit Invalid Login Attempts e g 3 retries before drive is wiped Rate at which password should be changed e g every 30 60 or 90 days Change user password Create user groups KRMC Compatibility There are two versions of KRMC that you can use to manage your drives KRMC Enterprise Editio...

Page 6: ...X 10 5 and above Intel based only 32 and 64 bit compatible Write Cycles 10 000 write cycles block Data Retention 10 years or more Operating Temp 0 C 70 C Humidity Range 20 90 Shock Resistance 1000G Max Vibration 15G Peak to Peak Max 1GB 16GB Defender V2 Specifications Data Transfer Rate Read 20 33 MB s Write 10 13 MB s Weight 10g Dimensions 64mm x 18 5mm x 9mm Power Read Max Read 5 VDC 122mA Power...

Page 7: ... connect your Defender V2 to your computer through a USB port When you connect your Defender V2 a CD ROM partition and a removable disk partition should appear in My Computer If you are running Windows 7 and do not see the removable disk please refer to page 8 in this manual The KDMV2 application should start automatically If KDMV2 does not start automatically 1 Open My Computer and open the Defen...

Page 8: ... Windows Folder and Search Options Note This is user preference only There is no need to configure Windows in order to use your Defender V2 1 From My Computer click on the Organize tab and then select Folder and search options 2 The Folder Options window appears Click on the View tab and then scroll down to the option for Hidden Files and Folders Select Show hidden files folders and drives 3 Click...

Page 9: ...nch the KDMV2 application Caution The KDMv2 app file needs to remain on your Defender V2 s CD ROM partition at all times Always run the application from the Defender V2 s CD ROM partition Do not try to copy KDMv2 or run KDMv2 from your computer s hard drive Note The KDMv2 icon is not always displayed on the desktop If you do not see the KDMv2 icon on your desktop you can locate the KDMv2 app file ...

Page 10: ...t to the unlock position towards the USB connector 2 2 1 Selecting a Setup Language The default language for the Setup Wizard is set to English To run the Setup Wizard in a different language 1 From the Welcome screen click on the Language selection menu A list of available languages will appear in a drop down menu Select your desired language from the drop down menu The Setup Wizard will switch t...

Page 11: ...h internet access in order to register for on board antivirus protection If your Defender V2 does not already have a valid antivirus license key then you must fill out the following registration form with the required information and then click on the Apply button in order to activate your one 1 year of free antivirus protection Click on the Skip button if you do not wish to activate antivirus pro...

Page 12: ...password requirements It updates in real time Disregard the messages in the Password Info box until you have finished entering your password into both the Password and Confirm Password fields 2 Enter the same password in the Confirm Password field for verification If the passwords you entered match you will receive a notification in the Password Info box 3 Click on the Apply button to set your pas...

Page 13: ...om the Set Password screen click on VK button It is located near the bottom right of the Confirm Password field 2 The virtual keyboard will appear below the Setup Wizard window Click on the keys on the virtual keyboard using your mouse cursor to enter your password 3 Click on the VK button again to close the virtual keyboard Note You can click on the Shuffle key on the bottom right corner of the v...

Page 14: ...t the Enable KRMC Cloud option and then click on the Apply button 2 A dialog box will appear asking if you want to register your device with KRMC Cloud Click on the Yes button 3 Your web browser will open and direct you to the KRMC Cloud login page 4 Purchase a license for your drive in order to use it with KRMC Cloud If you choose not to remotely manage your Defender using KRMC Cloud select the D...

Page 15: ...utomatically be imported to the KRMC Cloud server when you register your Defender V2 with KRMC Cloud Fill in your information in the appropriate fields Device Name Phone Number and Email are required fields and then click on the Apply button A window will appear confirming that your data has been saved Click on the OK button to close the window and then click on the Next button to finish setting u...

Page 16: ...ng the Setup Wizard 1 From anywhere in the Setup Wizard click on the Prev button until you return to the Start screen 2 On the Start screen you will see a Reset button located at the bottom of the window Click on the Reset button 3 A dialog box appears asking you to confirm the reset Click on Yes to reset your device to the factory default settings After the device has been reset to the factory de...

Page 17: ...gging and then reinserting your Defender V2 or manually running KDMv2 exe will bring the login window back Once you have successfully logged in to KDMV2 the Defender s secure partition will be accessible through My Computer or Windows Explorer For more information on accessing the secure partition see section 2 4 Encrypting Files and Folders on page 19 Caution Once KDMV2 has started you should nev...

Page 18: ...wipe all data off the device All data on the device will be lost To reset your Defender V2 to the factory default 1 Start KDMV2 2 When the login screen appears click on the Reset button 3 When you are prompted to confirm the reset click on the Yes button 4 When your password and data stored on the secure partition have been erased the following message will appear Click on the OK button to complet...

Page 19: ... to KDMV2 to gain access to the secure partition 2 Click on the KDMV2 icon located in the taskbar and then select Explore Security Drive from the popup menu Alternatively you can access the secure partition through My Computer or through Windows Explorer We recommend using either the drag drop action right click copy paste action or the shortcut keys Ctrl C and Ctrl V to copy and paste files and f...

Page 20: ... downloading the Defender V2 will save your place and continue the download the next time it is connected to a computer with internet access Virus definitions are stored in the System folder on the secure partition If these files are deleted they will be automatically re downloaded If the device is reset to the factory default these files will be deleted and will need to be re downloaded Do not de...

Page 21: ...utton to begin scanning your Defender V2 3 Once the scan has started Click on the Pause Scan button to pause the scan process Click on the Resume Scan button to resume the scan Click on the Stop Scan button to cancel the scan process 4 The scan results will appear in the Scan Results window 5 Click on the View Scan Log button to view a log of the previous scan 6 Click on the OK button to close the...

Page 22: ...he top of the antivirus console 2 Click on the Start Scan button and then select a path on your computer to begin scanning 3 Once the scan has started Click on the Pause Scan button to pause the scan process Click on the Resume Scan button to resume the scan Click on the Stop Scan button to cancel the scan process 4 The scan results will appear in the Scan Results window 5 Click on the View Scan L...

Page 23: ...of the antivirus console 2 Click on the Start Scan button and then select a file to begin scanning 3 Once the scan has started Click on the Pause Scan button to pause the scan process Click on the Resume Scan button to resume the scan Click on the Stop Scan button to cancel the scan process 4 The scan results will appear in the Scan Results window 5 Click on the View Scan Log button to view a log ...

Page 24: ...e Licenses button to see your current antivirus license If you do not have a valid license key 1 Click on the Renew Licenses Online button to obtain a valid license key for your antivirus this option may not be available 2 Enter your license key in the New License Key field 3 Click on the Apply button to apply your license key 4 Click on the OK button to close the antivirus console License ...

Page 25: ...The Password Settings window opens Enter your current password in the Old Password field Enter your new password in the New Password field and then enter it again in the Confirm New Password field 4 When you are ready to proceed click on the Apply button to set your new password 5 Once your new password has been set a confirmation window appears informing you that your password has been successful...

Page 26: ...guage 1 Login to KDMV2 to gain access to the secure partition 2 Click on the KDMV2 icon located in the taskbar and then hover your cursor over the Language option in the popup menu A list of available languages appears 3 Click on the desired language from the submenu that you want KDMV2 to be displayed in Changing Languages ...

Page 27: ...of the Defender s Quick Start Guide Click on Defender User Manual to download a digital copy of the Defender s User Manual 2 9 About KDMV2 To view information regarding the version of KDMV2 currently installed on your device 1 Login to KDMV2 to gain access to the secure partition 2 Click on the KDMV2 icon located in the taskbar and then select About A window appears showing the version of KDMV2 cu...

Page 28: ...ear and the secure partition will no longer be accessible from My Computer or Windows Explorer After the Defender V2 has been unmounted use the Windows Safely Remove Hardware function before removing your drive To safely remove your Defender V2 click on the Safely Remove Hardware icon located in the taskbar The icon may look different depending on your version of Windows Windows XP 2000 Windows Vi...

Page 29: ...ct your Defender V2 from the USB port 3 Warranty and Technical Support This product carries a 3 year warranty from the date of purchase Kanguru Solutions is not responsible for any damages incurred in the shipping process Any claims for loss or damage must be made to the carrier directly Claims for shipping errors should be reported to Kanguru Solutions within three 3 working days or receipt of me...

Page 30: ...egal terms and conditions available at www kanguru com Please review and agree before use Thank you Kanguru Solutions 1360 Main Street Millis MA 02054 www kanguru com 06 13 12 v2 0 2012 Kanguru Solutions ...

Reviews: