background image

18

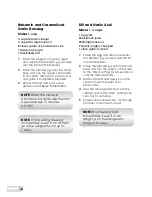
Balsamic and Caramelised 

Garlic Dressing

Makes 1 cup

½ cup balsamic vinegar
½ cup extra virgin olive oil
8 cloves garlic, oven roasted in skin
1 tbsp brown sugar
1 tbsp flaked salt

1. 

Place the vinegar, oil, garlic, sugar 
and salt into the blender jug; securely 
seal the lid onto the blender.

2. 

Place the blender jug onto the motor 
base and turn the speed control dial 
to the ‘LOW’ setting for 10 seconds or 
until garlic is completely blended

3. 

Remove the lid and pour over a 
garden salad. Serve immediately.

NOTE: 

Wrap the cloves in 

aluminium foil and bake them for 

approximately 15 minutes  

at 190˚C.

NOTE: 

If not serving dressing 

immediately, keep in an air tight 

jar in the refrigerator for up to  

7 days.

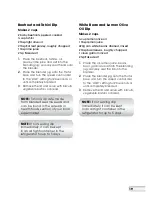
Dill and Garlic Aioli

Makes 1 ½ cups

1 egg yolk
60ml lemon juice
250ml light olive oil
2 tsp dill, roughly chopped
1 clove garlic, minced

1. 

Place the egg and lemon juice into 
the blender jug; securely seal the lid 
onto the blender.

2. 

Place the blender jug onto the motor 
base and turn the speed control dial 
to the ‘HIGH’ setting for 10 seconds or 
until the mixture is fluffy.

3. 

Remove the lid and slowly pour the 
olive oil in a thin stream over  
60 seconds.

4. 

Add the dill and garlic and turn the 
settings dial to the ‘LOW’ setting for 5 
seconds to combine.

5. 

Spread onto sandwiches, stir through 
potatoes or serve with salad.

NOTE: 

If not serving aioli 

immediately, keep it in an 

airtight jar in the refrigerator  

for up to 14 days.

Summary of Contents for KBL330

Page 1: ...his book Issue B14 Kambrook New Zealand Private Bag 94411 Botany Manukau Auckland 2163 New Zealand Customer Service Line Spare Parts 0800 273 845 Customer Service Fax 0800 288 513 www kambrook co nz K...

Page 2: ...Suits all KBL330 KBL340 models INSTRUCTION BOOKLET...

Page 3: ...se In the event that you need some assistance with your Kambrook appliance please contact our Customer Service Department on 1300 139 798 Australia or 0800 273 845 New Zealand Alternatively visit us o...

Page 4: ...Contents Kambrook Recommends Safety First p4 Your Kambrook Blender p6 Operating Your Kambrook Blender p7 Hints and Tips p11 Care Cleaning and Storage p13 Recipes p14...

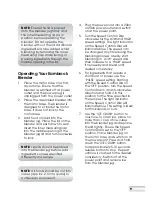
Page 5: ...ttachments with care remember the blades are razor sharp and should be kept out of the reach of children Always ensure the blender is completely assembled before operating The blender will not operate...

Page 6: ...ppliance is not in use Before cleaning always turn the appliance to the OFF position switch off at the power outlet unplug at the power outlet and remove the power cord if detachable from the applianc...

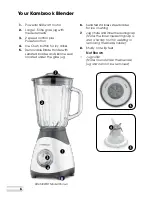
Page 7: ...ade Holder with serrated blades and silicone seal located under the glass jug 6 Serrated stainless steel blades for ice crushing 7 Jug chute and inner measuring cap Note the inner measuring cap is als...

Page 8: ...able Blade Holder in warm soapy water with a soft cloth Rinse and dry thoroughly Wipe the motor base with a damp cloth and dry thoroughly Disassembling the Blender 1 Place the motor base on a flat dry...

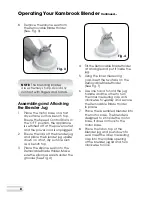
Page 9: ...he Removable Blade Holder Make sure the silicone seal sits under the grooves See Fig 4 Fig 4 4 Tilt the Removable Blade Holder at an angle and put it inside the jug 5 Using the inner measuring cap ins...

Page 10: ...the power cord into a 230V or 240V power outlet and switch on at the power point 5 Turn the Speed Control Dial clockwise for the LOW and HIGH speed settings The light indicator on the Speed Control D...

Page 11: ...stick to the sides of the blender jug To push the food back on the blades turn the Speed Control Dial to OFF and switch off at the power outlet and remove the power cord Remove the lid and use a plas...

Page 12: ...ven texture To add ingredients during blending remove the inner measuring cap on the lid and drop solid ingredients or pour liquids through the lid opening Use the inner measuring cap or a container w...

Page 13: ...liquids or hot ingredients Allow hot ingredients to cool before placing them into the blender jug Do not expose the glass jug to sudden temperature changes i e immersing the jug into hot water directl...

Page 14: ...nd dry thoroughly WARNING Blades must be handled carefully as they are sharp NOTE Do not place any part of the blender in the dishwasher NOTE Do not immerse the motor base power cord or power plug in...

Page 15: ...turn the speed control dial to the PULSE setting for 15 seconds or until smooth 3 Remove the lid and pour into four tall glasses Serve immediately Banana Breakfast Drink Makes 1 serve 1 Weet bix 375m...

Page 16: ...ontrol dial to the PULSE setting for 15 seconds or until smooth 3 Remove the lid and pour into four tall glasses Serve immediately Mango Smoothie Makes 4 serves 3 frozen mango cheeks 750ml milk 4 scoo...

Page 17: ...E setting for 15 seconds or until smooth 3 Remove the lid and pour into four tall glasses Serve immediately Chocolate Milkshake Makes 4 serves 750ml milk 4 scoops vanilla ice cream cup chocolate syrup...

Page 18: ...immediately Frozen Margaritas Makes 6 serves 12 medium ice cubes 150ml tequila cup orange liqueur cup lime juice cup lemon juice cup sugar syrup 1 Place the ice cubes tequila liqueur lime juice lemon...

Page 19: ...ving dressing immediately keep in an air tight jar in the refrigerator for up to 7 days Dill and Garlic Aioli Makes 1 cups 1 egg yolk 60ml lemon juice 250ml light olive oil 2 tsp dill roughly chopped...

Page 20: ...health foods section of your local supermarket NOTE If not serving dip immediately it can be kept in an air tight container in the refrigerator for up to 5 days White Bean and Lemon Olive Oil Dip Mak...

Page 21: ...base and turn the speed control dial to the LOW settings for 30 seconds or until completely blended 5 Remove the lid and serve immediately with bread and coriander NOTE If not serving soup immediately...

Page 22: ...and turn the speed control dial to the HIGH setting for 20 seconds or until completely blended 4 Remove the lid and pour the carrot mixture into the fry pan along with the cumin and salt and allow to...

Page 23: ...22 Notes...

Page 24: ...23 Notes...

Reviews: