


9
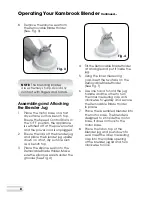
NOTE:
Ensure the lid is placed
onto the blender jug firmly and
the inner measuring cap is in
position before operating the
blender. Do not operate the
blender without the lid. Additional
ingredients can be added whilst
blending by removing the inner
measuring cap and placing or
pouring ingredients through the
middle opening in the lid.
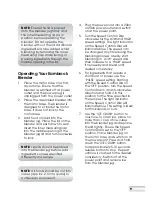
Operating Your Kambrook
Blender
1. Place the motor base on a flat,
dry surface. Ensure that the
blender is switched off at power
outlet and the power plug is
unplugged from the power outlet.
2. Place the assembled blender into
the motor base. The blender is
designed to sit inside the motor
base, it does not lock to the
motor base.
3. Add food or liquid into the
blender jug. Place the lid on the
blender and push down to seal.
Insert the inner measuring cap
into the middle opening of the
blender jug lid and turn clockwise
to lock.
NOTE:
Liquids should be placed
into the blender jug before solid
ingredients, unless specified
differently in a recipe.
NOTE:
All foods should be cut into
cubes (approx. 2-3cm square) to
achieve an even result.
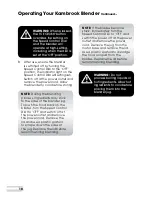
4. Plug the power cord into a 230V
or 240V power outlet and switch
on at the power point.
5. Turn the Speed Control Dial
clockwise for the LOW and HIGH
speed settings. The light indicator
on the Speed Control Dial will
illuminate blue. The speed can
be changed any time during the
blending process. Ideally, start
blending on ‘LOW’ speed and
then increase to a ‘HIGH’ speed
if necessary and blend until
desired consistency.
6. For ingredients that require a
short burst of power, use the
‘PULSE’ speed setting. Starting
with the Speed Control Dial in
the‘OFF’ position, turn the Speed
Control Dial in an anti-clockwise
direction and hold it in this
position for the time specified in
the recipes. The light indicator
on the Speed Control Dial will
illuminate blue. This setting is ideal
for thick liquids, or nuts.
7. Use the ‘ICE CRUSH’ button to
crush ice. To crush ice, place no
more than 1 cup of ice cubes
into the blender jug and replace
the lid tightly. Ensure the Speed
Control Dial is set to the 'OFF'
position. Place blender jug on
the motor base and switch on at
the power point. Press and hold
down the 'ICE CRUSH' button
for approximately 5-10 seconds,
release button to stop. Repeat
until ice is crushed to the desired
consistency. Switch off at the
power point and remove ice
from the blender jug.
Summary of Contents for KBL330
Page 2: ...Suits all KBL330 KBL340 models INSTRUCTION BOOKLET...
Page 23: ...22 Notes...
Page 24: ...23 Notes...


